
Month: September 2026

  • Trash Pickup Tool Guide for Cleaner Volunteer Events

    Trash Pickup Tool Guide for Cleaner Volunteer Events

    Three of us stood under a tree while spring hail smacked our sleeves. Our Uber kept canceling, our fingers were numb, and we still finished the block because each of us had a good grabber, decent gloves, and a bag that stayed open in the wind.

    Why Your Trash Pickup Tool Choice Matters More Than You Think

    That morning taught me something I still use on every cleanup. A trash pickup tool doesn't feel like a gadget when you're cold, wet, and staring at a curb packed with soggy cups, cigarette butts, and broken fast-food lids. It feels like the difference between flinching and moving.

    I started picking up litter because cleaning my own mess felt weirdly heavy. Cleaning a sidewalk felt lighter. You bend once, hear the click of the grabber, drop the trash in the bag, and your brain says, fine, I can do one more. Then one more. Then the whole block looks different.
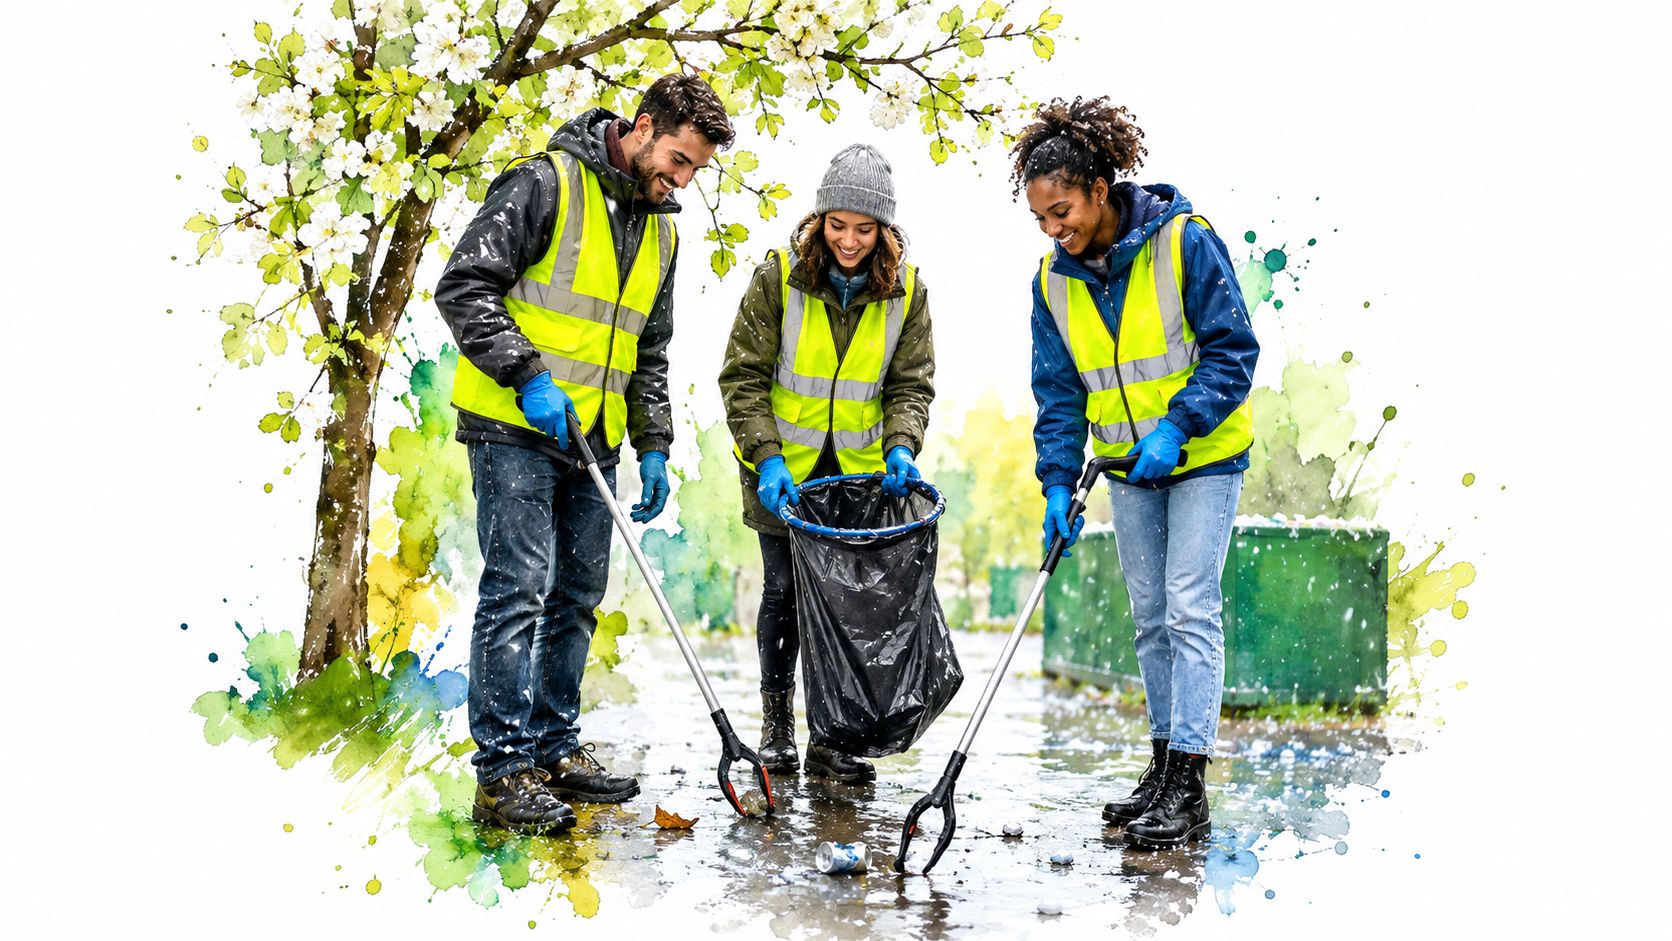
    Three volunteers wearing high-visibility vests use trash pickup tools to clean up litter in a park.

    The tool changes your mood first

    I've led cleanups in heat that made the bags stick to your leg and in wind that tried to turn every wrapper into a kite. In both cases, the volunteers who had the right tool settled in fast. They didn't hover over each piece deciding whether it was too gross or too awkward. They just worked.

    That's why I tell new people to stop thinking about "trash pickup tool" like it's one thing. A picker for dry cans on a sidewalk is one job. A tool for soggy paper in grass is another. A tool for a cigarette butt field near a bus stop is another again.

    If you're curious why so many of us keep showing up, I wrote more about that pull in why people pick up litter in the first place.

    Practical rule: If a tool makes you hesitate less, it is the right tool for that moment.

    Safety, speed, and a little joy

    Trash pickup tools have changed a lot over time. Horse-drawn trash carts gave way to motorized collection vehicles in the early 20th century, and by 1929 garbage trucks had hoppers so workers no longer had to lift bins overhead. Front-loader trucks with hydraulics became common in the 1970s, and by the mid-1990s modern trash and recycling trucks could haul up to 20 tons. You can trace a straight line there from brute lifting to smarter handling in the history of trash collection equipment.

    That same logic works at volunteer scale. You want less strain, less touching, less awkward bending, and fewer bad decisions.

    I learned that across weekly cleanups in every kind of Chicago weather. The right tool speeds up the easy stuff. More important, it tells you what not to touch. That boundary is gold. Once you know where your grabber's job ends, you clean with more confidence and a calmer head.

    How to Choose the Right Trash Pickup Tool for Your Cleanup

    On a hot Saturday in Little Village, I watched two volunteers work the same block. One had a sturdy claw grabber and cleared cups, cans, and takeout boxes in a steady rhythm. The other had a flimsy picker with weak jaws. Every crushed can slipped. Every pickup took two tries. By the end of the alley, one person was still fresh and the other was rubbing a sore wrist.

    That is how I choose a trash pickup tool. I start with the mess in front of me, then I match the tool to the hazard, the surface, and the distance I want between my hand and the item.
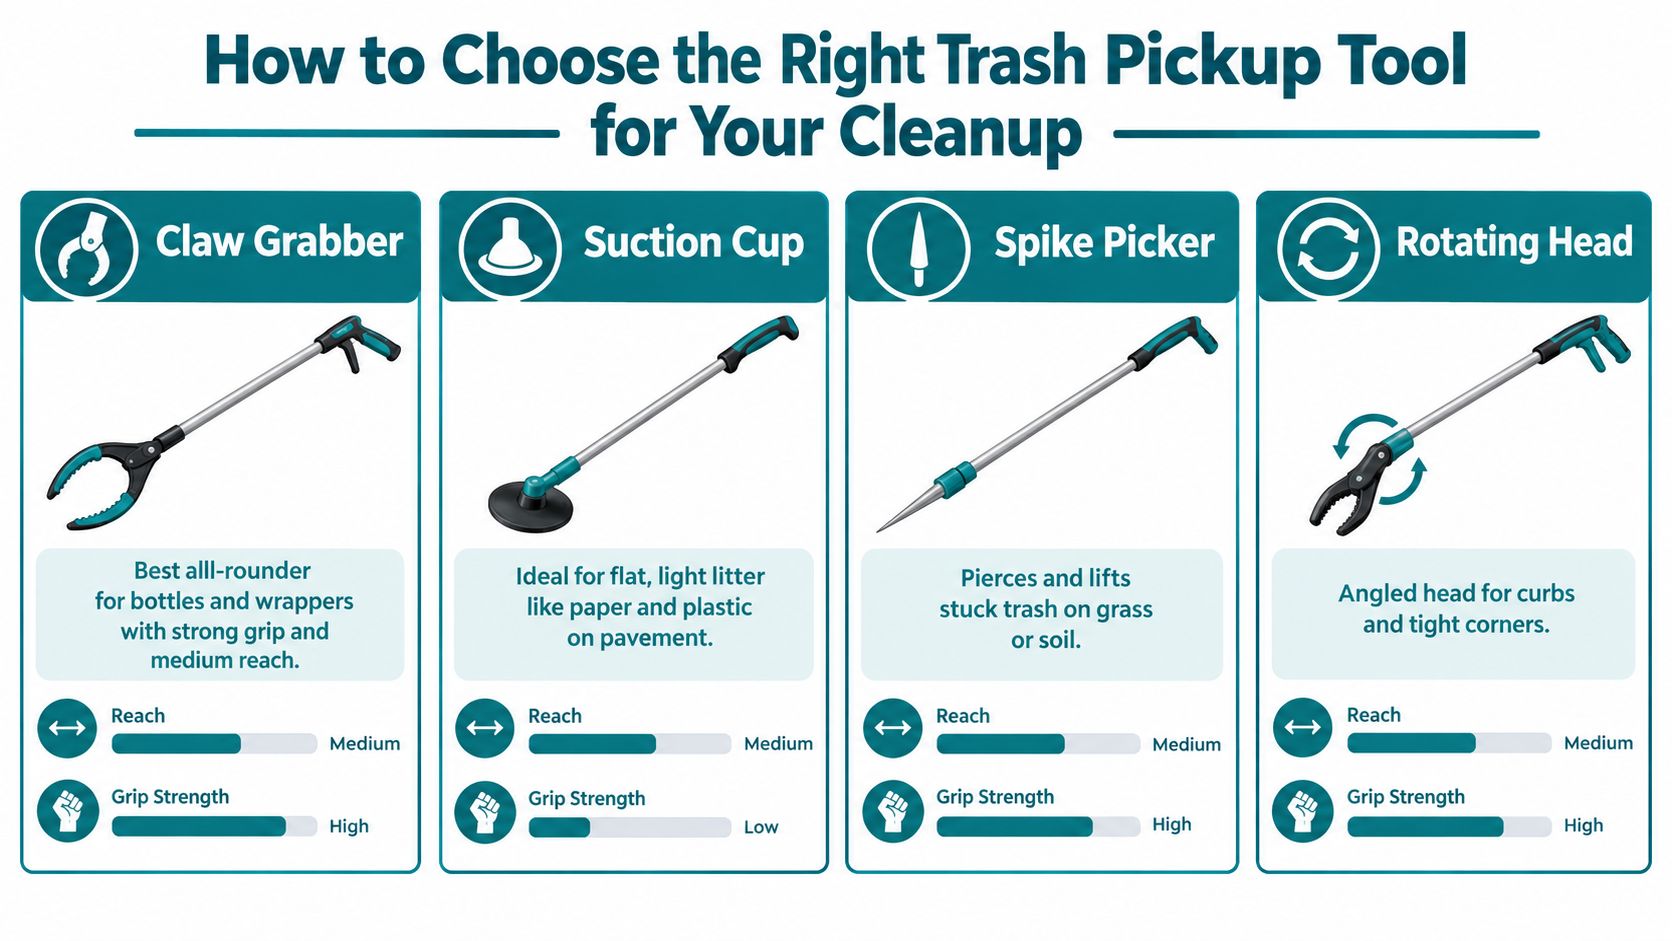
    An infographic showing four different types of trash pickup tools with descriptions for their specific uses.

    Start with the litter, not the catalog

    A typical grabber gives enough reach for sidewalk work without forcing you to bend over every few seconds. One folding model, for example, lists a 17-inch folded length and a 1.5-inch suction cup in this grabber product example. Specs like that matter, but only after you know what you are picking up.

    I sort tools into jobs:

    • Claw grabber: My default for bottles, cans, food containers, and heavier wrappers. It holds its grip when the bag is open and the wind is pushing back.
    • Suction cup style: Better for flat, light litter on smooth pavement. Flyers, napkins, and thin plastic come up faster when the ground is doing half the work.
    • Spike picker: Useful for debris stuck in grass or pressed into damp soil.
    • Rotating head grabber: Best near curbs, fence lines, hedges, and parked cars where straight-on reach is awkward.

    A weak tool slows the whole crew. A mismatched tool does something worse. It pushes volunteers to pinch with gloved fingers, kick items loose with a shoe, or reach toward something they should have left alone.

    My decision rules in the field

    I use quick rules, not brand loyalty.

    Cleanup Scenario Best Tool Type Why It Fits
    Sidewalk with cups, cans, wrappers Claw grabber Strong grip and easy drops into a bag
    Smooth pavement with paper and thin plastic Suction cup Lifts flat litter cleanly
    Park grass with stuck debris Spike picker Frees pieces caught in roots or soil
    Curbs, hedges, tight edges Rotating head Reaches odd angles without twisting your wrist
    Cigarette-butt heavy corner Fine-tip claw or spike Small-target control matters more than jaw strength
    Suspected sharps or hazardous waste No standard grabber Stop, mark the spot, report it

    That last row matters most.

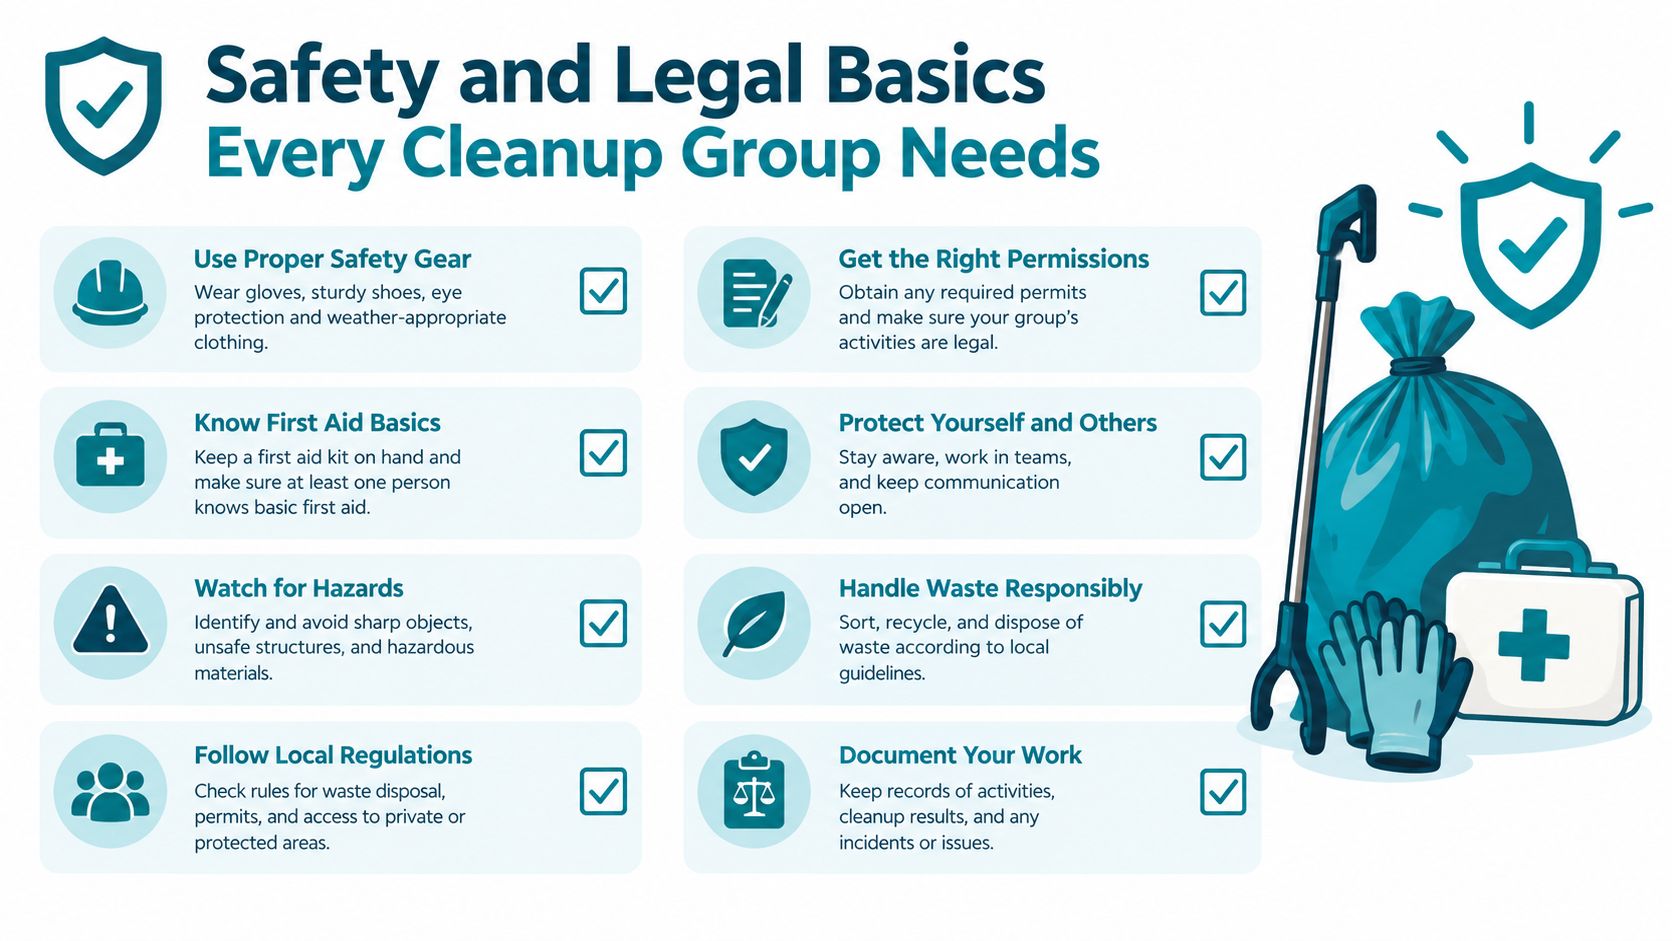
    One safety guide says volunteers should use grabbers for ordinary litter, wear high-visibility clothing, gloves, and hard-soled shoes, and report large items, hazardous waste, and sharps instead of handling them directly in this litter grabber safety guidance.

    If an item could cut, puncture, leak, or spread contamination, the tool choice is simple. Do not pick it up yourself.

    I have made that call in alleys after storms, beside bus stops, and along vacant lots where the grass hides surprises. A grabber is enough for routine litter. It is not enough for needles, broken containers with residue, leaking bags, dead animals, or anything you cannot identify from a safe distance. In those cases, I flag the spot, take a photo if needed, and pass it to the city, park staff, or a trained crew.

    Cigarette butts are a good example of why scenario beats marketing copy. They are small, dirty, and often packed into cracks, mulch, or mud. A big claw that works great on bottles can feel clumsy there. Cleanup groups also run into glass and contaminated debris in the same stretch, which is why broad product claims fall apart fast. The safer approach is to match the tip shape to the target, and leave risky items for pros.

    If you want a plain-English list of what belongs in a basic cleanup setup, this trash pickup equipment guide for volunteer cleanups is a useful starting point.

    A short demo helps if you're a visual learner.

    Using Your Gear Well on Volunteer Cleanup Day

    A cleanup goes smoothly when your setup is boring. I mean that as praise. The bag stays open. The gloves fit. The grabber opens and closes without drama. Nobody is asking where to put the glass bottle or who has the extra bags.
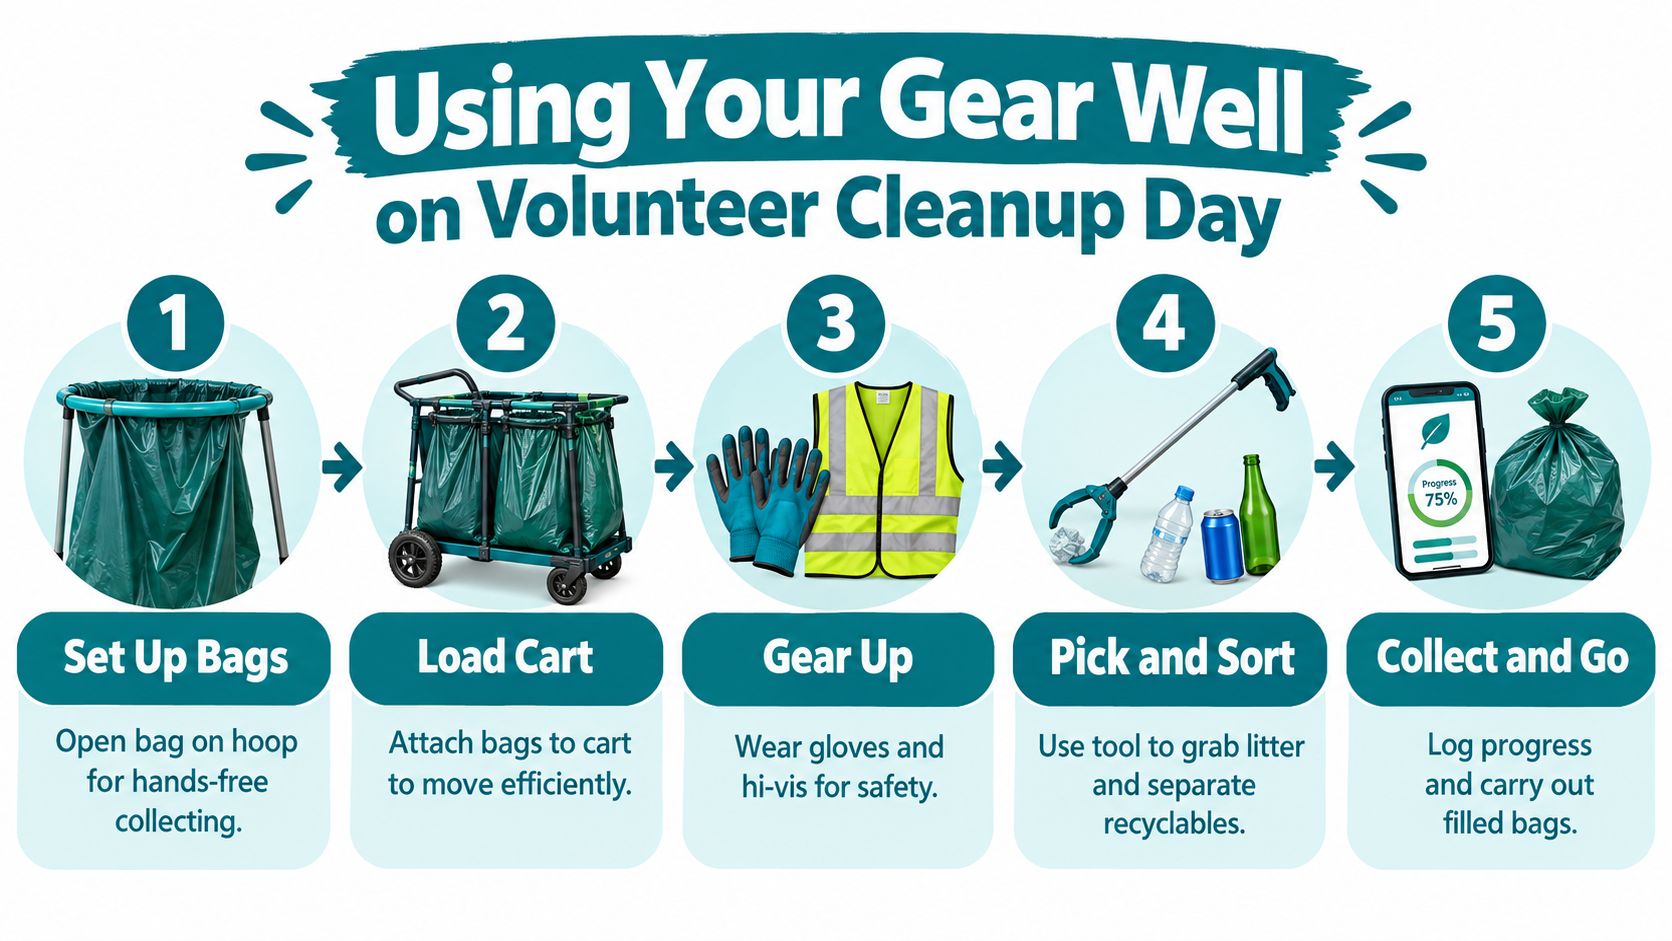
    A five-step infographic showing how to use cleanup gear efficiently for a community volunteer trash collection event.

    My field routine

    I start by staging the boring stuff first.

    1. Open the bags before you need them. A hoop keeps the mouth of the bag open so your grabber can drop trash cleanly.
    2. Load a cart or trolley if the route is long. Carrying full bags by hand burns energy fast.
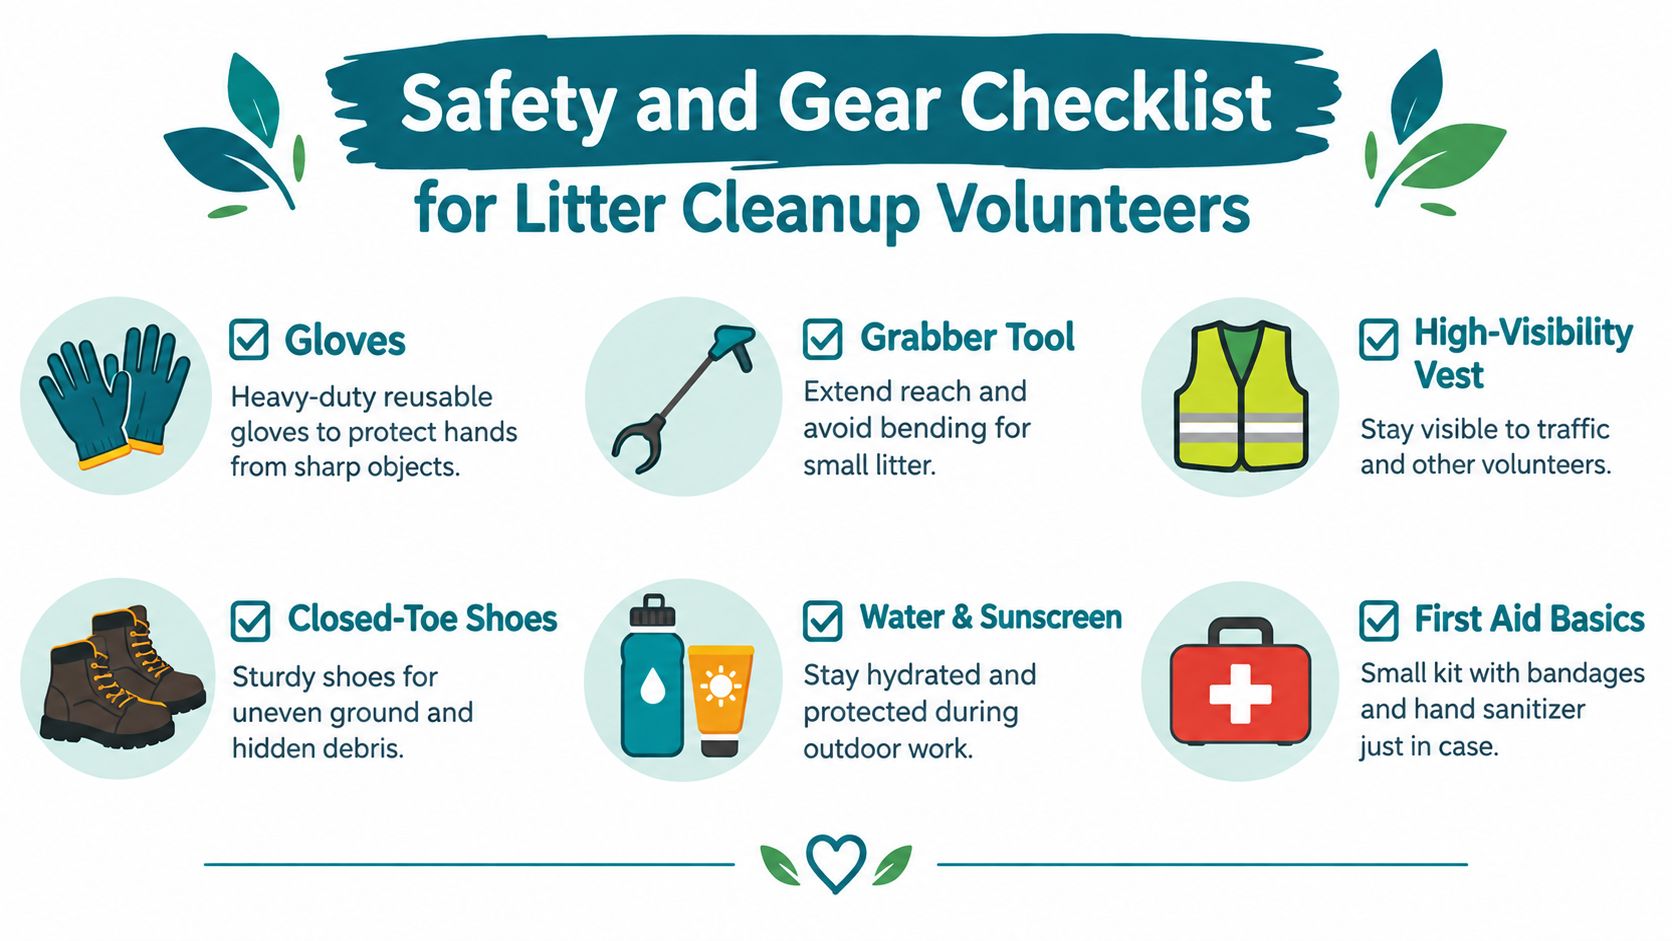
    3. Put on gloves, hi-vis, and hard-soled shoes. You want protection before the first pickup, not after the first bad surprise.
    4. Sort as you go. I like one stream for organics, one for recyclables, one for garbage.
    5. Keep a phone handy. You may need photos, notes, or a report for a dangerous item.

    Volunteer kit guidance backs up that setup. It recommends bin bags, recyclable bags, gloves, a hoop to keep bags open, a cart or trolley, a mobile phone, and a first aid kit in this cleanup equipment list for volunteer groups.

    Turn a cleanup into usable data

    When I want more than a feel-good morning, I borrow a simple audit method. Use fixed survey zones. Pick up only what you can handle safely. Separate waste into categories during collection. Weigh each category after the session.

    One campus litter audit used a 3-hour collection window, waste tongs, and three bags for organics, recyclables, and garbage in this campus litter audit report. I like that model because it turns "we cleaned a lot" into something you can compare later.

    The trap is sloppy definitions. If one team counts the bus stop and another stops at the tree line, your numbers won't match. If one volunteer tosses cans into garbage and another sorts them into recycling, same problem.

    Field note: Keep the zone fixed and the sorting rules fixed, or don't pretend the results compare.

    For groups that want benchmark-style tracking over time, repeated standard surveys beat random one-off counts. The NSW litter reporting method is a good example. It surveys 1,000 sites twice yearly with a standard method and tracks both volume and item counts. That same source also warns against treating one metric as the whole truth. I agree. A block can look cleaner and still hide dense pockets of cigarette butts in the grass line.

    If you're new and want a simple walkthrough, this how to pick up trash guide covers the basics in plain language.

    Building a Volunteer Ready Kit on Any Budget

    When I pack for a group, I don't think in terms of one magic picker. I think like a cook setting up a line before dinner rush. If the knife is sharp but the pans are missing, service falls apart. Same deal here.
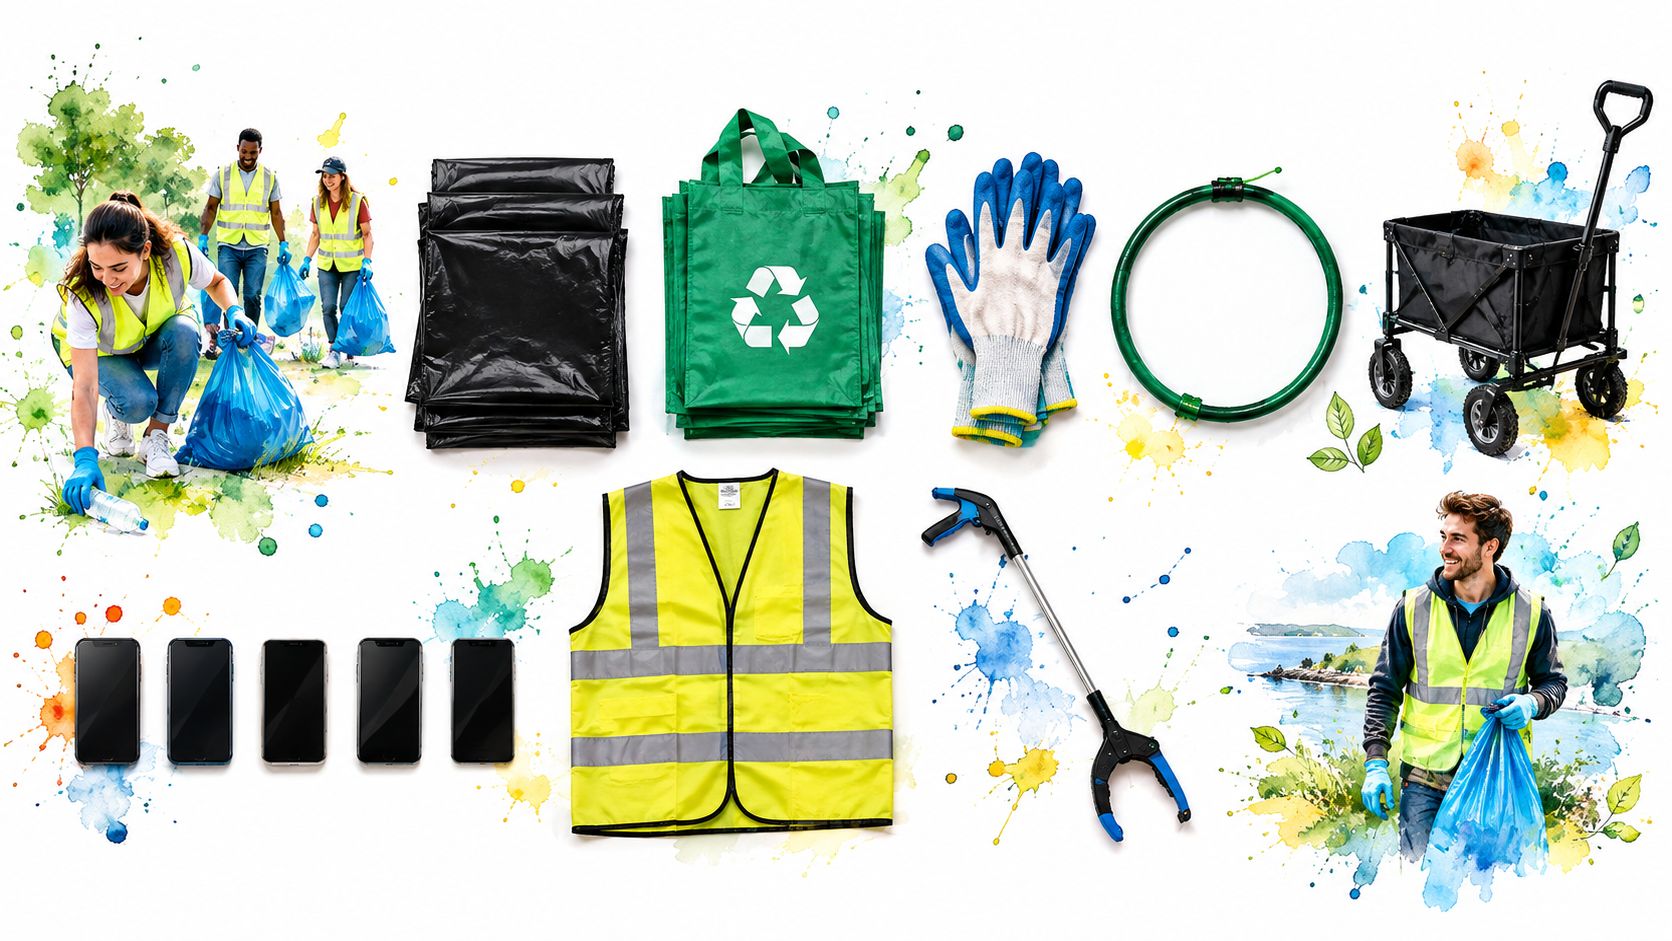
    A collage showing volunteers picking up trash with various cleanup tools and supplies on a white background.

    The kit I want at the curb

    For a small team, I want enough grabbers for the people who hate bending, extra gloves, bags that won't rip, and one way to move full loads without carrying them like dead weight. A cart changes the mood of a cleanup more than people expect. It turns the bag pile into one rolling station.

    I also standardize the kit so every site feels familiar. Same bag colors. Same spot for gloves. Same rule for where filled bags go. That way a volunteer can join in a new neighborhood and still know the rhythm within a minute.

    I keep these points in mind:

    • For hands: grabbers in a few styles, plus backup gloves
    • For sorting: separate bags that volunteers can identify quickly
    • For movement: one cart or trolley if the route is spread out
    • For safety: hi-vis, first aid basics, and a charged phone
    • For weird days: spare liners, tape, and an extra outer bag for wet or sharp-edged trash

    Why group logistics matter more than people think

    Most advice online talks about grip strength and handle comfort. Fine. But group cleanup failure usually starts with logistics. The bags won't stay open. Nobody brought enough supplies. One person is carrying everything. People walk half a block to find the right bag.

    That matters even more because the litter itself doesn't always behave the way people expect. A major U.S. litter study cited by an industry source found nearly 50 billion pieces of litter along roadways and waterways, equal to 152 items per U.S. resident and more than 2,000 pieces per mile. It also counted 25.9 billion pieces along waterways and 23.7 billion along roadways, and said cigarette butts remained the most littered item even after falling by almost 70% in the 2021 litter figures summarized here.

    Those numbers match what a lot of volunteers feel on the ground. A place can seem cleaner overall and still hand you a miserable hour of scattered bottle caps, half-buried plastic, and butt clusters around benches and curb drains.

    A group cleanup kit should solve friction first. If volunteers keep stopping to adjust, search, carry, or sort, the day gets longer fast.

    If you're on foot, pack foldable tools and split supplies across two backpacks. If you're on a bike, strap the hoop flat and carry bags inside a bin or pannier. If you're in a car, store grabbers folded and grouped so setup takes minutes, not rummaging.

    Simple Care and Safety Habits That Keep Tools Working

    Last July, a teenager on my crew used a grabber to drag a waterlogged rug out of a park hedge. The jaws twisted. The spring started clicking. By the second block, the tool would close on a bottle and drop it two steps later.

    That is the kind of failure you can prevent.

    A trash pickup tool lasts longer when you match it to the hazard and stop asking it to do a job meant for gloves, a broom, a shovel, or a city crew. Grabbers are for loose, light litter you can lift cleanly. They are poor choices for sodden fabric, sharp metal, leaking containers, and anything stuck fast in mud or ice.

    The two minute check

    Before I leave home, I give each tool a quick test in the alley. I squeeze the handle. I watch the jaws meet. I look for a loose hinge, a split rubber tip, or a bent shaft from the last cleanup. After wet or gritty events, I wipe the tool down, dry it fully, and clear the grit out of the moving parts before it hardens into a grinding paste.

    If you use a folding model, fold it and store it dry. Some compact grabbers fold to about 17 inches, which is handy for a car bin or closet shelf, but the win is keeping the hinge clean so it still locks straight next time.

    My routine stays simple:

    • Before you leave: check jaw alignment, hinge tension, and gloves
    • After rain or snow: wipe the shaft and jaws, then let the tool dry fully
    • After sand, mulch, or glassy grit: rinse or brush out the hinge and trigger area
    • Before the next event: test the grip on something small and something bulky, like a bottle cap and a can

    One fast test saves a frustrating morning.

    The line I don't cross

    I learned this one on a windy cleanup near Western Avenue. A volunteer spotted litter just past the curb and started reaching from the grass. Cars were moving too fast, and the grabber gave her a false sense of reach. I pulled her back and left the trash where it was.

    That call was right. Some public roadside guidance says not to pick litter from roads or carriageways, to avoid roads with speed limits over 30 mph, and to stay on pavements, paths, and walkways, as described in this roadside litter picking guidance.

    I give new volunteers a plain rule. If you need to step into traffic space, stretch under a guardrail, reach into blind brush, or handle something that could cut, poke, leak, or break, the grabber is no longer enough.

    Then we switch to the relay rule. Pick up the safe stuff. Mark or photograph the dangerous find if your group does that. Report sharps, chemical containers, bulky dumping, dead animals, and anything you cannot identify to the city, park staff, or another trained crew.

    A working tool is only half the job. A volunteer who knows when to stop keeps the whole cleanup safer.

    Your Next Block Is Waiting

    I like weekend mornings for this work. The city is still rubbing its eyes. The light is honest. You can hear someone's laugh from half a block away while a bag rustles and a grabber clicks like a metronome.

    That's how a habit starts. You don't need a massive route. Pick one corner store block, one bus stop stretch, one park edge. Bring one friend if you can. If nobody comes, go anyway and make it short enough that you'll want to come back next week.

    I've seen strange little victories pile up. A volunteer who was shy starts waving at strangers. Someone who came for one event comes back with gloves for a friend. A neglected patch of grass starts looking like part of the neighborhood again instead of a place people ignore. That's how friendships grow too. You're side by side, doing something plain and good, and conversation gets easier because your hands already know what to do.

    Keep the celebration simple. Take a photo. Mark the block on your map. Give the weird hailstorm, hot wind, or perfect sunrise its due. Those details are part of why you'll remember the morning and do it again.

    You don't need perfect gear. You need gear that matches the job, a few safety rules you won't bend, and the nerve to start.

    Then your block starts talking back. Cleaner curb. Fewer cans in the grass. A corner that feels cared for.

    That's enough to get going.


    If you want people to clean with, Litter Caterpillars runs volunteer trash pickup events in Chicago and provides basics like grabbers, bags, and gloves for many outings. If this guide helped you think more clearly about which trash pickup tool fits which cleanup, come join a morning and put those choices to work on a real block.


  • Litter Pickup Tool Guide That Makes Cleanup Easier

    Litter Pickup Tool Guide That Makes Cleanup Easier

    The first time I led a cleanup in a cold Chicago blow, I watched a new volunteer bend for every gum wrapper along the curb. Ten minutes later, I handed her a grabber, and her whole morning changed.

    Why Your First Cleanup Feels Different With the Right Tool

    I still think about one of our early Litter Caterpillars mornings, back when hail came sideways and we huddled under a tree waiting on rides that never showed. We were wet, shivering, and laughing anyway. What kept that cleanup from turning into a miserable slog was simple gear. A bag in one hand, a litter pickup tool in the other, and suddenly the work felt less like punishment and more like a strange little neighborhood adventure.

    A first-person view of a person using a litter pickup tool to clean a park in Chicago.

    When you're new, you think pickup is about grit. Just bend down and get it done. I used to think that too. Then I saw what happens over a long sidewalk, a busy alley, or a park fence line. Bending for every cigarette pack and fast-food lid drains you fast. A decent tool keeps you upright, keeps your hands cleaner, and lets you stay in rhythm.

    Why the tool changes the whole mood

    A litter pickup tool doesn't just add reach. It changes your pace.

    You stop doing this:

    • Bend, grab, stand, step
    • Bend again for the next tiny piece
    • Break your rhythm every few seconds

    You start doing this:

    • Walk and scan
    • Pinch and lift
    • Drop into the bag and keep moving

    That feels small until you've worked one long block. Then it feels like the difference between carrying groceries by hand and using a cart.

    Practical rule: If your cleanup pace feels jerky and your back starts talking to you early, your tool choice is off.

    I also want to be honest about the emotional side. The right gear makes cleanup more fun. That's not corny. When your body isn't fighting the work, your brain has room to notice the jokes, the murals, the weird little treasures people find, the conversations that start between strangers.

    What you should expect from a good fit

    I want you to leave your first cleanup thinking, "I can do that again next weekend."

    A good litter pickup tool helps you:

    • Save energy so you don't burn out halfway down the block
    • Stay safer around sharp or nasty trash
    • Move faster without rushing
    • Feel more confident when the ground is muddy, windy, or full of mixed debris

    There's a bigger cleanup economy around these tools too. Washington State's litter programs collected more than 5.2 million pounds of litter and cleaned more than 18,000 miles of road in 2024, and the same market coverage says the global litter picker market reached about USD 1.19 billion in 2024 with a projected 6.3% CAGR to roughly USD 2.06 billion by 2033 (Washington cleanup scale and litter picker market figures). I don't bring that up to sound fancy. I bring it up because these tools get used hard, at scale, by real cleanup crews and volunteers.

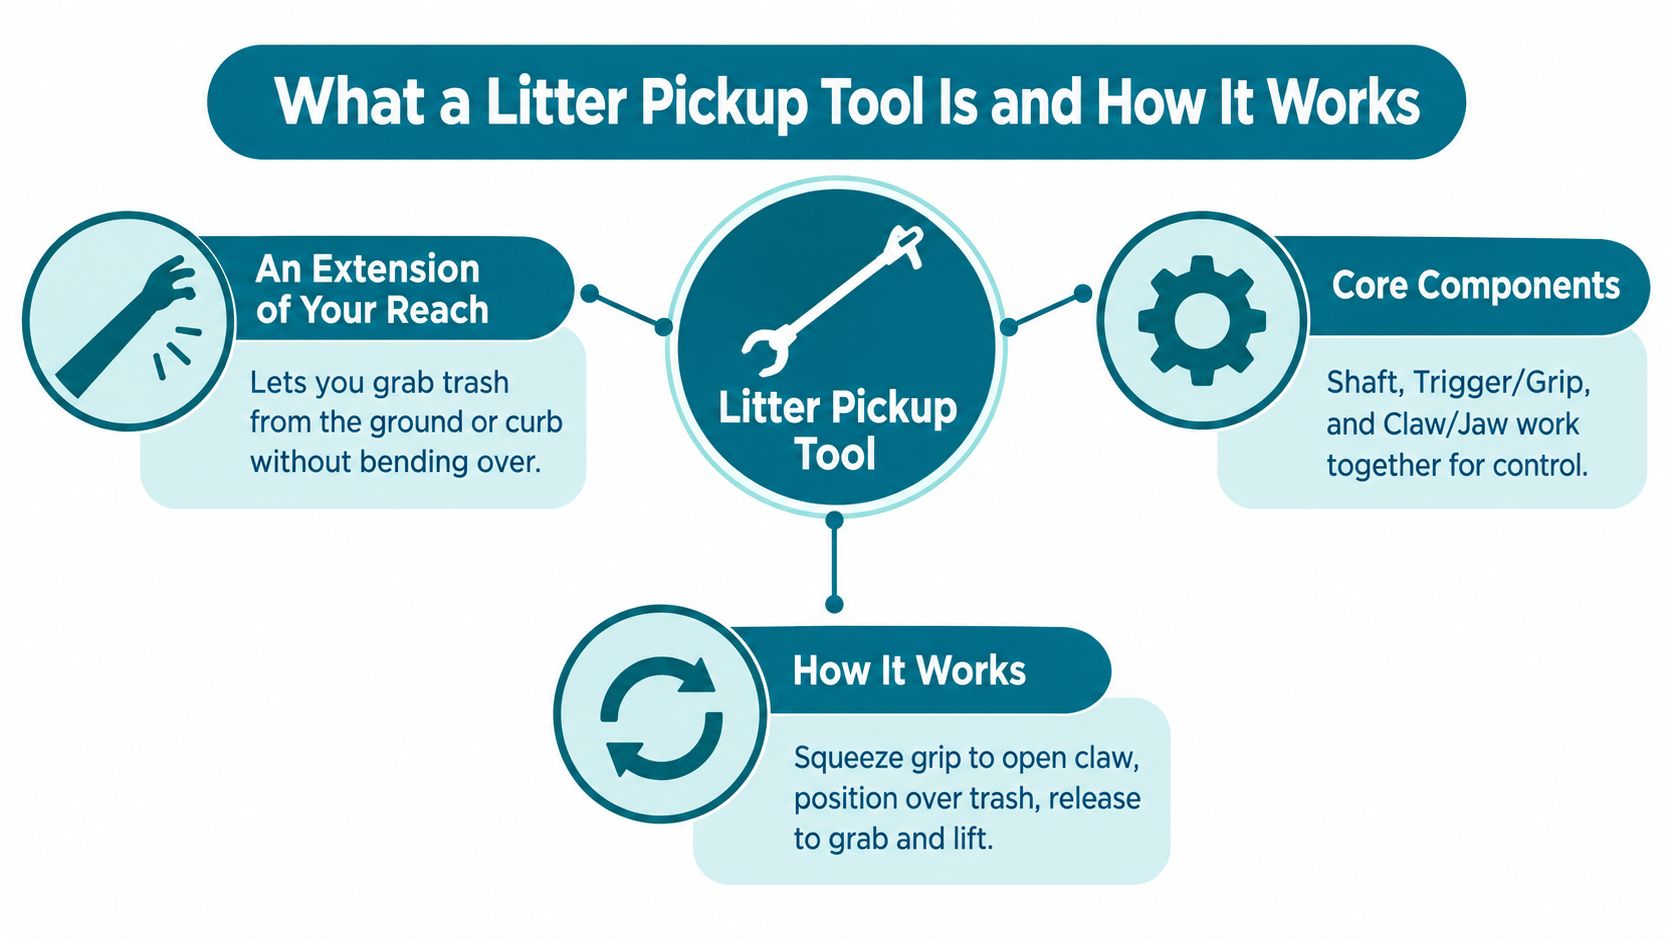
    What a Litter Pickup Tool Is and How It Works

    On a Chicago cleanup, I can usually tell who borrowed the wrong tool in the first five minutes. They are poking at a wet flyer by the curb, bending at the waist, then chasing a bottle cap that slips out of the jaws. The tool is in their hand, but it is not doing enough work for them.

    A litter pickup tool is a handheld tool that extends your reach so you can lift trash without touching it and without folding yourself over every few steps. On our routes, that usually means one thing. A grabber or tong-style picker with a handle, a long shaft, and a gripping end.

    The basic idea works like kitchen tongs on a stick. Your hand makes a small motion at the grip. The tool turns that into a bigger motion at the far end, where the jaws open and close around the trash.

    An infographic explaining what a litter pickup tool is, its core components, and how it works.

    The three parts that matter most

    Nearly every litter pickup tool has three working parts, and each one changes how the tool feels on a real block.
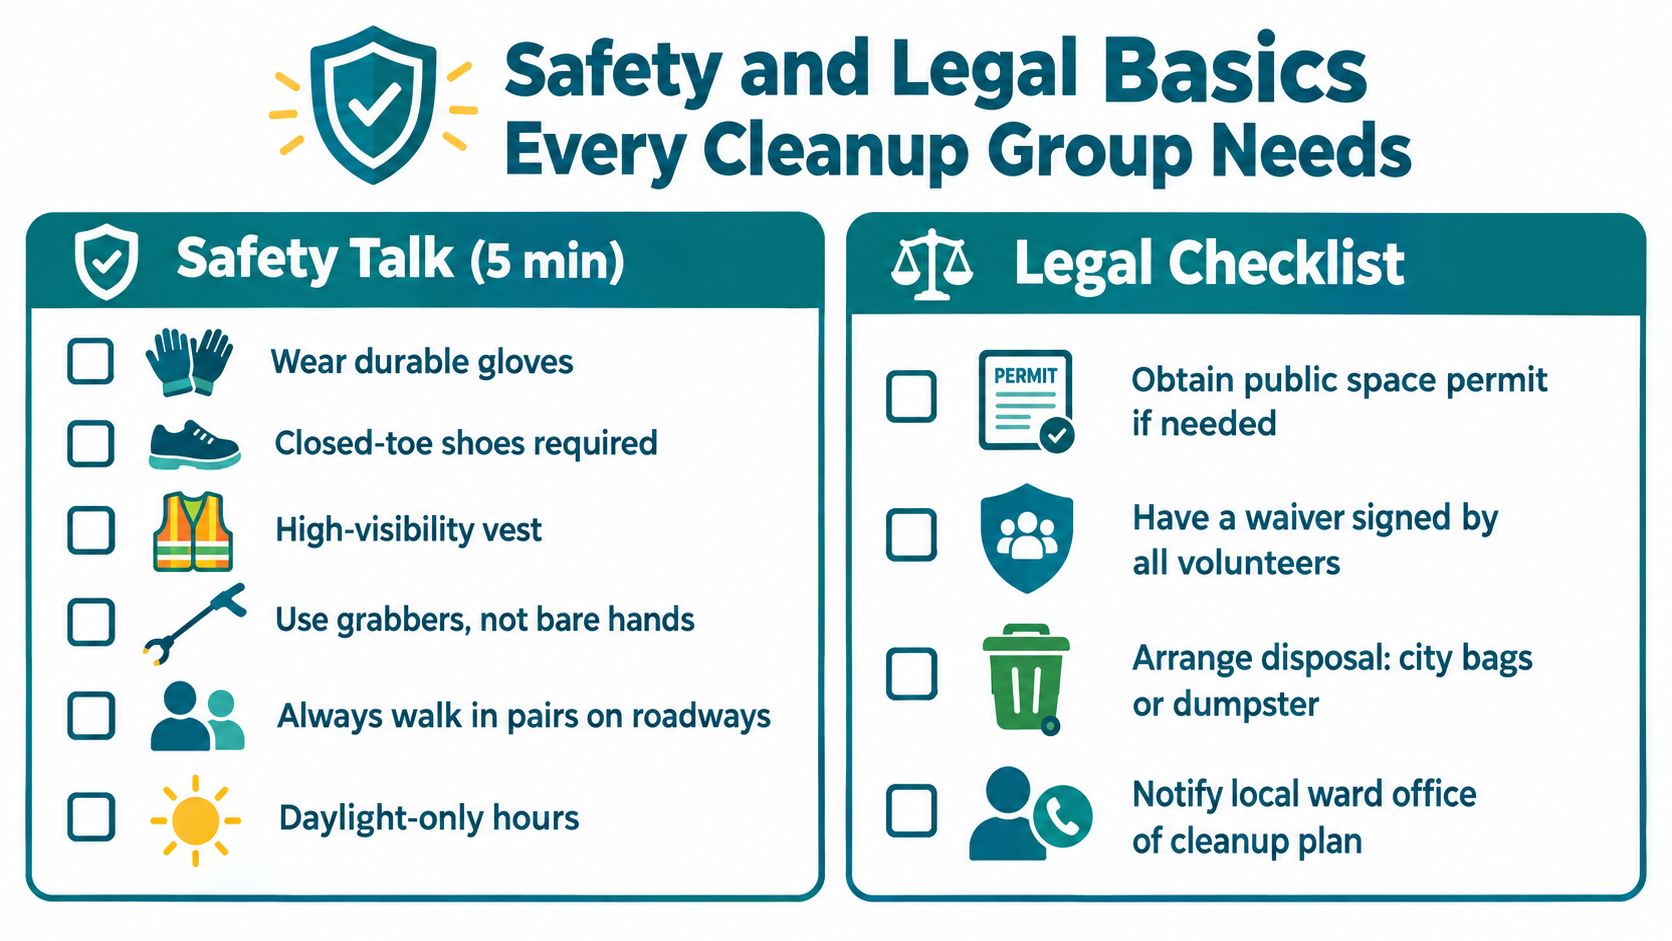
    1. The handle or grip
      This is your control point. Some tools use a trigger. Some use a full-hand squeeze. If you are picking along Milwaukee Avenue for an hour, a stiff grip will wear you out long before the bag is full.

    2. The shaft
      The shaft gives you reach. It also sets your posture. On a flat sidewalk, the right length keeps you more upright. In a weeded lot or along a guardrail, it helps you reach trash without stepping into the mess.

    3. The grabbing end
      This part meets the trash. Wide jaws can catch cups and bottles. Narrow tips do better with cigarette packs, caps, and scraps pinned in grass. That is why one tool can feel great on a boulevard and clumsy near a storm drain.

    How the motion works

    Most tools follow the same cycle:

    • Squeeze the handle
    • Open or close the jaws, depending on the design
    • Set the jaws on the item
    • Grip it firmly
    • Lift and drop it into your bag or bucket

    That cycle repeats hundreds of times in one cleanup.

    A good tool makes that rhythm feel steady. A bad one turns every pickup into two or three tries, which is how a short route starts to feel long. The Conservation Volunteers describes the same basic benefit in its beginner guide. A grabber lets you pick litter at a distance, so you avoid constant bending and direct contact with trash (beginner litter-picking guidance from TCV).

    Why length changes how the tool behaves

    This part trips people up, so I keep it simple. Longer reach helps until it starts to hurt your control.

    On open ground, a longer tool can save steps and cut bending. On a crowded city sidewalk, that same extra length can feel like carrying a canoe paddle into a hallway. You can reach farther, but you lose some precision around fences, parked cars, and bus-stop poles.

    You will also see a big spread in tool lengths on the market, from shorter models around the low-30-inch range to specialty tools that go much longer. Sellers often list the reach and skip the tradeoff. More length can mean less control, more swing weight, and slower pickups in tight spaces (litter tool length and design variation examples).

    Here is the curbside version I give new volunteers:

    • Shorter tools feel quicker in tight spots but ask more from your back
    • Mid-length tools fit the widest range of ward cleanups
    • Very long tools help with ditches, slopes, or barriers, but they can feel awkward on narrow sidewalks

    That is the whole machine. Your hand sends force through the handle. The shaft carries it outward. The jaws turn it into a grip on the trash. Once you see those three pieces working together, picking the right tool gets a lot less confusing.

    Main Types of Litter Pickup Tools and When to Use Each

    Chicago cleanup routes aren't all the same. A lakefront path, an alley behind a restaurant strip, and a highway shoulder each ask for different moves. That's why I don't like generic feature lists. I like matching the tool to the mess.

    Grabbers for mixed city trash

    If you only buy one tool, start with a standard grabber. This is the everyday workhorse. It handles wrappers, bottles, cups, cans, and all the annoying little curb pieces that collect around bus stops and chain-link fences.

    I especially like a rotating-head grabber when I'm working parked-car edges or reaching under hedges. You can angle the jaws instead of twisting your whole wrist. That's handy when you're trying to pick a bottle off a sloped curb or fish a can from between weeds.

    Rakes and scoops for light spread-out debris

    A rake is useful when the ground is covered in leaves mixed with paper bits, napkins, or foam cups. I use that kind of setup in park edges and vacant-lot corners where litter sits in a thin layer across dirt or grass.

    Scoops help when tiny scraps pile up in one spot. Think broken bits around a bench, mulch beds full of candy wrappers, or the grit line near a storm drain. A scoop can gather what a claw keeps missing.

    If your route has mostly flat, light debris, a rake or scoop can beat a grabber on speed. If the trash is mixed and awkward, a grabber usually wins on control.

    Magnet poles and simple DIY options

    Magnet poles do one job. They pick up metal. If you're collecting nails, caps, or small ferrous scraps near construction edges, they help. For paper, plastic, or glass, they won't do much.

    DIY tools can work in a pinch. I've seen people use barbecue tongs, improvised sticks, and garden tools. That's fine for a quick solo block if you're careful, but for group cleanups I want actual pickup tools with predictable grip and reach.

    Here's the fast match guide I use.

    Which Litter Pickup Tool Fits Your Cleanup Job

    Tool Type Best For Watch Out For
    Standard grabber Sidewalk litter, bottles, cans, wrappers, park paths Cheap jaws can slip on thin or wet items
    Rotating-head grabber Curbs, fence lines, under bushes, awkward angles More moving parts can feel looser over time
    Rake Leaves mixed with light litter on grass or dirt Hard to control for single items
    Scoop Small scraps gathered in one area Clumsy on uneven ground
    Magnet pole Metal bits near construction or alleys Useless on plastic, paper, and most common street litter
    DIY tongs or improvised tool Very light personal use Weak grip, less safe, poor control

    My Chicago ward rule of thumb

    When I lead volunteers, I think in terrain first.

    • Busy commercial strips: Bring a grabber for cups, receipts, and food containers around curbs and planters.
    • Residential blocks after wind: Use a grabber, and add a small scoop if the tree lawn has shredded paper bits.
    • Alleys: Choose a stronger jaw that can handle bottles, cans, and damp trash.
    • Vacant lots: Mix tools. One person with a grabber, one with a rake for loose litter in grass.
    • Shoulders and rough edges: Longer reach helps, but too much length makes control sloppy.

    If you want to compare common cleanup gear before an event, I like using a practical roundup like trash pickup equipment for volunteer cleanups as a planning reference.

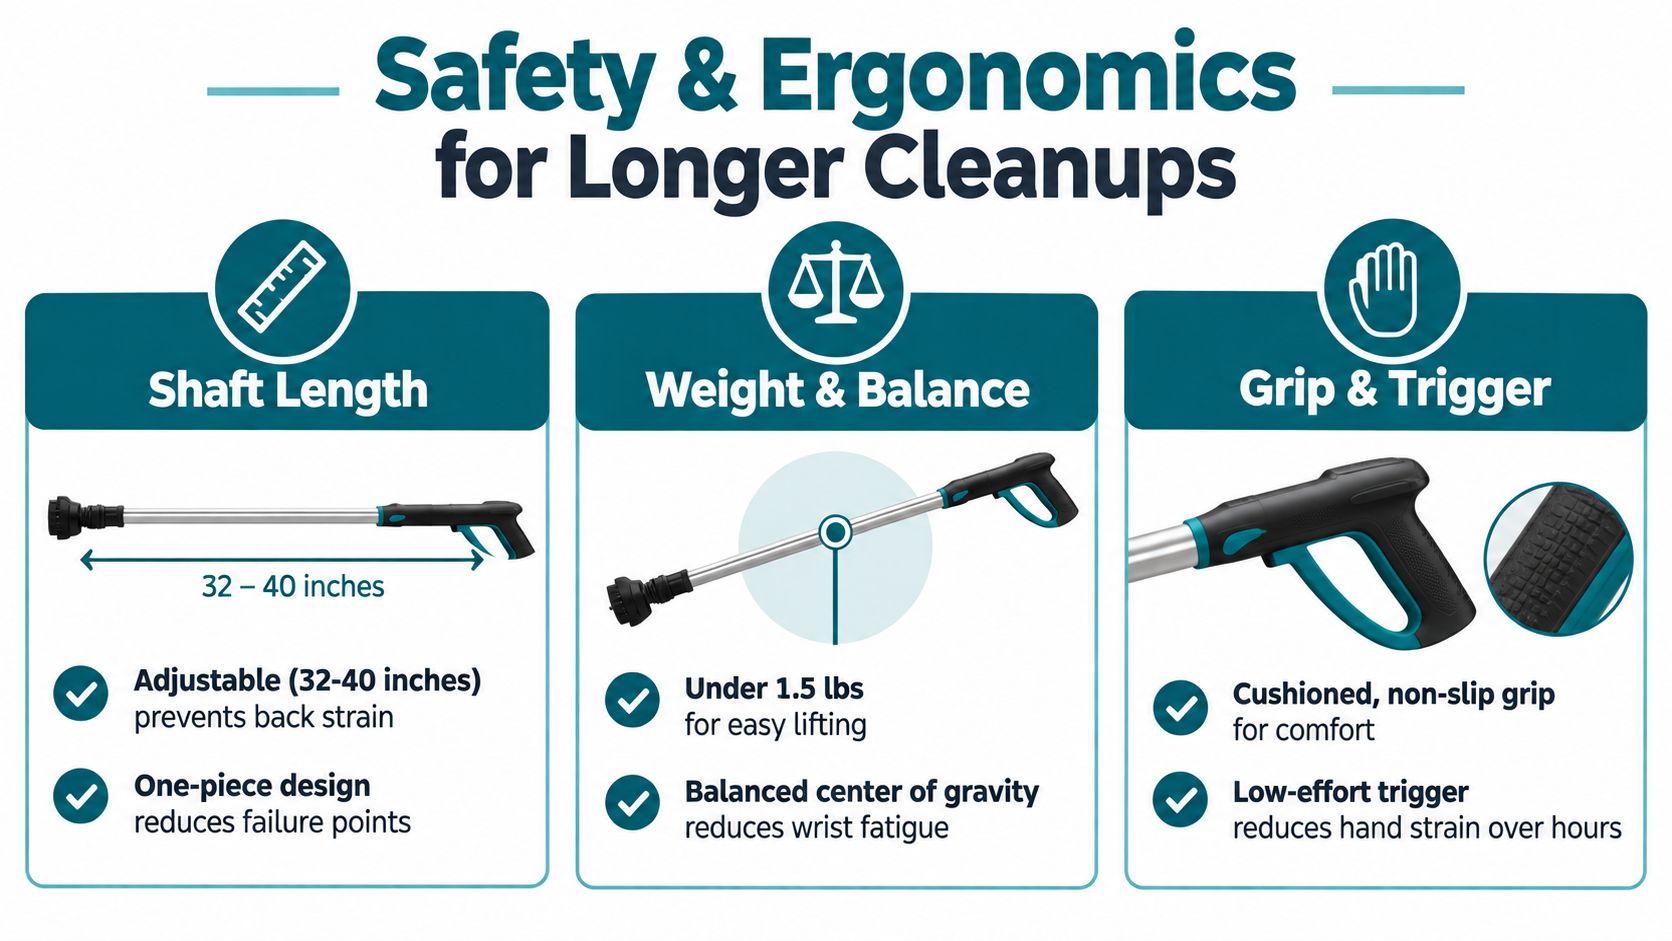
    Safety and Ergonomics That Keep You Picking Longer

    The fastest way to wear out a new volunteer is simple. Hand them a tool that fights their body.

    I learned that on a cold ward cleanup near an alley off Milwaukee. One volunteer brought a short bargain grabber from home. It looked fine in the parking lot. Twenty minutes later, she was bending for every cup and twisting her wrist to reach under parked cars. Another volunteer had a longer, lighter tool with a grip that sat naturally in the hand. Same route. Same trash. One person was fading, and the other was still moving smoothly an hour later.

    A litter pickup tool should feel like a good broom. It should extend your reach without changing the way your body wants to stand and move.

    A safety and ergonomics infographic for a litter pickup tool, highlighting adjustable shaft length, lightweight balance, and comfortable grip features.

    Start with posture, not features

    On Chicago sidewalks, posture usually matters more than an extra gadget on the tool.

    Your back should stay relaxed and fairly upright. Your shoulders should stay low. Your wrist should stay close to straight when the jaws meet the ground. If one of those three starts working too hard, the tool is the problem.

    Length drives most of that. A tool that is too short makes you fold at the waist, especially on long curb runs. A tool that is too long can feel sloppy in tight spots like bus stops, chain-link fence lines, and the space between trash cans in alleys. Weight matters too. A heavy picker may feel solid for the first few grabs, then start dragging on your forearm once you have walked two or three blocks.

    Before I send a group out, I ask people to do a simple test.

    • Stand naturally with the tip near the ground
    • Reach for a spot near your shoe without hunching
    • Check your wrist to see if it stays mostly straight
    • Swap tools if your shoulder lifts or your grip feels strained

    That thirty-second check saves a lot of complaints later.

    Match the tool to the block

    Ergonomics are not just about your body in the abstract. They depend on where you are picking.

    On a flat residential sidewalk with wrappers and cans, a standard reach tool usually lets you keep a nice rhythm. In an alley with damp bags, broken-down boxes, and heavy drink containers, stronger jaws and a steadier shaft matter because you do not want to squeeze twice for every pickup. Along a boulevard edge or a weedy vacant lot, extra reach helps, but only if you can still control the tip. Too much length out there feels like trying to write your name with a yardstick.

    That is why I choose for terrain first, then comfort. The right ergonomic tool is the one that keeps your body neutral while handling the trash sitting in that ward.

    Gloves are required

    I never let volunteers treat gloves as optional.

    You should always wear heavy-duty gloves and use a litter picker when possible. Safety guidance from Keep Britain Tidy warns against picking litter up by hand because sharp objects can hide inside ordinary trash (heavy-duty glove and tool guidance from Keep Britain Tidy).

    Street trash hides surprises. A paper sack can cover broken glass. Wet leaves can hide a can lid. A crushed bottle near the curb can break again when the jaws press down on it. Gloves and a pickup tool give you one more layer between your skin and the mess.

    Build the pause-before-you-pick habit

    Good volunteers get faster by slowing down for one beat.

    I teach people to pause, read the item, then grab. Volunteer risk guidance advises using litter pickers where possible and checking items for sharp edges or contamination before handling them (volunteer litter-picking risk guidance).

    On the street, that habit looks like this:

    • Look first for shine, jagged edges, or leaking spots
    • Notice the surface if the item is wet, torn, or partly buried
    • Grab from the safest angle instead of rushing straight in
    • Leave it and report it if it looks hazardous

    If you want a plain-language refresher, this guide on how to pick up trash safely during community cleanups pairs well with what I teach on weekend routes.

    One last thing. If a tool makes you shrug your shoulders, clamp your hand too hard, or bend every few steps, do not try to tough it out. Switch tools early. A cleanup should leave you tired in the normal way, not sore from fighting your gear.

    Cost Tiers and Volunteer Friendly Models You Can Trust

    You don't need to overthink your first buy. You aren't outfitting a moon mission. You're trying to clean your block without wrecking your back or buying junk that quits after two Saturdays.

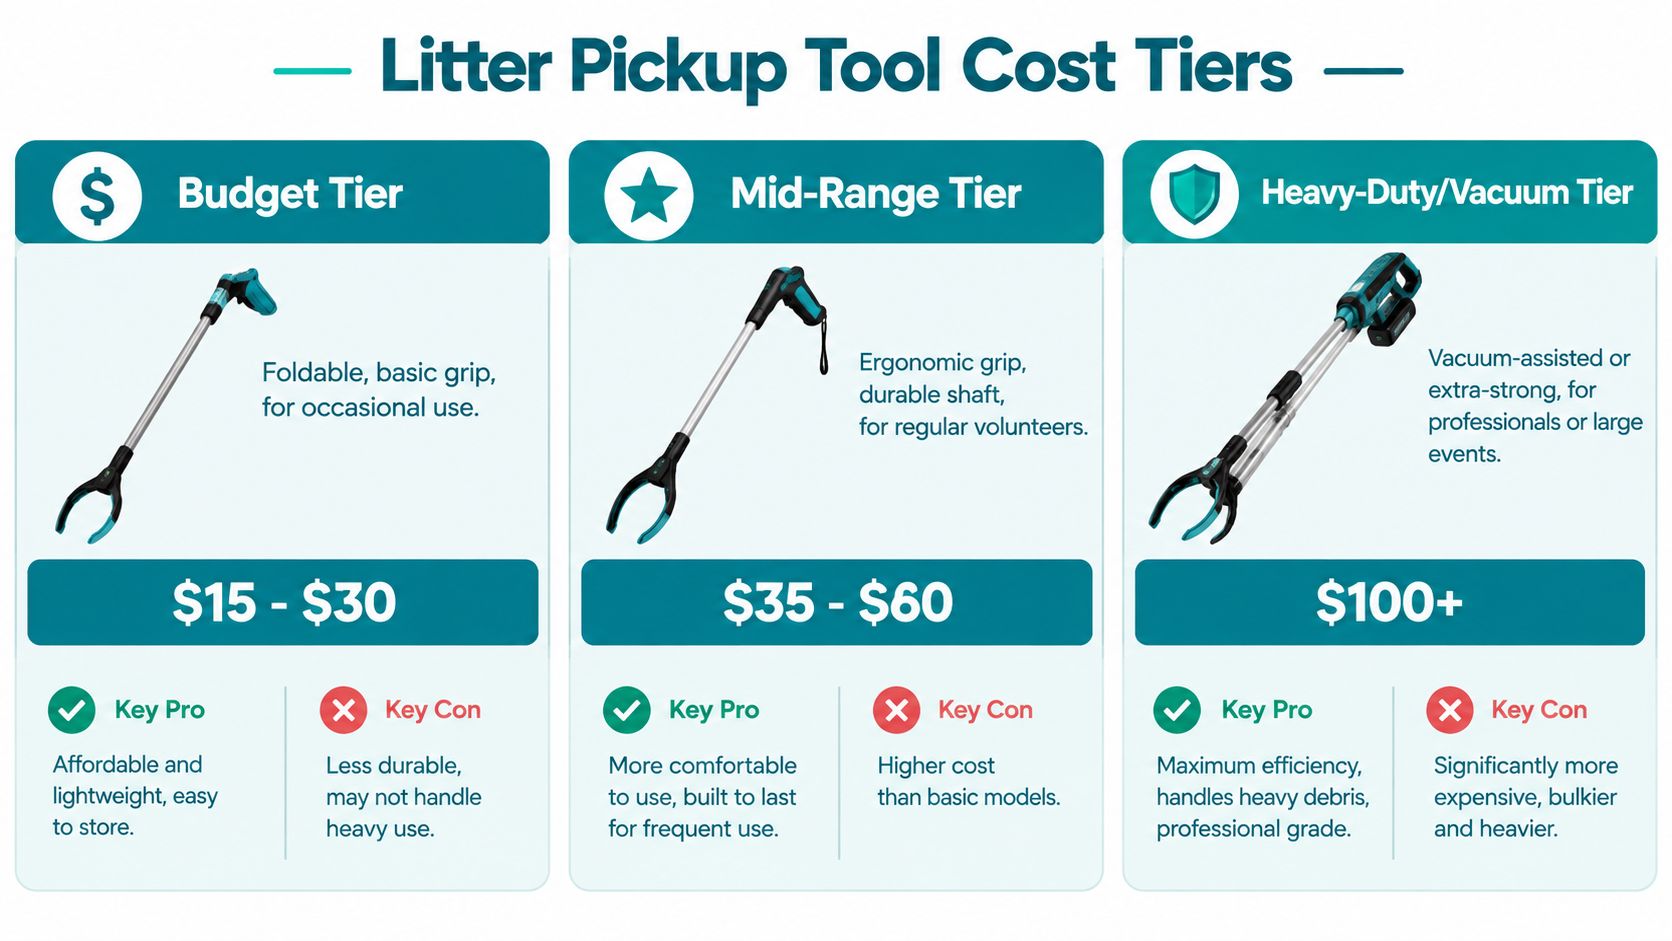
    I sort litter pickup tools into three practical tiers. I don't need an exact sticker price to make the decision. I just look at use frequency, trash type, and whether I'm buying for one person or a whole crew.

    A comparison chart showing three different tiers of litter pickup tools based on price and features.

    Budget tools for casual block walks

    Foldable grabbers and basic pickup claws usually sit here. They're fine for occasional walks, quick curb checks, or someone who wants to keep a tool in the car.

    The tradeoff is feel. Budget tools can be perfectly usable, but they often have shakier jaws, less comfortable grips, and more flex in the shaft. If you're only doing short sessions, that may not bother you. If you're doing weekly pickups, you'll notice.

    Mid-range tools for regular volunteers

    This is the sweet spot for those I clean with. A stronger shaft, better grip, and more reliable jaw shape make a difference over time. If you pick up mixed litter on sidewalks, alleys, and parks every weekend, this is usually where your money works hardest.

    I also like this tier for student groups and neighborhood captains. The tools usually hold up better when different people use them back-to-back.

    Heavy-duty and machine-assisted setups for big events

    This tier is a different animal. Once you get into municipal or industrial cleanup, the upgrade is the collection system, not just the hand grip.

    Some vacuum-based litter pickers pair with a 240-liter container and suction systems that can ingest mixed debris like cans, bags, and bottles. Larger municipal machines use 80-gallon tanks, 16-gauge steel construction, and about a 2:1 compaction ratio, which extends service time and cuts dump frequency because crews spend less time stopping to unload (industrial litter system container and compaction specs).

    For a volunteer group, that idea matters even if you never touch a machine. Bigger bags, smarter staging, and fewer dump runs keep your crew working instead of walking trash back and forth.

    How I buy for a group

    I don't buy every tool at the same level. I mix the kit.

    • For new volunteers: Keep a batch of simple, dependable grabbers that fit most.
    • For regulars: Add sturdier ergonomic models for longer routes and rougher debris.
    • For specialty jobs: Keep a few oddballs around, like stronger jaws for alley glass or a rake for lot edges.

    If you're joining a cleanup instead of buying your own right away, one practical option is a group that already supplies tools. Litter Caterpillars runs volunteer trash pickups in Chicago where grabbers are part of the event setup, so you can test what feels right before spending money.

    Simple Maintenance and Storage That Extends Tool Life

    I've seen good tools die early from one lazy habit. People toss them in a wet trunk, leave grime in the jaws, and forget about them until next weekend. Then the spring sticks, the grip smells weird, or the claw stops closing cleanly right when the route starts.

    You don't need a fancy routine. You need a repeatable one.

    My three-minute post-cleanup reset

    When I get back from a pickup, I do the same quick sequence every time.

    1. Wipe the shaft
      Dirt and street residue build up fast, especially after rain.

    2. Check the jaws
      Look for lodged plastic, string, or sharp fragments.

    3. Dry the tool fully
      Moisture is what turns a decent tool into a cranky one.

    4. Test the action
      Open and close it a few times. You want a clean snap, not a sluggish chew.

    Clean tools are safer to handle next time. They also make wear easier to spot before a volunteer ends up fighting a half-broken grip.

    Where to store it in real life

    Storage doesn't need to be pretty. It just needs to keep the tool dry and easy to grab.

    • Apartment living: Hang it in a closet corner or behind a door so the jaws don't snag bags or coats.
    • Garage setup: Keep it off the floor. Wall hooks work well.
    • Group shed or shared space: Stand tools upright or hang them by type so people don't crush lighter grabbers under heavier gear.

    What wear looks like before failure

    A tool usually warns you before it quits.

    Watch for:

    • Loose jaws that wiggle side to side
    • Sticky triggers that don't spring back smoothly
    • Hairline cracks near the grip or hinge
    • Bent shafts after rough alley work

    When I see those signs, I pull the tool from group use until I can test it. Mid-route failures waste time, but worse than that, they frustrate new volunteers who are still deciding whether cleanup feels welcoming or annoying.

    Pick Your Tool and Join the Next Chicago Cleanup

    When you strip away the product chatter, the decision is pretty simple. Match your tool to your height, your route, and the kind of trash you see.

    If you're cleaning a regular city sidewalk, start with a mid-length grabber that feels light and controlled in your hand. If you're taller, give yourself more shaft length so you can stay upright. If you're heading into grass, lot edges, or places with spread-out light debris, add a rake or scoop to the plan.

    My simple choice filter

    Ask yourself three questions:

    • Where am I cleaning? Sidewalk, alley, park edge, vacant lot
    • What am I picking up? Wrappers, bottles, cans, leaves, metal bits
    • How long will I be out? Quick block walk or full morning shift

    That gets you most of the way there. The right litter pickup tool should feel obvious once you stop shopping by gimmick and start shopping by route.

    Why this matters on a weekend morning

    When your gear fits the job, your attention shifts. You stop thinking about your lower back, your sore grip, or whether you should've stayed home. You start noticing the people next to you. You talk. You laugh. You finish a block and want one more.

    That's the good stuff.

    If you're ready to test your setup with other people, join a Chicago litter cleanup volunteer event and try your tool on real streets, real curbs, and real mixed trash. One solid morning will teach you more than a week of scrolling product pages.

    Pick one tool. Walk one block. Let the city teach you the rest.
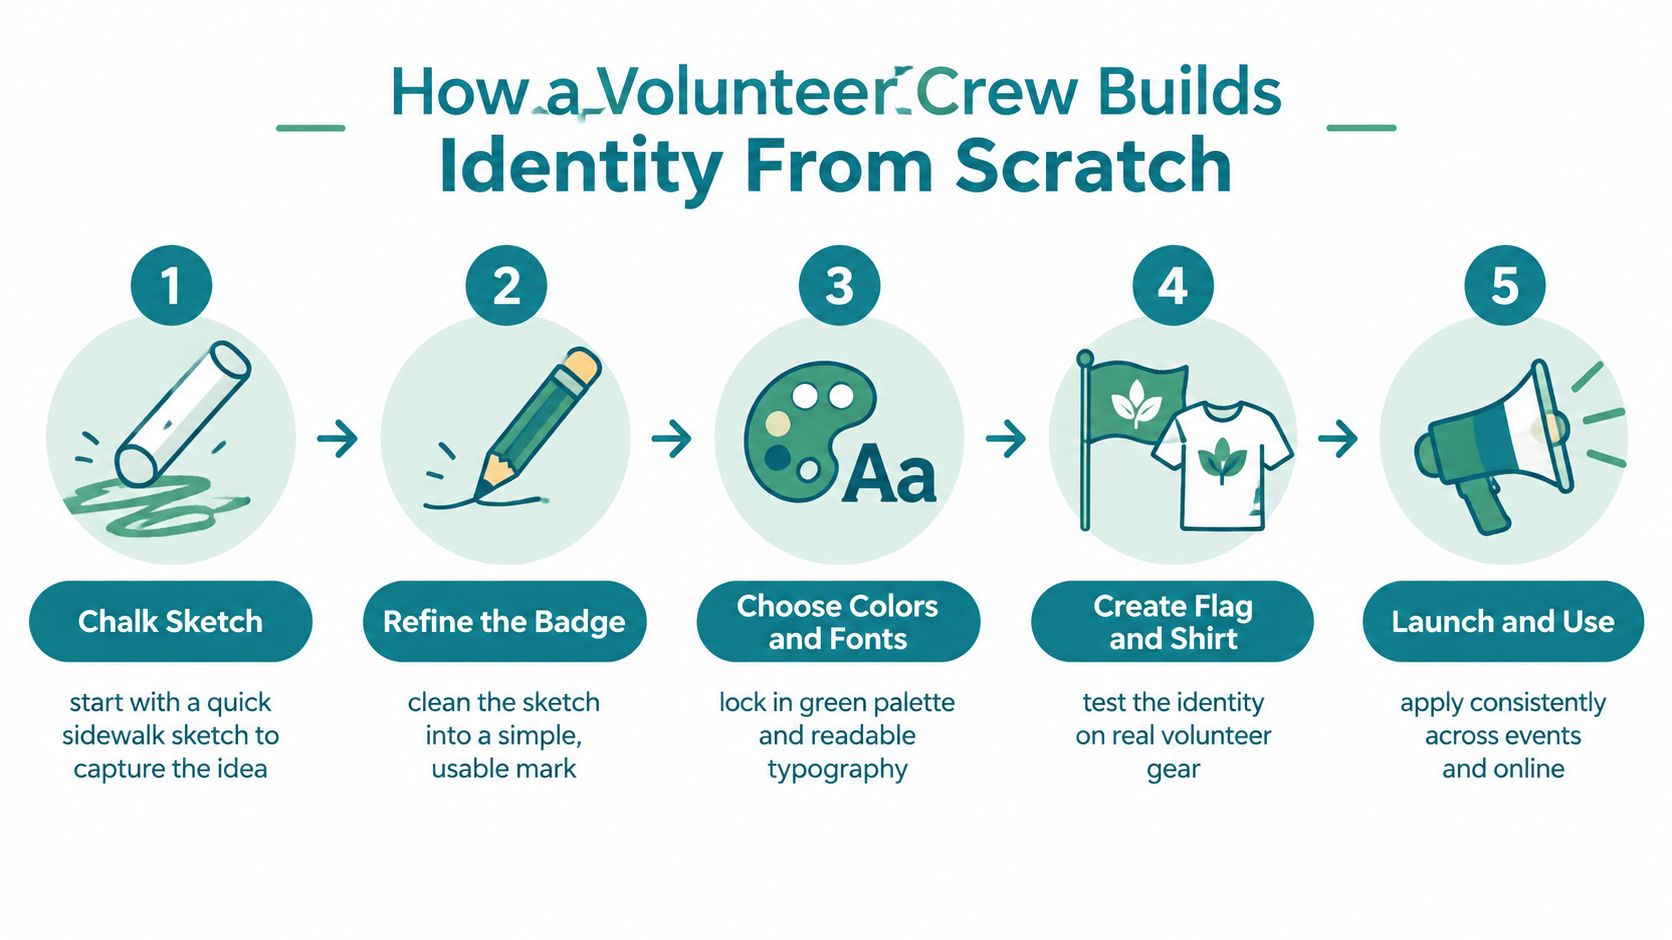

    If you want a place to use a litter pickup tool with other kind, brave people, Litter Caterpillars organizes weekend Chicago cleanups where volunteers can show up, grab gear, and get to work together. It's a simple way to test what tool feels right on real sidewalks, meet people, and help clean the city one block at a time.

  • Volunteer Uniforms That Build Pride and Keep You Safe

    Volunteer Uniforms That Build Pride and Keep You Safe

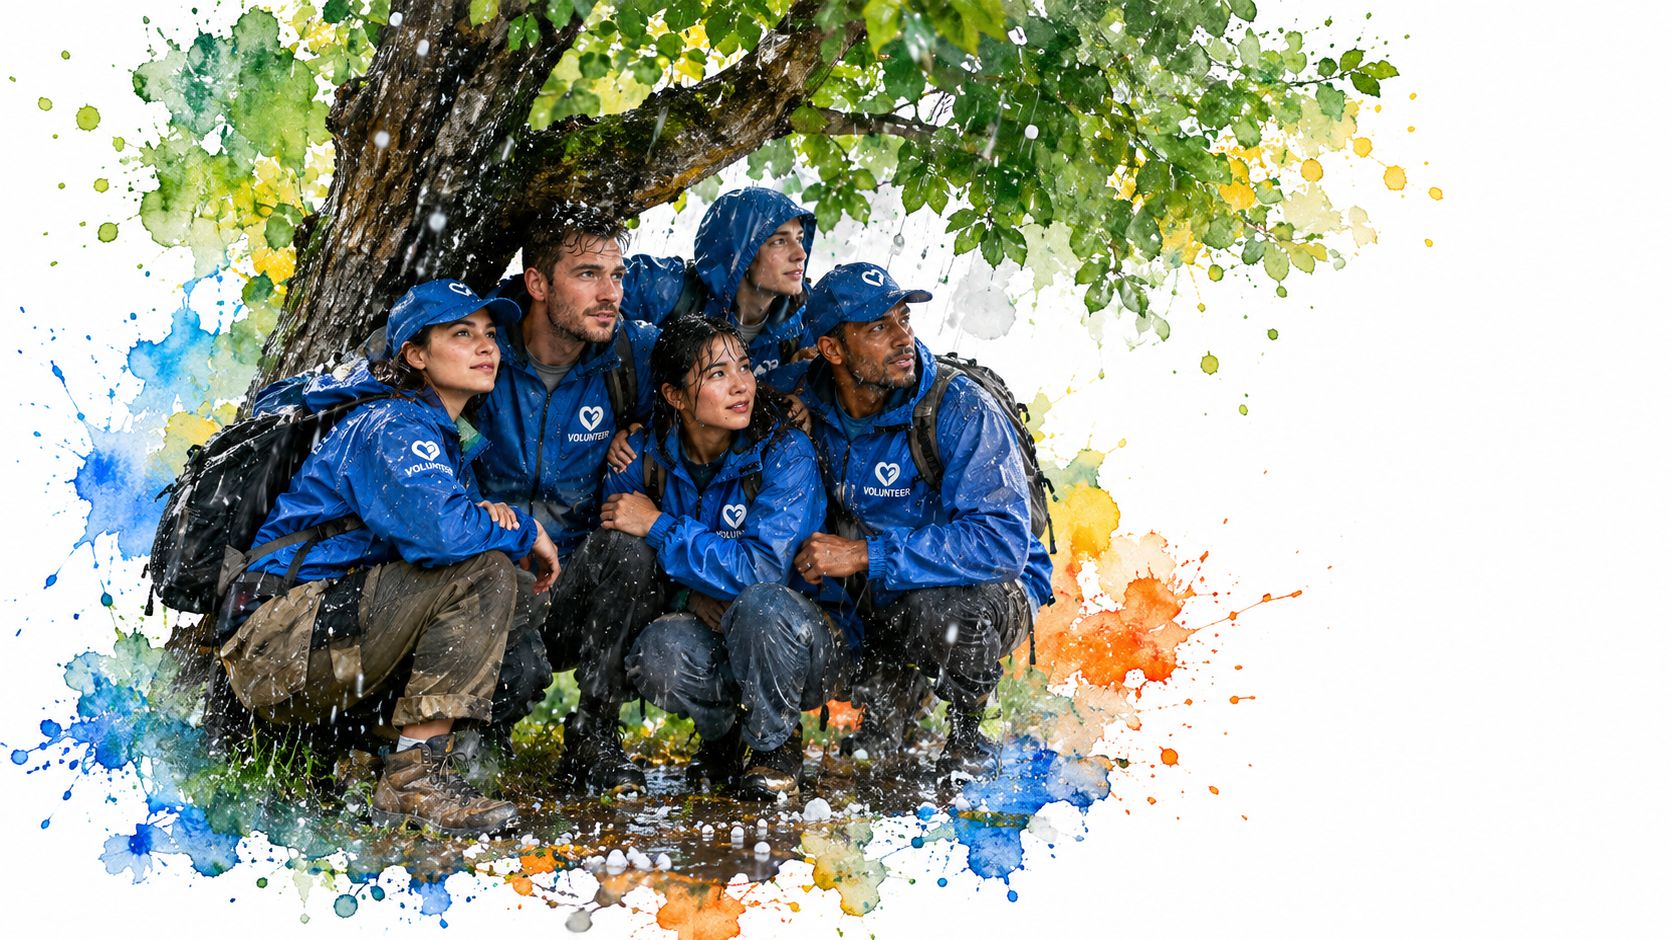
    A Chicago hailstorm caught three of us halfway through our first cleanup. We huddled under a tree, shivering while every Uber canceled, and our shared flags became the only clear sign that we belonged together.

    Why Volunteer Uniforms Matter More Than a Logo

    That day taught me something I still use when I think about volunteer uniforms. A shirt can carry a logo, but a uniform system has to do more work. It has to help the public find you, help volunteers find one another, and help a newcomer feel included before they know anyone's name.

    The first approved volunteer uniform in the U.S. National Park Service VIP program was an orange “pop-on” smock, approved in December 1970 when the program began. By 1975, the Service had introduced a distinctive cardigan vest, described in agency materials as sunny gold trimmed in loden green, with versions for men and women. Volunteers whose main duty involved visitor contact had to wear it. The National Park Service history of volunteer uniforms shows how quickly a simple garment can become a public signal.

    A diverse group of volunteers in blue jackets and caps huddling under a tree during rain.

    The three jobs your uniform must do

    A stranger on a Chicago sidewalk shouldn't have to guess whether you're part of the cleanup. A bright flag, visible badge, or shared jacket gives them an answer before you speak.

    A volunteer arriving alone needs the same answer. They should spot the check-in table, recognize the group near the corner, and know whom to ask for gloves. That small moment can turn anxiety into movement.

    The third job happens. A newcomer puts on a vest, pins on a name tag, or receives a team flag. Suddenly, they aren't watching from the edge. They have a place.

    A useful test: If your uniform idea doesn't improve recognition, safety, comfort, or belonging, leave it out.

    I think about uniforms as a bridge between identity and action. The logo matters because it tells a story, yet the garment also has to survive bending, lifting, rain, sweat, and a hurried bus ride home. A practical campaign t-shirt guide can help you think through message, artwork, and shirt choices before you commit to a design.

    Uniforms can also shape group habits. You can read more about organizational culture building when you're trying to turn occasional attendance into a shared practice. Start with the people, the work, and the hazards. Add the logo after those pieces make sense.

    Design Your Volunteer Uniform System Before You Shop

    Start with a map, not a catalog. Before you buy shirts, write down where volunteers work, what they carry, how long they stay outside, and which roles face moving vehicles, poor light, wet pavement, or heavy lifting.

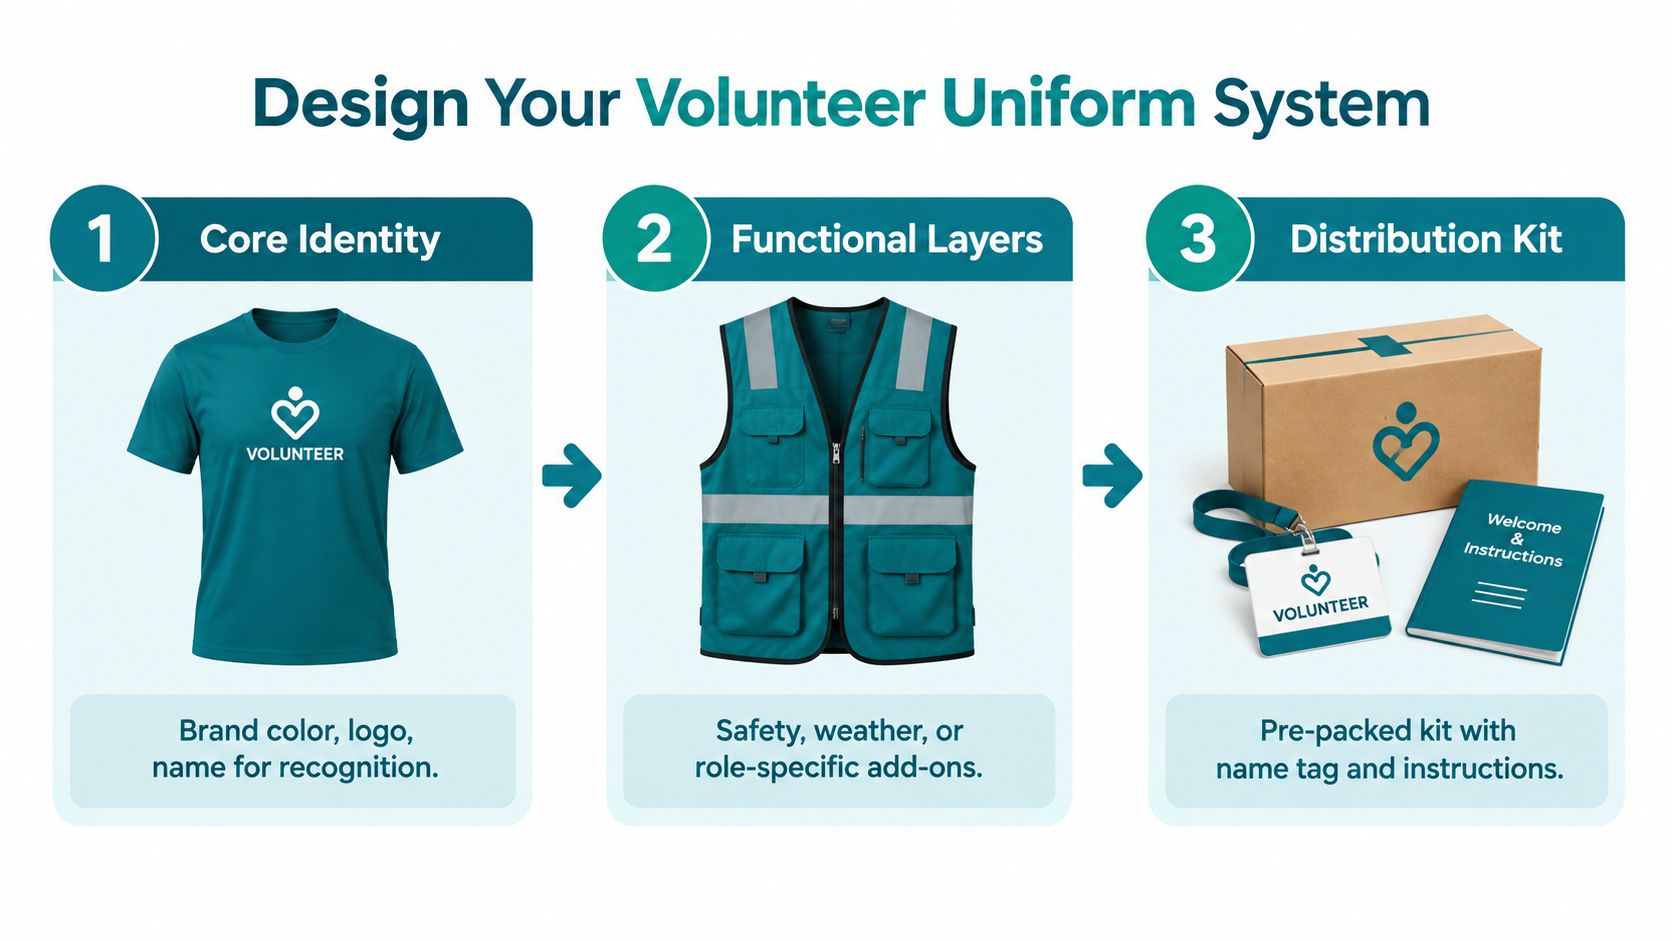
    I use two layers. The core identity layer carries the group's shared look. It might include a shirt, cap, name tag, or small flag. The functional layer comes on top when the task requires visibility, rain protection, cold-weather coverage, or a role marker.

    That separation keeps branding from carrying a safety burden it can't meet. Street clothes can work beneath a logo vest in some settings, yet roadway-facing volunteers need a complete compliant safety garment rather than a bright shirt paired with an unrelated vest.

    A three-step guide to designing volunteer uniforms featuring a t-shirt, utility vest, and a distribution kit.

    Build the brief in four passes

    Map the roles. Separate sidewalk collectors, traffic-facing spotters, team leads, photographers, supply runners, and check-in volunteers. They don't all need identical clothing.

    Map the conditions. List normal weather, low-light periods, wet locations, wind, heat, and the movements each role makes. A person who bends for hours needs different comfort from someone standing at a check-in table.

    Choose the identity layer. Pick a color that stays readable in street scenes and photographs. Place the logo where a jacket, vest, or open coat won't hide it. Use names or role labels when volunteers need quick identification.

    Choose the safety layer. Specify the exact vest or outerwear model, the label class, the available sizes, and the conditions that trigger use. If you need help thinking through fabric weight, stretch, or garment construction, find custom team uniform fabrics before you send a purchase request.

    Your finished brief can fit on one page:

    • Identity: approved shirt, cap, badge, flag, or name tag.
    • Safety: approved high-visibility outerwear and label check.
    • Weather: rain, snow, heat, and cold layers.
    • Roles: who wears each add-on and when.
    • Fit: size range, alternate garments, and spare stock.
    • Care: washing, drying, storage, repairs, and returns.
    • Conduct: visible identification, photo rules, and prohibited lookalike gear.

    Keep the brief plain enough for a new volunteer lead to use without a meeting. If someone has to interpret every line, the system will change from event to event.

    Sourcing Volunteer Uniforms on a Grassroots Budget

    A low-cost uniform doesn't have to look careless. I've seen groups spend their limited money in the wrong place, then discover they can't replace a missing size or a damaged vest. The better question is simple: what can you issue, wash, repair, and replace through a full season of cleanups?

    Sourcing Option Best For Trade Off
    Bulk tees Groups that meet often and want one shared identity layer Sizes and fabric quality need careful planning
    Thrift shirts with iron-on marks Small pilots and mixed personal styles Matching color and long-term durability can vary
    Logo vests over personal clothing Inclusive programs with limited shirt stock The vest still needs clear fit and care rules
    Donated high-visibility vests Roadside work with a very tight budget Donations may arrive in mixed classes, sizes, and condition
    One approved hi-vis model Groups that need repeatable street-work practice Upfront sorting and replacement planning take attention

    Spend first on the layer that protects people

    For roadway work, spend on the safety garment before you spend on a polished shirt. Fluorescent high-visibility clothing grew from a longer safety-apparel history. Bob Switzer developed fluorescent garments in the 1930s after an injury, UK railway workers trialed high-visibility clothing in Glasgow in 1964, and the first ANSI/ISEA 107 standard arrived in 1999, according to this history of high-visibility clothing.

    A logo shirt can wait. A compliant vest can't when volunteers work near public access roads.

    Match the purchase to the group

    A small group can test a few shirt colors and issue reusable name tags. A growing group needs a size record, a storage bin, and a rule for who receives roadway gear. A group that works in changing neighborhoods may prefer logo vests over personal clothing, since volunteers can arrive in comfortable layers while the group still looks connected.

    I'd also reserve money for spare sizes and simple replacements. One approved hi-vis model makes training easier, reduces confusion at check-in, and lets a volunteer lead spot a mismatch quickly. A small badge or flag can carry group pride when shirts fade, stretch, or disappear into laundry baskets.

    Buy what your team can maintain. A cheap garment that no one can fit, wash, or replace becomes expensive friction.

    Ask every vendor the same questions. What sizes can you order later? Does the logo survive ordinary washing? Can you replace one damaged piece? Does the safety garment carry the required label? A grassroots budget works best when you protect repeatability rather than chase a perfect first order.

    Fit Distribution and Care That Keeps Volunteers Coming Back

    The clothing table can either welcome people or push them away. I've watched a volunteer arrive on a cold morning, wait while someone searches through a box, try on a shirt that pulls across the shoulders, then leave before the first bag fills. The cleanup lost a pair of hands before it reached the sidewalk.

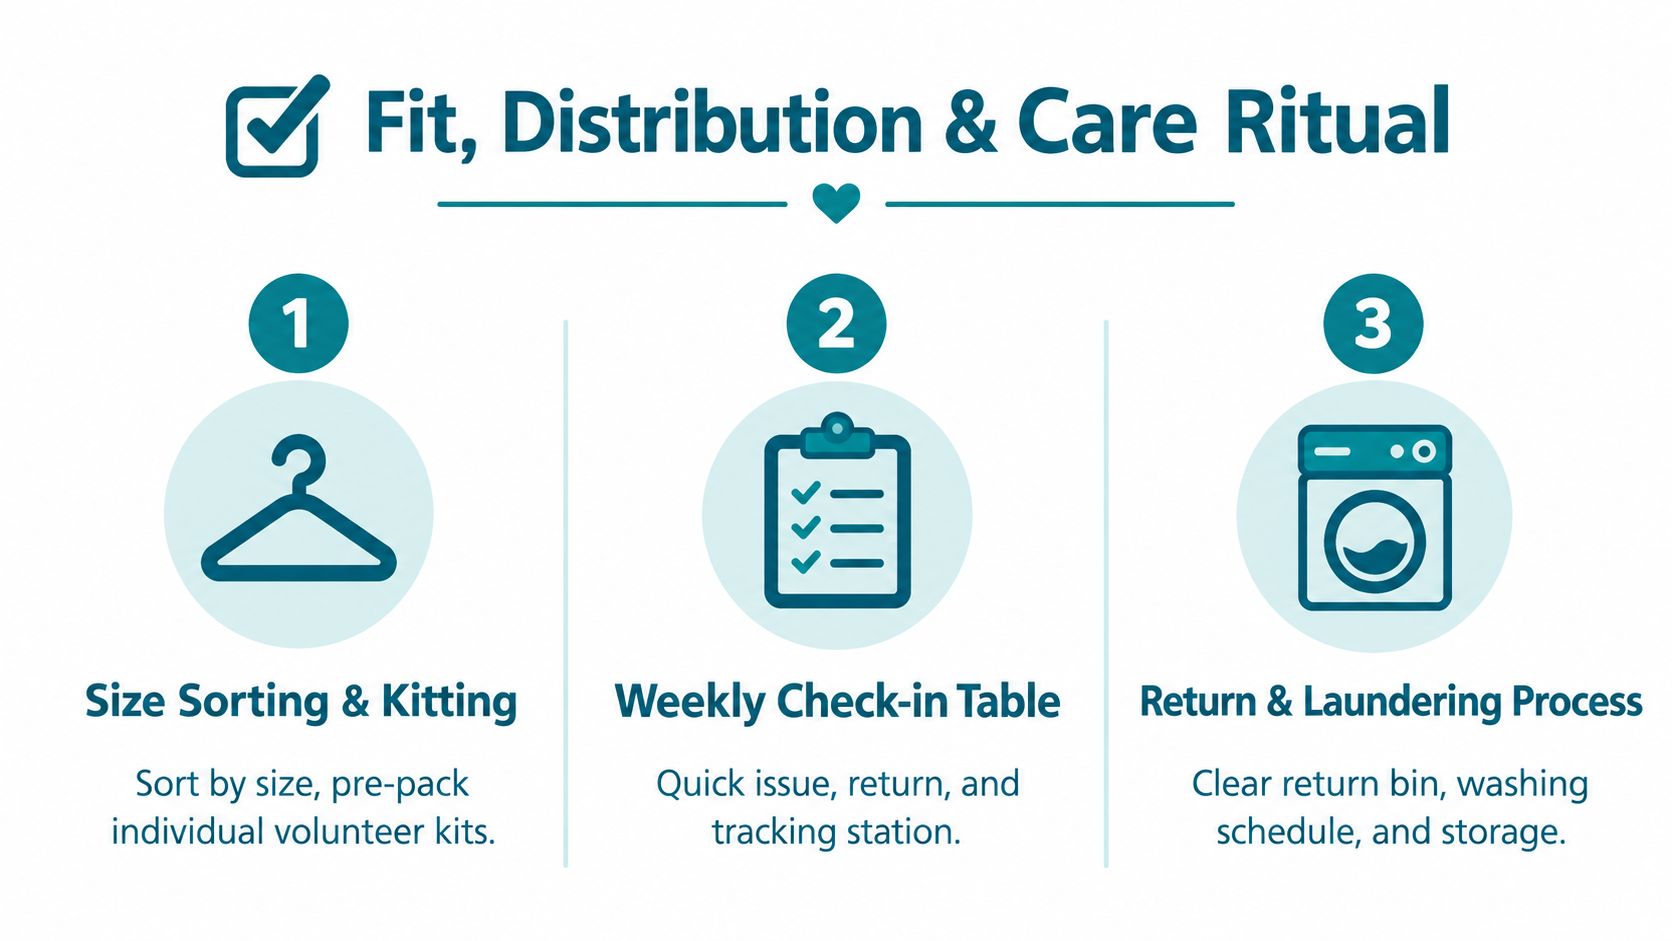
    Treat distribution like a short ritual. Sort garments before people arrive. Label bins by size. Pre-pack a kit with the garment, name tag, role note, and return instructions. Keep a small fitting area where someone can change without an audience.

    A three-step process infographic for volunteer uniforms including sizing, distribution check-ins, and the laundering return cycle.

    Make fit part of safety

    Offer more than one cut when you can. Keep enough room for bending, reaching, layering, and walking. A volunteer uniform should allow comfortable movement without weakening a professional appearance, as described in this hospital volunteer clothing guidance.

    A vest over personal clothing can help when a volunteer can't use the standard shirt because of sensory needs, religious dress, mobility needs, body shape, or weather. An alternate garment still needs a clear safety rule and visible identification. Inclusion works best when you write the option into the policy instead of treating it like a special favor.

    Run the check-in table quickly

    Use a simple record with the volunteer's name, issued size, role layer, and return status. Keep a bin for clean stock and another for used garments. Put the return location on a small card inside every kit.

    Name labels can save time when several people own similar jackets. These tips for school uniform labels give useful ideas for durable placement and readable identification, even though cleanup teams need to adapt them for outdoor workwear.

    Care rule: Every issued item returns clean, dry, complete, and ready for the next person.

    The U.S. Forest Service volunteer-uniform manual calls for uniforms to remain neat, clean, and complete, and it treats high-visibility vests as an approved exception for special circumstances. That manual's uniform guidance supports a modular approach, identity underneath and safety or weather layers above.

    Wash according to the garment label. Dry wet gear before storage. Repair loose seams early. Retire damaged reflective material instead of hoping the next volunteer won't notice.

    Here's a short visual reminder you can share with team leads:

    A smooth clothing ritual tells volunteers that their time matters. They get in, get equipped, and get moving.

    You can pair this process with practical volunteer retention strategies that reduce avoidable friction before and after each cleanup.

    Safety Visibility and Weather Rules You Can Actually Enforce

    A roadside vest is not decoration. Seattle's Adopt-A-Street guide says volunteers must wear the safety vest at all times, and Texas DOT requires volunteers to wear the agency-provided safety vests during cleanup. Seattle's Adopt-A-Street safety guidance gives the plainest version of the rule: if you work beside traffic, keep the vest on.

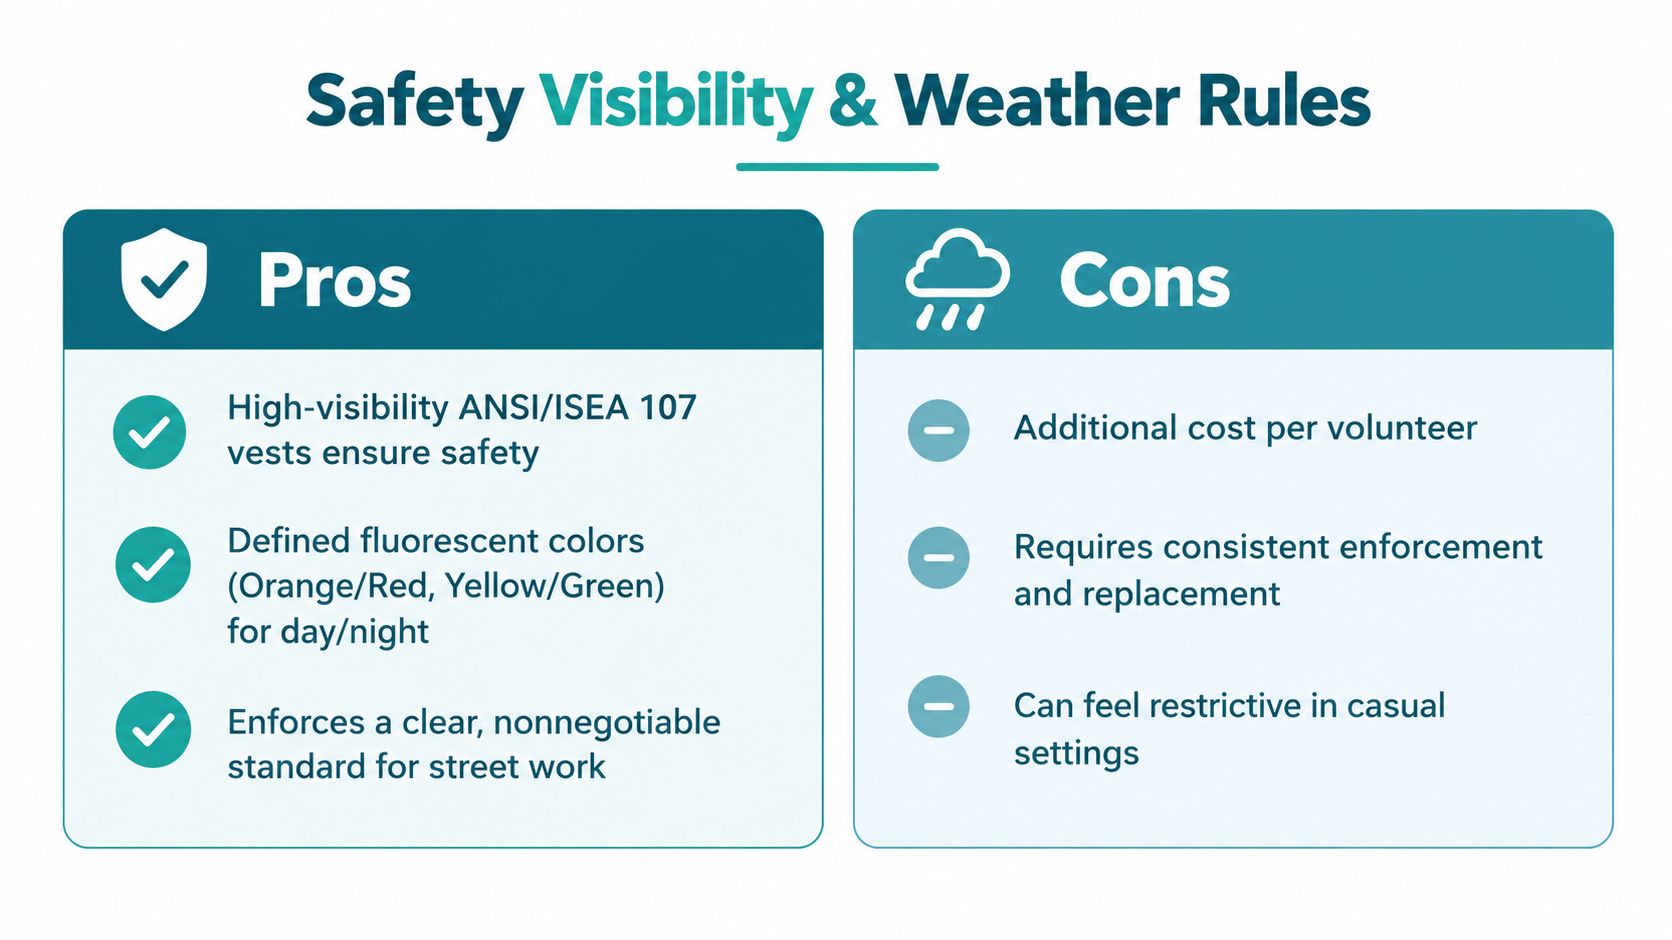
    A comparison chart outlining the pros and cons of implementing safety visibility gear and volunteer uniform rules.

    Treat the vest as tested equipment

    ANSI/ISEA 107 high-visibility safety apparel requirements cover fluorescent background colors and retroreflective materials. Roadway-facing volunteer work generally belongs in the worker PPE category, not the branding category.

    A bright vest alone doesn't prove compliance. Class 2 apparel has one cited benchmark of at least 775 square inches of fluorescent background material and 201 square inches of retroreflective material, with requirements around tested construction, minimum material areas, and 360-degree conspicuity. This ANSI/ISEA 107 explanation describes the benchmark and why a random bright garment can fall short.

    Assign hi-vis outerwear to the volunteers who face the road. Before each event, check the garment label and condition. Keep ordinary street clothes outside the compliance layer, since a mixed outfit can interrupt the intended visibility pattern.

    Give every weather condition a simple response

    Rain changes the system. Add waterproof outerwear over the identity layer, keep reflective areas visible, and replace soaked gear after the event. A hood shouldn't block side vision.

    Snow and cold require room for layers, dry socks, gloves, and footwear that lets volunteers walk and bend safely. Don't force a thin branded shirt to carry the whole weather burden.

    Heat calls for breathable base clothing, sun protection, water, and breaks. Long pants and sleeves may still fit the task, yet the fabric and fit must allow movement and airflow. Public volunteer guidance commonly names layered clothing, waterproof clothing, sunscreen, and season-specific protection. Hamilton's safety material also points volunteers toward bright or reflective clothing, closed-toe shoes, and garments that don't restrict vision or movement. The NCTCOG cleanup guide adds boots, hats or caps, long pants, and long-sleeved shirts for outdoor work.

    Kickoff rule: Roadside volunteers wear the approved vest. Everyone wears closed-toe shoes and clothing suited to the weather. Anyone who can't stay comfortable, visible, and mobile pauses or changes roles.

    Use this volunteer safety checklist to turn the rule into a pre-event habit. A policy works when a lead can explain it in one breath and enforce it without guessing.

    Make It Stick With Policy Templates and Pride

    A good uniform policy should fit on a page. It should tell people what to wear, when to add safety gear, how to request an alternative, and where to return issued items. It shouldn't make volunteers decode a legal document before they pick up a grabber.

    Copy-ready policy language

    Volunteer uniform policy: Wear the approved identity layer during group activities. Add the approved high-visibility garment when you work on or near a public access roadway, in low light, or in another condition named by the event lead. Keep identification visible. Wear closed-toe shoes and clothing that allows safe movement and fits the weather. Don't use garments that resemble police, military, or public security uniforms. Ask the lead for an approved alternative if the standard garment conflicts with faith, health, mobility, body-fit, or sensory needs.

    The Red Cross and Red Crescent volunteer security manual says volunteers should carry photo identification or wear a badge or recognized uniform, keep uniforms and emblems clearly visible, avoid police or military lookalikes, and avoid metal badges that could cause accidents. Its volunteer security guidance gives you a practical foundation for identification and appearance rules.

    Let pride have a place

    Policy handles the edges. Pride keeps the center alive.

    A small flag can lead a group down the block. A cloth badge can turn a borrowed vest into something people want to wear. A theme song can make a wet morning feel like the opening scene of a shared story. Those details don't replace safety gear. They give the safe gear a human face.

    I learned that under the tree during the hailstorm. Three strangers looked miserable, yet the flags, the jokes, and the shared colors gave us a reason to stay together. Years later, the same principle still works at a cleanup near an empty lot, a bus stop, or a corner where everyone else walks past.

    Write a one-paragraph volunteer agreement beside the policy:

    I'll wear the assigned gear for my role, keep identification visible, follow weather and roadway directions, tell a lead when my clothing or equipment doesn't fit safely, and return shared items clean, dry, and complete.

    Read it at check-in. Ask for consent before taking photos. Give people a way to decline or request a different image. Keep exceptions private, practical, and easy to approve.

    Your uniform system should feel like a hand on the shoulder, not a locked gate. Start with one identity layer, one approved safety model, a few weather options, and a distribution ritual you can repeat next weekend.


    Visit Litter Caterpillars to see how a Chicago volunteer cleanup group combines safety, friendship, flags, badges, and shared purpose in real field conditions. Join the next cleanup, test your uniform system with us, and help turn one cold or rainy morning into a team memory.

  • Best Trash Pickup Schedule for Volunteer Groups

    Best Trash Pickup Schedule for Volunteer Groups

    At 9:14 on a Saturday morning, my gloves were soaked, the hail was bouncing off the cemetery pavement, and five of us were still trying to keep our trash bags from filling with water. That cleanup taught me the best trash pickup schedule isn't the one that looks neat on a calendar. It's the one people can trust.

    The First Pickup That Started Everything

    Our first cleanup began under a cemetery awning on Chicago's North Side. Hail hammered the sidewalk. The bags sagged like water weights, and every glove felt useless within minutes. Five volunteers huddled together, watching the sky and wondering whether the person who planned the event had lost his mind.

    That person was me.

    I had wanted a clean start, a simple act of service, and a reason to bring people together. Instead, I got a Chicago spring storm that turned a short litter walk into a cold endurance test. We still picked up what we could. We laughed at the absurdity, took shelter when the weather demanded it, and went home with a lesson I couldn't ignore.

    A schedule isn't bureaucracy. It's a promise between the organizer and the volunteer. It tells people when to wake up, what to wear, where to park, how long they'll work, and who will make the call if the weather turns rough. Without that promise, a cleanup depends on enthusiasm alone. Enthusiasm fades quickly when people don't know whether anyone else will show.

    Practical rule: A schedule should make showing up feel simple before the work begins.

    Municipal systems often use weekly collection as the baseline for basic household waste service. The UN SDG metadata defines basic collection as service at least once a week for one year, which helps explain why weekly pickup remains a familiar reference point in many communities (UN SDG metadata on household waste collection). Volunteer groups can borrow that rhythm without copying a city route. A recurring morning gives the group a dependable beat.

    Since that first storm, I've learned that the calendar matters less than the habit built around it. The rest of this guide draws from that hailstorm, winter cleanups, hot Chicago mornings, and every Saturday when a small crew became a reliable one.

    Choosing the Right Day Time and Frequency

    Start with your volunteers, not your preferred time. Send one simple poll: “What recurring cleanup slot can you attend most often?” Give people a short list of realistic choices, then choose the slot that receives dependable support rather than the slot that sounds ideal.

    Use a four-part decision

    1. Pick a fixed window. Try 8 a.m. Saturday for families and early risers, 6 p.m. Thursday for after-work crews, or the second Sunday of each month for a monthly stewardship group. Keep the day and start time stable long enough for people to build it into their lives.

    2. Match frequency to litter pressure. Busy corridors usually need a weekly visit. A park may work better on a biweekly rhythm, while a quieter greenway may only need a monthly cleanup. Waste collection systems already use different cadences for different streams. A 2020 door-to-door study found that households set out paper and cardboard at weekly, two-week, and monthly intervals, while glass followed a less frequent pattern for many participants (material-specific collection behavior in a door-to-door system). Your group can use the same logic. Let the site tell you how often to return.

    3. Set a route limit. Use the 60/90 rule. Plan for a route that takes about an hour, and never let the full event run longer than 90 minutes from arrival to group photo. Volunteers who finish with energy are more likely to come back. Volunteers who finish exhausted often remember the strain more clearly than the result.

    4. Review after several visits. Track attendance, bag count, weather, problem spots, and actual finish time. A mediocre slot that runs consistently for six months beats a perfect slot that your team abandons after three attempts.

    Route length also affects safety. A compact route keeps the group visible, makes supply support easier, and limits the distance people carry full bags. For larger service areas, use a planning sequence that moves from policy review to broad route design, route balancing, crew paths, and later adjustment. The waste collection planning guidance recommends compact, non-overlapping routes, balanced collection and hauling time, and avoiding heavily traveled streets during rush periods.

    I treat the schedule as a social contract. The route can change after you learn more, but the promise to meet should change only for a clear reason.

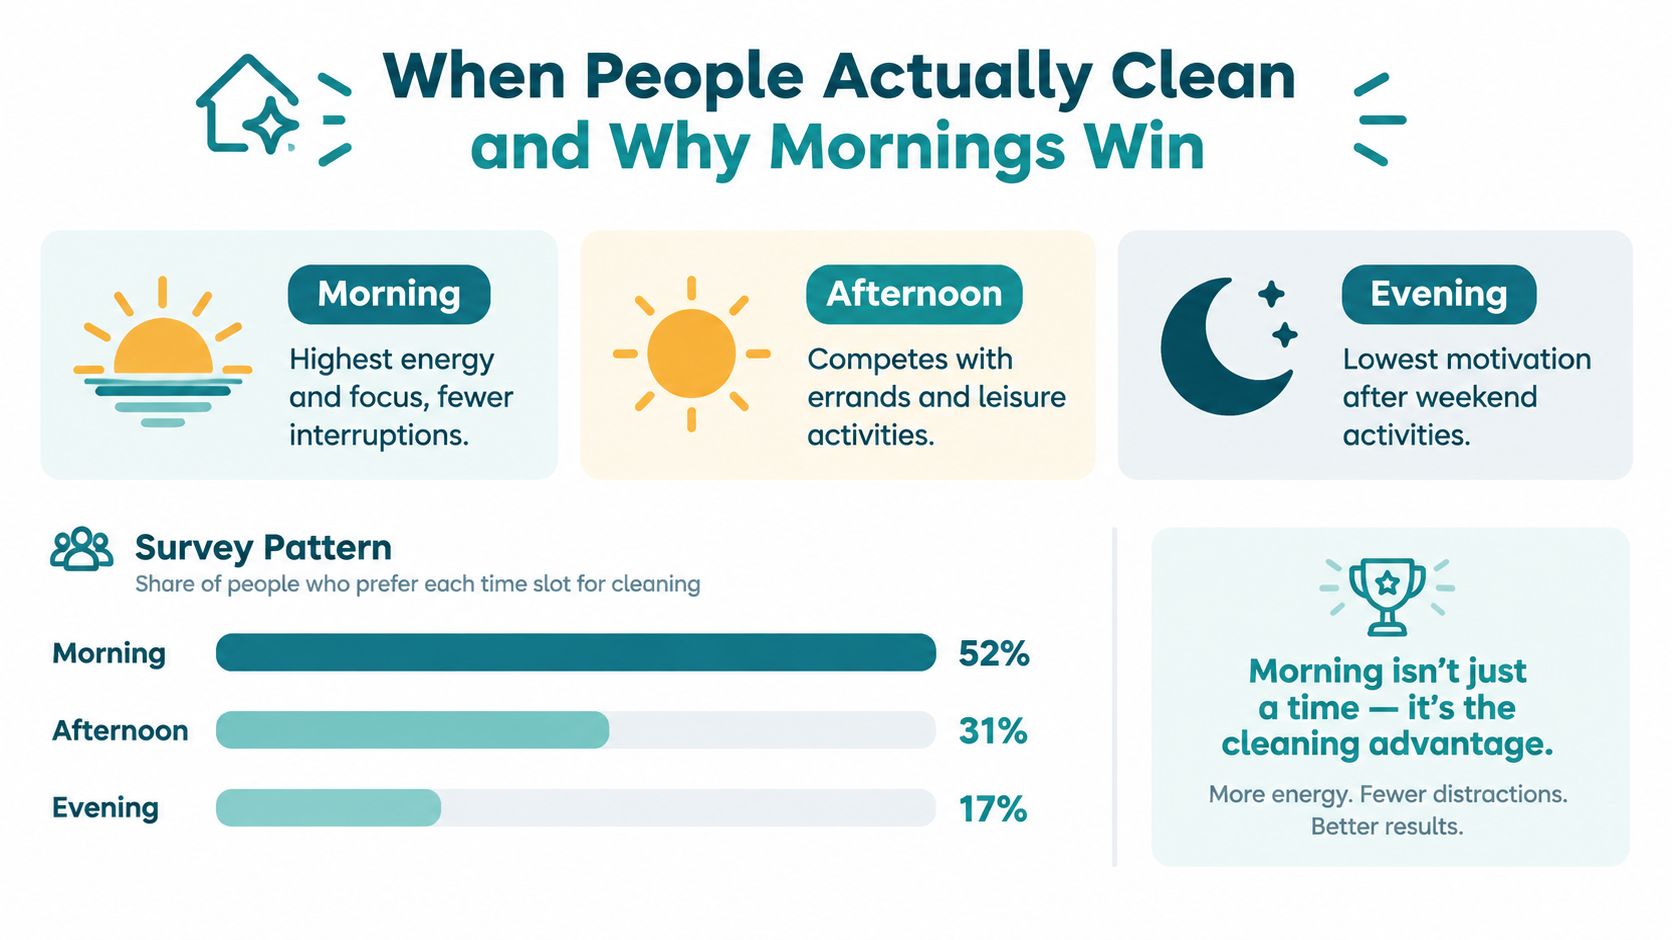
    Why Weekend Mornings Win Every Time

    The first cold Saturday morning usually reveals whether a cleanup can become a habit. People arrive with coffee, daylight, and enough time to settle into the route. Weekend mornings give volunteer groups a reliable starting point: cooler air makes walking and lifting easier, daylight exposes hazards, and coffee or brunch offers a social finish that a work shift rarely provides.

    Weekday evenings can serve a committed crew, especially near offices or transit. They bring more friction, though. Commuting delays, darkness, dinner plans, and end-of-day fatigue can turn a willing volunteer into a no-show. Evening events work best as a supplement, not the only chance to participate.

    Pop-up pickups help when a storm, festival, illegal dumping incident, or construction project changes a block quickly. Their flexibility comes at a cost. People cannot build a standing habit around an uncertain date. Recent operations research examines collection models that use bin-fill information, traffic, weather, and route re-optimization instead of relying on a rigid calendar (dynamic waste collection and route re-optimization research). Volunteer groups can borrow that flexibility for urgent work while keeping a dependable weekly rhythm for the people who return.

    Metric Weekend Morning Weekday Evening On-Demand / Pop-Up
    Attendance pattern Usually steadier for recurring groups More sensitive to work and travel Unpredictable unless the issue feels urgent
    Energy Fresh start, cooler conditions, daylight Mixed energy after the workday Depends on notice and event urgency
    Social habit Easy to connect cleanup with coffee or brunch Social time competes with dinner and commuting Requires fast coordination
    Best use Weekly community routine Supplementary crew or special route Overflow, urgent litter, or event response
    Main trade-off Competes with family, sports, and religious plans Darkness and fatigue Weak routine and difficult planning

    Before setting a recurring date, check youth sports schedules, religious calendars, neighborhood festivals, and major city events. A short local survey can prevent months of weak attendance. Organizers planning public-facing weekend outreach can also use these weekend canvassing best practices to manage arrival points and volunteer flow.

    The exact Chicago day may change, but consistency matters more than perfection. A weekend cleaning schedule gives people a repeatable way to make service part of their identity. Weekend mornings work for many groups because one time slot supports attendance, safety, conversation, and the return habit together.

    Seasonal Adjustments and Weather Contingencies

    Chicago weather demands a plan with branches. I don't treat a forecast as an automatic cancellation. I treat it as a design variable that changes the route, start time, supplies, and decision deadline.

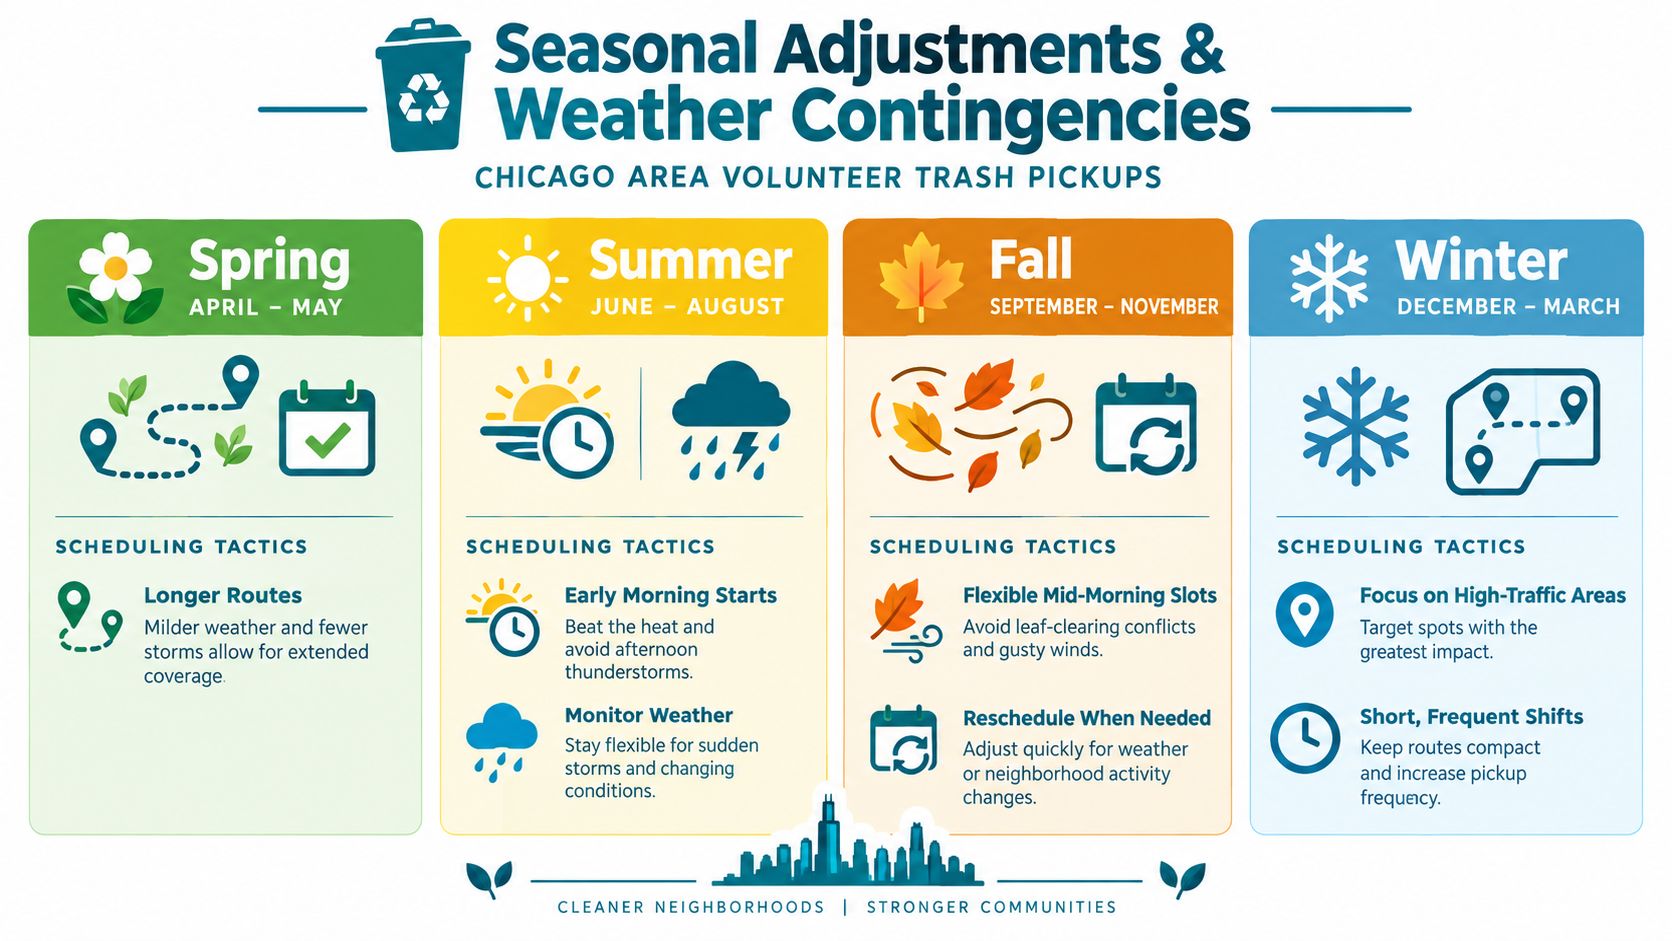
    An infographic detailing seasonal adjustments for volunteer trash collection in Chicago, including weather-specific scheduling strategies.

    Build the year around conditions

    Spring, April through May: Give the group its longest routes when temperatures feel manageable and daylight arrives early. Alley garbage often needs attention after winter, so start with routes that have visible accumulation. Keep a storm alternative ready because spring can turn quickly.

    Summer, June through August: Start at 7 a.m. to avoid the hottest part of the day. Cap the shift at 90 minutes, schedule hydration breaks every 30 minutes, provide sun protection, and use buddy checks every 20 minutes. If heat or thunderstorms threaten the route, shorten the coverage rather than asking people to push through.

    Fall, September through October: Return to the standard 8 to 10 a.m. window. Use the season to welcome people returning from summer travel, but watch for gusty conditions, wet leaves, and neighborhood conflicts around fall cleanup work.

    Winter, November through March: Compress the route to busy, visible areas. Shorten the shift to 60 minutes, prepare cold-injury training, and place hand warmers with the supplies. A small crew on a short route can do better work than a large group standing around in dangerous cold.

    Use three weather colors

    • Green, proceed: Keep the route and normal start time.
    • Yellow, proceed with adjustments: Shorten the route, add water or warm gear, change the start time, or move the meeting point.
    • Red, postpone: Cancel outdoor work or move indoors to sort recyclables and prepare supplies.

    The A Rocha cleanup manual recommends morning starts, daylight operations, and avoiding the coldest and hottest hours. It also advises fixed meeting points, closing times, multiple volunteer groups, and designated safety officers (community litter cleanup safety guidance).

    Check the forecast at 72, 48, and 12 hours before pickup. Send every update through one channel, whether that's a text tree, GroupMe, or WhatsApp. Name one cancellation authority. Volunteers shouldn't debate safety in five separate chats while standing outside in hail.

    Ready to Use Schedule Templates

    A reliable template protects volunteer energy before the first bag is filled. Keep the recurring pieces fixed, then put changing details in one shared Google Sheet. Static fields should cover safety rules, supply standards, waiver language, role descriptions, and the weather decision process. The sheet can track dates, captains, routes, attendance, conditions, and follow-up notes.

    Template A for a neighborhood cleanup

    Copy this structure into your event document:

    • Schedule: Second Saturday of every month, 9:00 to 10:30 a.m.
    • Meeting point: Park pavilion.
    • Route plan: Rotate three two-block routes.
    • Leadership: Two co-leaders, one route captain per assigned route.
    • Supplies: Gloves, bags, grabbers, first-aid kit, water, sanitizer, and a weighing method.
    • Registration: RSVP link plus emergency contact and waiver fields.
    • Closing ritual: Group photo, bag count, and post-pickup coffee.
    • Google Sheet fields: Month, route, captain, theme, attendance, conditions, supply gaps, and next action.

    The fixed structure makes the cleanup familiar, while the monthly route and theme give returning volunteers something new to own. Keep the signup fields, safety language, and role definitions fixed. Organizers building a shared sheet can also use these free volunteer scheduling tools.

    Use a 12-month map so each pickup has a clear reason to return:

    Month Route Captain Theme
    January Park edge Assigned captain Winter walkway check
    February Residential blocks Assigned captain Snowmelt litter sweep
    March Alley route Assigned captain Alley Sweep
    April Creek edge Assigned captain Creek Cleanup and Earth Day tie-in
    May Tree-lined blocks Assigned captain Arbor Day route
    June Park perimeter Assigned captain Summer Park Patrol
    July Commercial corridor Assigned captain Busy-block cleanup
    August Greenway Assigned captain Greenway Care
    September School approach Assigned captain Back-to-routine sweep
    October Alleys Assigned captain Fall Alley Sweep
    November River access route Assigned captain River Stewardship
    December Short central route Assigned captain Winter Welcome

    Change the captain and route in the sheet, but leave the operating language alone. For larger operations, organizers can adapt ideas from workflow scheduling for operations managers to clarify route ownership, dependencies, and handoffs. That distinction matters in Chicago: a familiar process helps people arrive ready, while clear ownership prevents a rainy morning or a missing supply from derailing the group.

    Template B for a special event pickup

    Use the week before the event for permits, gear staging, and the volunteer roster. Set a cap of 40 volunteers so station leads can keep sight of the group. A larger crowd may collect more quickly, but it also creates more check-in, communication, and safety work. On event day, use this sequence:

    Time Action
    7:00 a.m. Setup, supplies, signs, and check-in
    8:00 a.m. Safety briefing and zone assignments
    8:30 a.m. Stations open
    11:30 a.m. Final sweep and bag consolidation
    Noon Wrap and group photo
    1:00 p.m. Debrief with station leads

    The Chicago River Day model offers a useful structure. Place stations at regular intervals, use color-coded zones, and complete release-of-liability paperwork before crews leave the meeting point. Keep the signup sheet consistent across both templates: name, email, t-shirt size, emergency contact, waiver status, and role. Roles should include greeter, photographer, route lead, and supply manager.

    Element Neighborhood Weekly Special Event
    Planning window Recurring monthly setup Pre-event permits and staging
    Volunteer size Flexible small crew Capped roster
    Route design Three rotating routes Color-coded zones and stations
    Leadership Two co-leaders Station leads and event coordinator
    Follow-up Coffee and next date Debrief and issue log

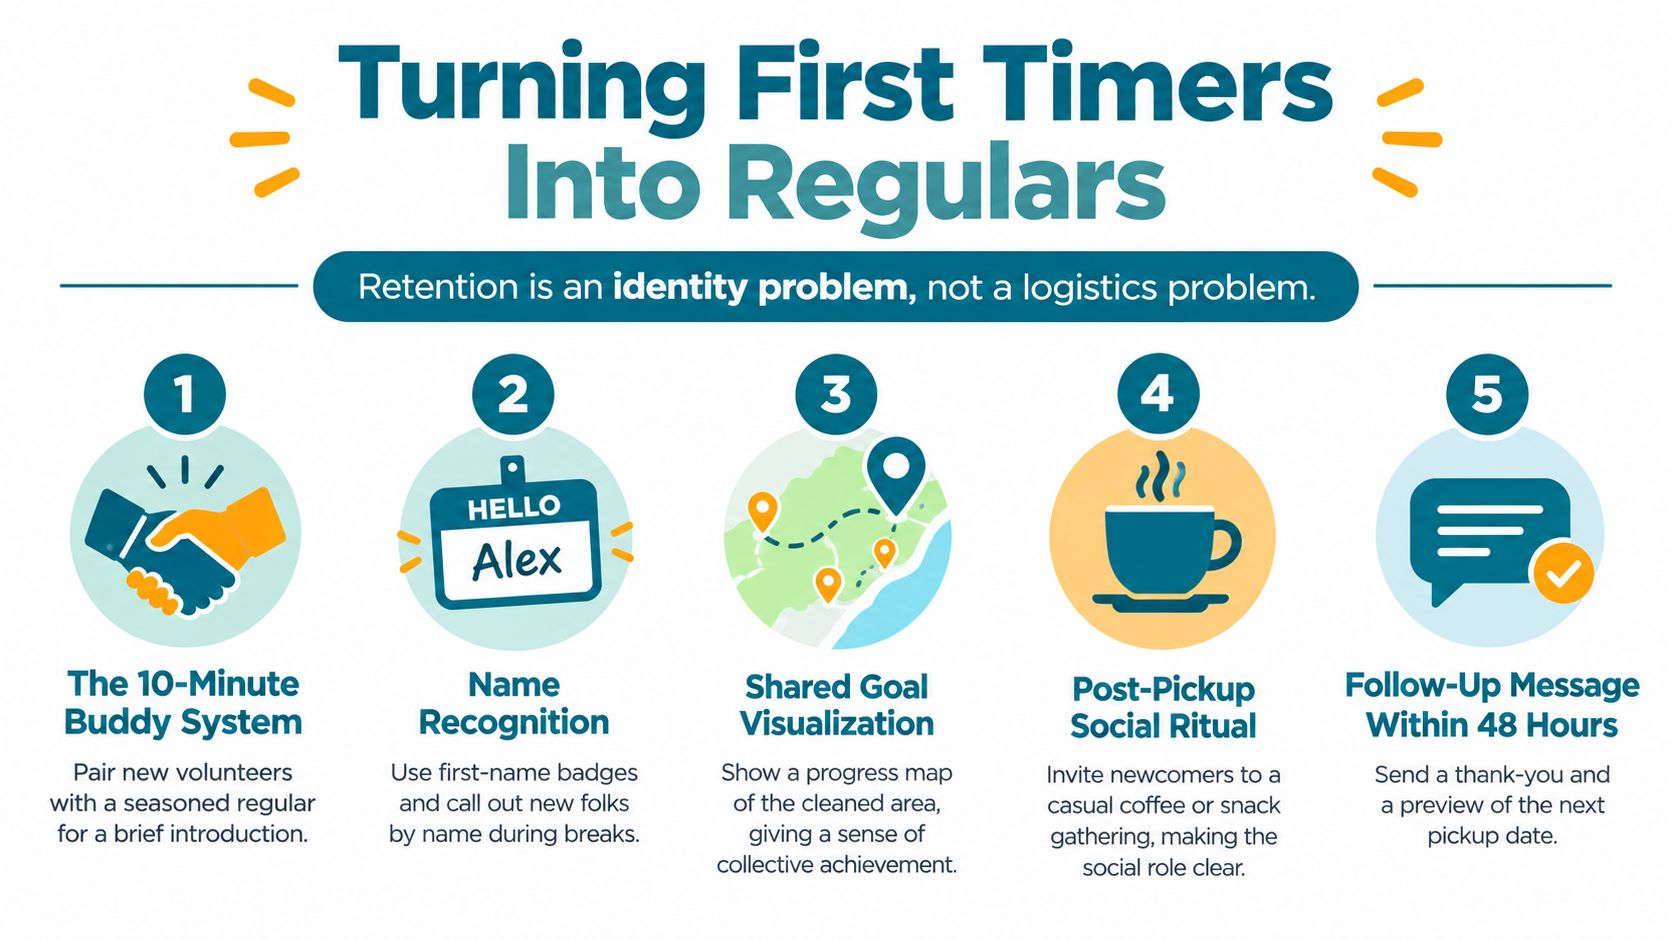
    Turning First Timers Into Regulars

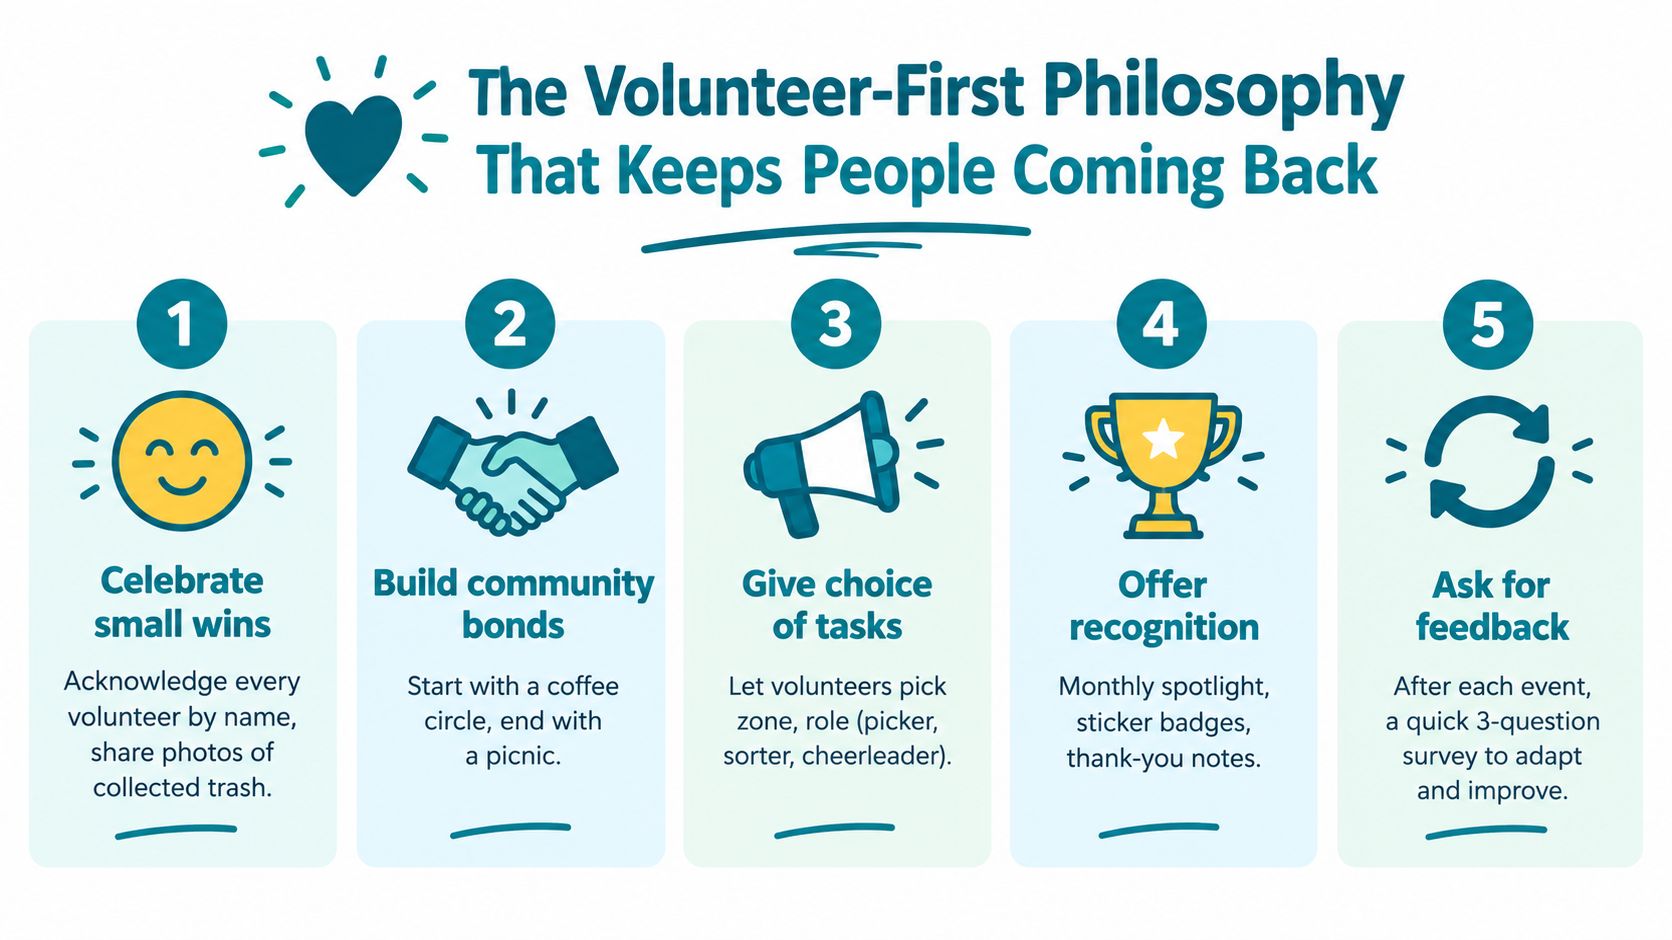
    A route map gets people to the meeting point. Belonging gets them back. After a first pickup, people return when the group remembers their name, trusts them with a role, and gives them a clear reason to expect the next meeting. That social habit matters as much as the schedule.

    Five habits that build return visits

    1. Start with a 10-minute welcome circle. Introduce everyone by first name, ask why they came, and pair newcomers with a buddy. Keep it brief so the work begins on time and nobody feels stuck before the cleanup.

    2. Make the result visible. Weigh the bags at the end of the shift and post the totals in a shared channel. A concrete record helps volunteers connect one hour of work with a visible result. Use the same simple process each week.

    3. Name the role, not the task. Assign titles such as Route Lead, Sort Captain, or Safety Officer. A title signals trust and clarifies how that person contributes. “Volunteer” explains why someone arrived. A role explains what they own.

    4. Build a closing ritual. Coffee, donuts, and a five-minute story from a returning member create a natural ending. People remember conversations, jokes, familiar faces, and the cleaned block together. That social connection makes the next invitation feel like a standing part of the neighborhood, rather than another obligation.

    5. Send the next invitation within 48 hours. Include a personal thank-you, a photo, and the next month's date. Make the return path obvious so the person does not have to search for the group again.

    These habits match the identity-first approach in volunteer retention strategies. The organizer's job is to remove the awkward gap between “I came once” and “this is my group.” In Chicago weather, that connection also helps people stay committed when a cold morning or a changed plan tests turnout.

    Neighborhood crews show the pattern in different ways. A Logan Square group I followed grew from a small starting crew into a much larger base of regulars. A Rogers Park shoreline team saw fewer dropouts after assigning clear roles, while a Pilsen cleanup brought more first-timers back after adding the 48-hour invitation. These are local operating stories from the groups used for this article, not published benchmarks. Use them to shape your own experiments, not to promise a fixed result.

    An infographic titled Turning First Timers Into Regulars outlining five steps to improve volunteer retention and engagement.

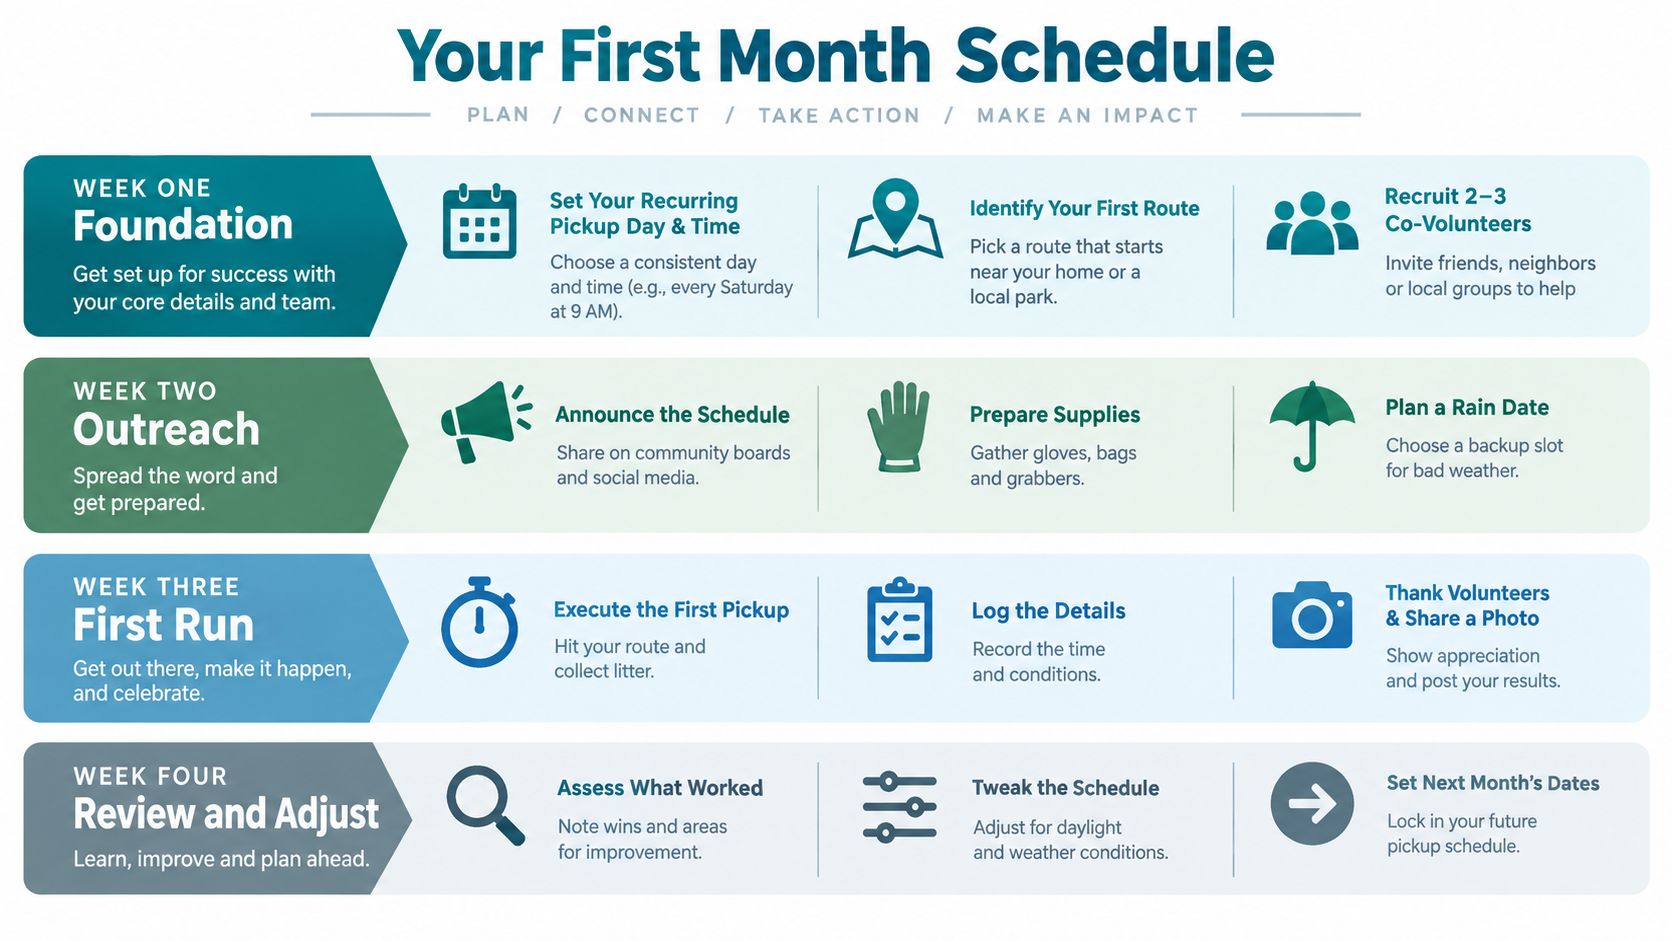
    Your First Month Checklist

    A first month succeeds when volunteers know what will happen before they arrive, and when the organizer learns enough to make the next pickup easier. Track the meeting point, route length, timing, weather decision, and arrival instructions. These details turn a one-off event into a weekly habit.

    Week one, set the foundation

    • Announce the recurring Saturday slot.
    • Choose a first route near a home, park, or familiar landmark.
    • Assign a cleanup captain.
    • Recruit 2 to 3 co-volunteers.
    • Confirm gloves, bags, grabbers, water, first aid, and communication access.
    • Create a signup sheet with roles, emergency contacts, and waiver status.

    Keep the public message short. State the meeting point, arrival time, route length, expected finish, clothing advice, and weather policy. A clear commitment helps people decide quickly, especially when the cleanup competes with errands, family plans, or a cold Chicago morning.

    Week two, run the first pickup

    Arrive before the group. Test sign-in, inspect the route, and explain safety boundaries before anyone starts collecting. Record the actual start and finish times, weather, bag volume, confusing intersections, and locations that need city collection rather than volunteer handling.

    Run through the cancellation protocol, even under a calm forecast. Volunteers should know who sends the message, which channel carries it, and what happens after postponement. For a practical inspection routine, adapt use this checklist for daily walk-throughs to sidewalks, alleys, parks, and supply areas.

    Week three, adjust with evidence

    Review attendance and comments while the details are fresh. If people arrive late, clarify the arrival time or move the meeting point. If the route ends early, add a nearby block. If it runs long, remove the least visible segment. Change one variable at a time so the crew can tell what improved the experience.

    Send a thank-you message with a group photo and the next date. Ask one direct question: “What would make the next pickup easier to attend?”

    Week four, lock the backup plan

    Choose seasonal backup dates. Assign a co-organizer by day 30, so the schedule does not depend on one person's memory, phone, or energy. Store the route map, contact list, supply inventory, and weather decision in one shared location.

    Live litter reports, QR-code sign-ins, weather, traffic, and route changes may eventually help crews direct time toward areas that need attention. Those tools support judgment, but a dependable invitation still creates the habit. Volunteers return because the meeting rhythm is clear and the crew feels like theirs.

    Block the next four Saturdays now, then assign a cleanup captain to each one.

    A four-week infographic guide detailing a step-by-step schedule for organizing community trash pickup events and volunteer efforts.

  • Litter Cleanup Volunteer Guide How to Join and Help

    Litter Cleanup Volunteer Guide How to Join and Help

    The hail started before we finished our first bag. Three of us huddled beneath a tree, shivering while our rides kept canceling, and somehow we were laughing. That was my first litter cleanup, and I learned that cleaning other people's mess can feel easier than facing your own.

    Why I Started Picking Up Trash and Why You Might Too

    For years, I could not keep my own things organized. Every object seemed to demand a memory. An old jar brought back a trip, while a forgotten snack recalled an attempt to eat better. Even a small mess became a decision I kept postponing.

    Street litter asked less of me. A bottle had no personal history, and a wrapper did not make me remember where I bought it. I could reach down with a grabber, drop the item into a bag, and keep walking.

    The first storm changed what volunteering meant to me. The weather was miserable, yet it gave the morning a shared story. We were three people trying to finish an odd little adventure, and the cold made our jokes better.

    A young female volunteer happily picks up litter in a scenic park using a grabber tool.

    Why showing up matters

    I returned because the work offered a clear promise. I could arrive, carry a bag, and leave one small place cleaner. I did not have to feel organized first. I needed gloves, some courage, and people willing to stand beside me.

    The Litter Caterpillars follow that same rhythm. The group cleans across Chicago's wards, including areas other groups may avoid, and meets on weekend mornings. Volunteers bring flags, theme songs, and badges, turning an ordinary sidewalk into a place with its own shared identity.

    Rain or shine, that routine changes people. You learn to keep showing up, and familiar faces become friends because you have sweated, shivered, and worked beside them.

    My rule: Choose one cleanup before you decide whether volunteering fits you.

    Litter cleanup also has a broad community history. Keep America Beautiful describes volunteer work spanning community events and public spaces across the United States. Its overview of litter cleanup volunteerism shows how a simple bag-and-grabber routine can connect people at a much larger scale. Keep America Beautiful describes the scale of litter cleanup volunteerism.

    You do not need to fix the whole city. Choose one morning, meet people outdoors, and let the bag fill gradually. Consistency becomes easier when friends are waiting for you, and a small act can leave you braver than when you arrived.

    How to Find and Join a Litter Cleanup Group Near You

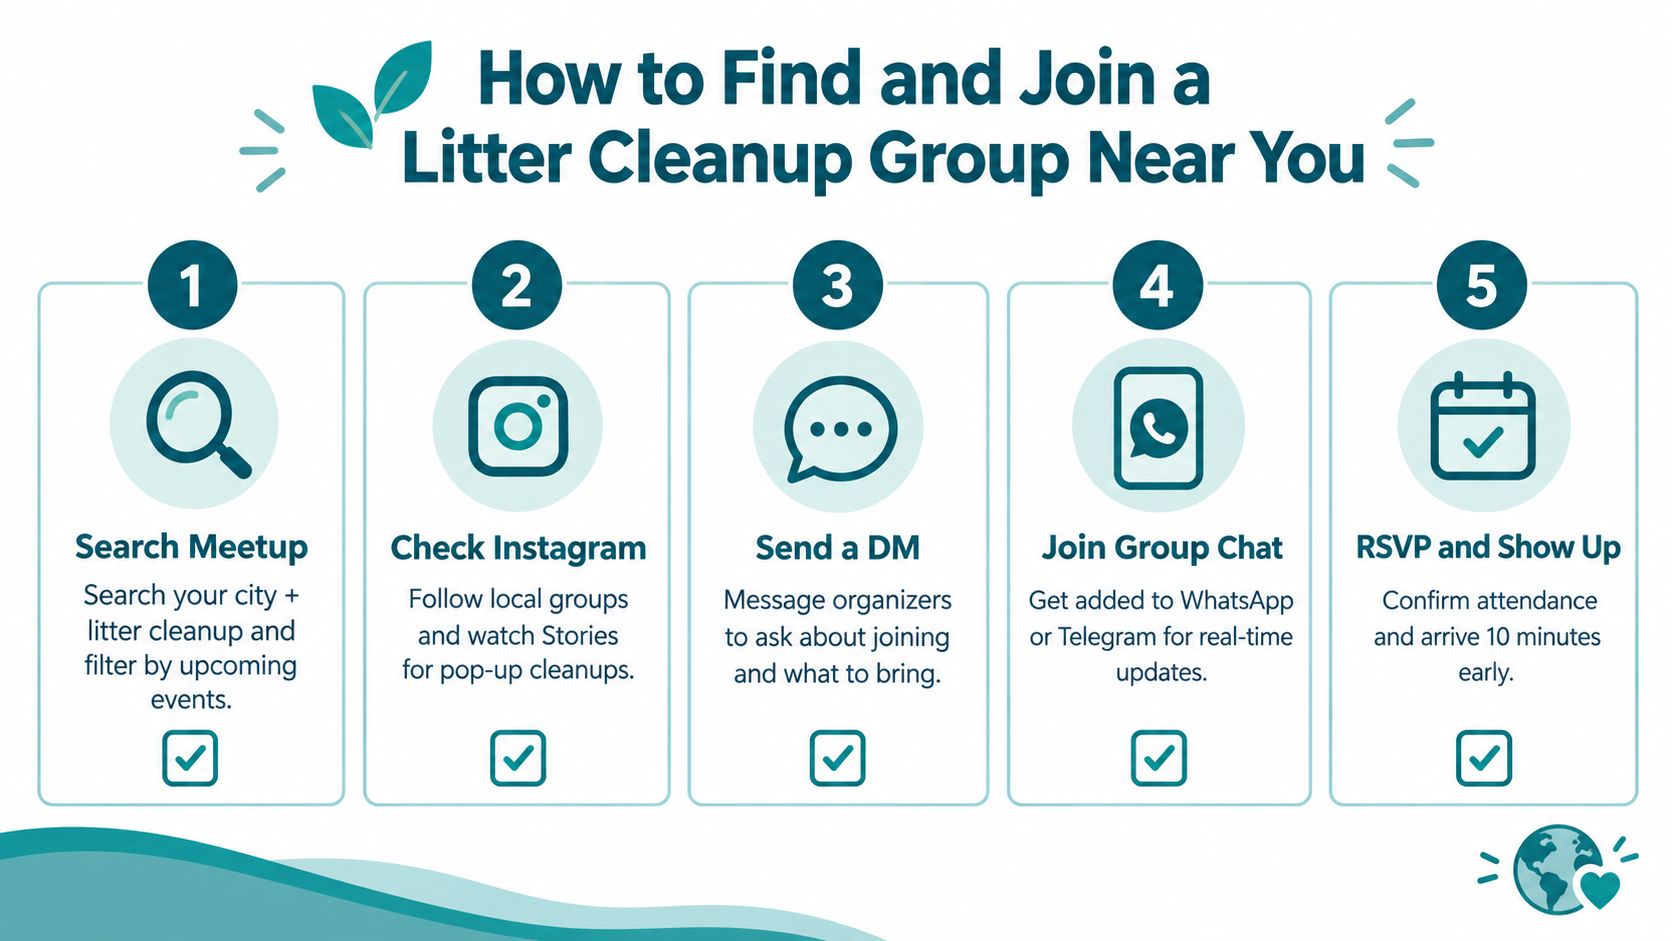
    I usually begin with Meetup, because event listings give me a date, meeting place, and host in one screen. Search your city with phrases like “litter cleanup,” “trash pickup,” or “community cleanup,” then filter for upcoming events.

    Read the listing before you RSVP. Look for the meeting point, expected pace, supplied equipment, weather plan, age rules, and contact method. A clear listing should tell you what happens after you arrive, not leave you guessing beside a park entrance.

    Use Meetup and Instagram together

    Instagram helps when groups announce smaller events quickly. Search your city name with “litter pickup” and follow local groups, parks, neighborhood associations, and environmental volunteers. Watch Stories for pop-up cleanups, route changes, and weather notices.

    Send a short direct message:

    Hi, I'm interested in joining your next litter cleanup. Is the event open to new volunteers, and should I bring anything?

    That message does enough. You don't need a personal essay. Hosts can tell you whether they provide grabbers, gloves, and bags, or whether you should bring your own.

    An infographic showing five easy steps to find and join a local litter cleanup group volunteer event.

    Choose a first event you can actually attend

    Weekend mornings work well for many volunteer groups because the schedule leaves room for service and conversation. Pick a site that feels manageable, with a clear meeting point and a host who answers questions.

    A group chat can make the first visit easier. Ask whether the organizers use WhatsApp, Telegram, or another open chat for last-minute updates. RSVP, save the address, and arrive early enough to find the host without rushing.

    If you're searching around Chicago, browse local volunteer trash pickup events near you and compare the next available meetup with your schedule. Then make the decision concrete. RSVP before you talk yourself out of it, send the host your question, and put the event on your calendar.

    What to Expect at Your First Litter Cleanup Meetup

    My first calm meetup began with a small circle of people near the starting point. The host welcomed everyone, explained the route, and gave a short safety briefing. Nobody expected a speech or a perfect introduction. We signed in, collected supplies, and started talking while we prepared.

    The group split the area into small zones. That choice kept us from crowding one patch of sidewalk while another remained untouched. I paired with a buddy, took a grabber and bag, and followed the boundary of our assigned block.
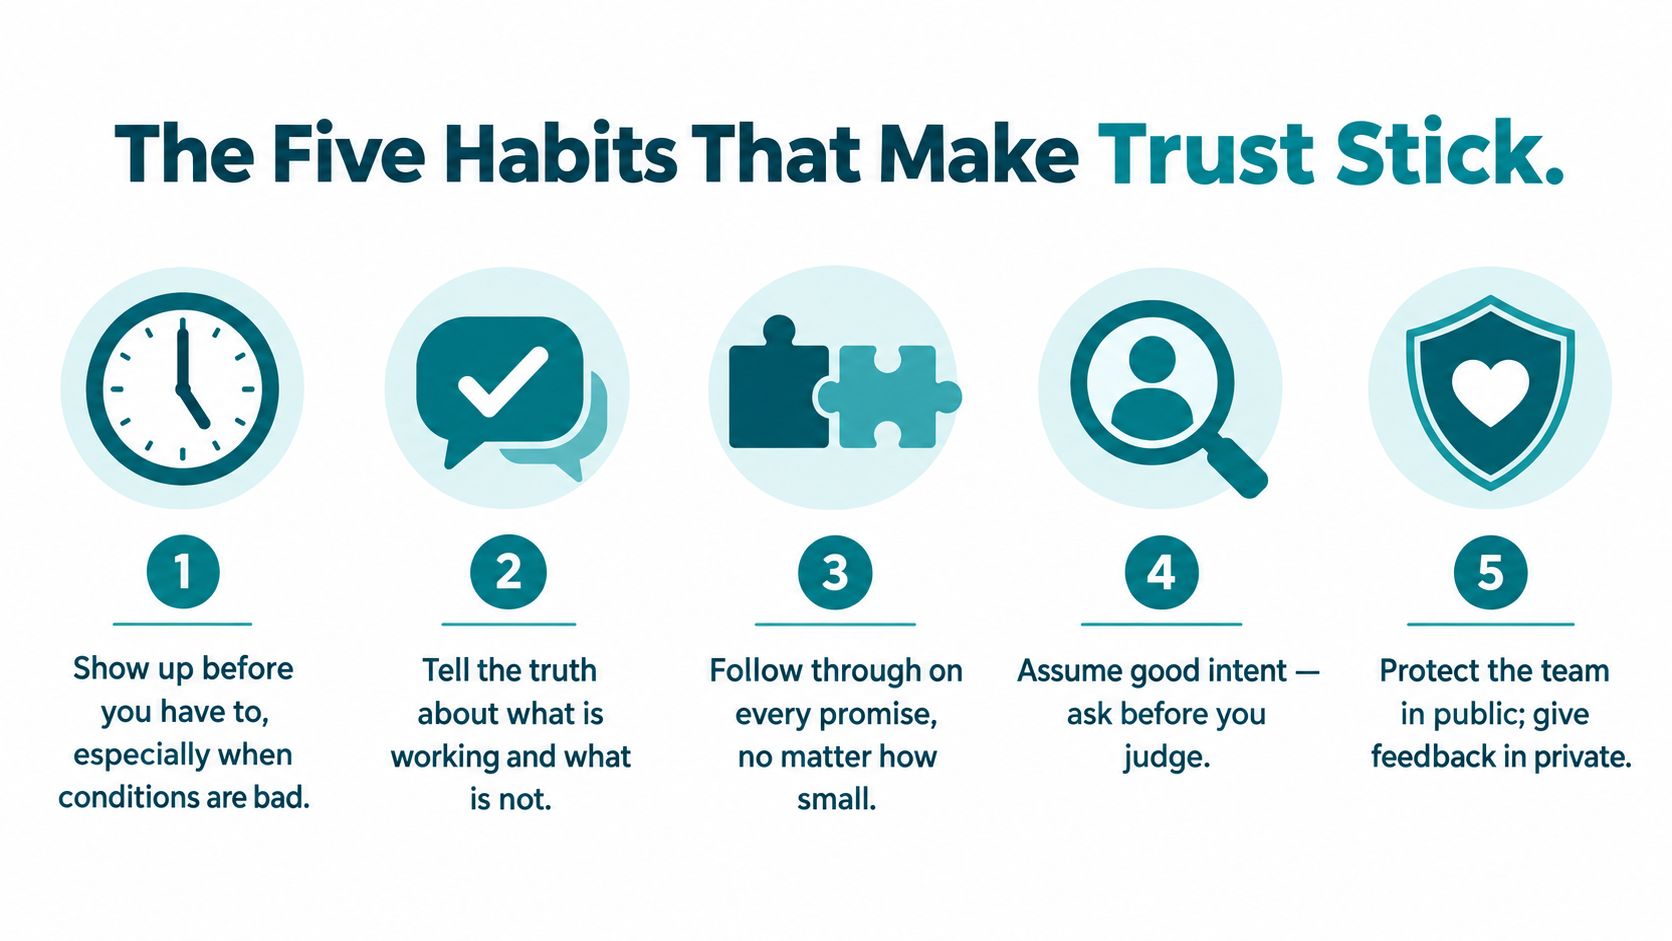
    At first, I felt awkward. My buddy found a cup beneath a hedge, and I found a tangled receipt near a curb. After a few minutes, the pattern became almost meditative. Reach, squeeze, drop. Reach, squeeze, drop. Between finds, we talked about neighborhoods, pets, jobs, and whatever had happened that week.

    A simple rhythm carries the morning

    The host checked routes and kept the group together without hurrying anyone. We took breaks for water and paused when the ground, traffic, or weather made a section unsuitable. A first-time litter cleanup volunteer doesn't need to compete with anyone. A steady pace works better than a frantic one.

    You may meet students, neighbors, people new to the city, and regulars who know every shortcut around the block. Some people talk constantly. Others work without a word. Both styles fit.
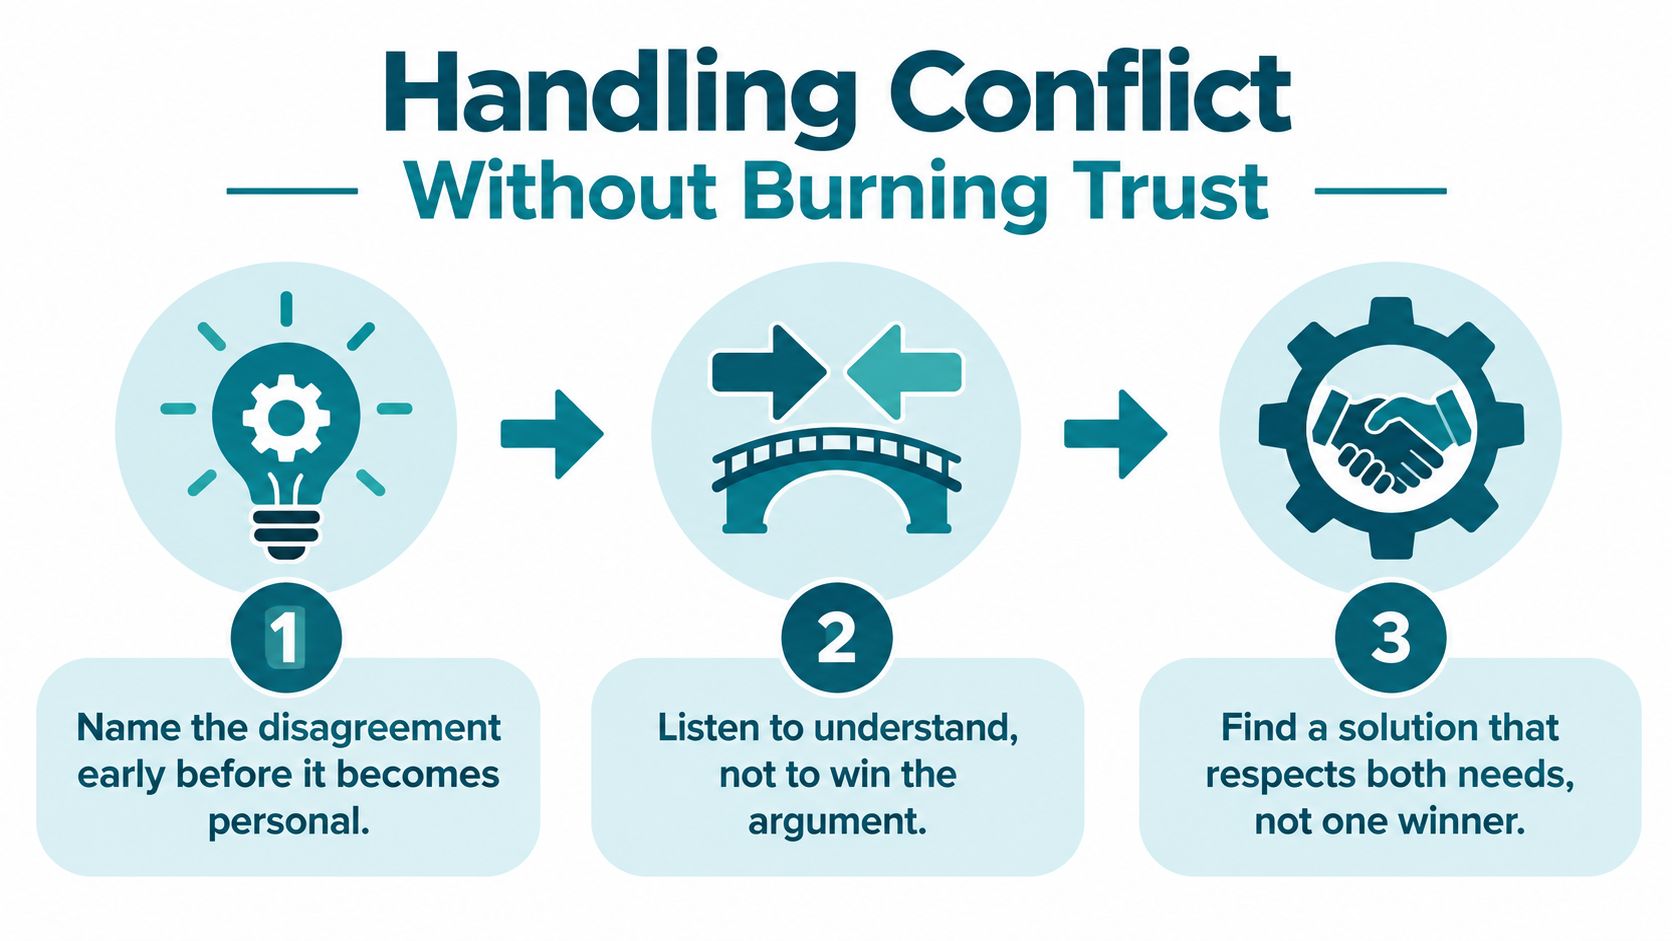
    An infographic titled What to Expect at Your First Litter Cleanup Meetup, outlining six steps to follow.

    Near the end, volunteers bring filled bags to the agreed pickup point. Some groups sort recyclables or record what they find. The group may take a photo, thank everyone, and discuss the next route. The goodbye often feels warmer than the greeting because you've shared a task that leaves visible evidence.

    You don't have to arrive confident. You can borrow confidence from the person walking beside you.

    The meetup may include laughter, quiet concentration, muddy shoes, and an unexpected weather change. That mixture makes the experience memorable. You leave with cleaner streets behind you and a few names you can recognize at the next gathering.

    Safety and Gear Checklist for Litter Cleanup Volunteers

    I pack the night before because a rushed volunteer forgets the item that matters most. Start with gloves, a grabber, high-visibility clothing, closed-toe shoes, water, and sunscreen. Add layers when wind or heat may change the feel of the morning.

    Use this checklist:

    • Gloves: Wear sturdy gloves that protect your hands from hidden sharp edges. Never pick up litter with bare hands.
    • Grabber: Use a grabber instead of reaching into bushes, gaps, or piles. It keeps your hands farther from unknown objects.
    • High-visibility vest: Wear reflective gear near any traffic or parking area so drivers and teammates can see you.
    • Closed-toe footwear: Choose hard-soled shoes or work boots that handle uneven ground and concealed debris.
    • Water and sunscreen: Drink regularly, take breaks, and protect exposed skin during outdoor work.
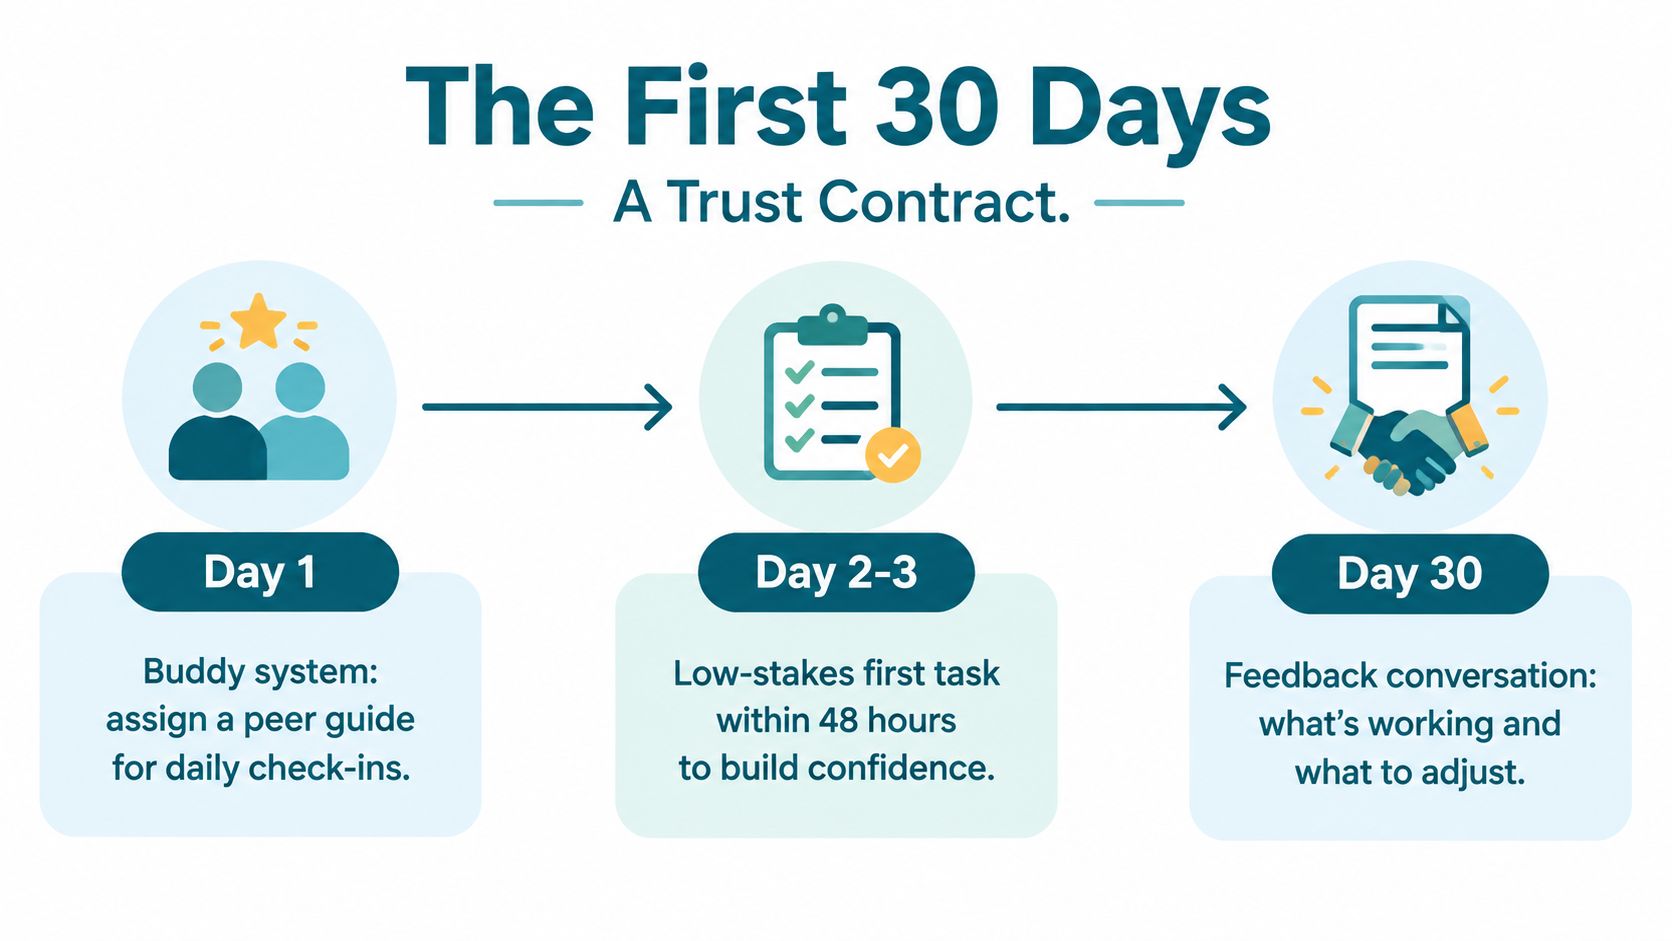
    • Basic first aid: Carry bandages and hand sanitizer for small needs after you finish handling bags.

    See the litter cleanup equipment options used for trash pickup work before your first event.

    Follow the route, then stop for hazards

    A safe workflow starts with a site inspection. The leader checks for traffic, water, unstable ground, construction, severe weather, and other hazards. The team divides the area into small zones, works in buddy pairs, fills only manageable bags, and places tied bags at a safe pickup point.

    Stay off the roadway. Work in daylight, avoid wet or poor-visibility conditions, and never choose a busy road to collect more litter. Minnesota's Adopt a Highway guidance also tells volunteers to face oncoming traffic, avoid bridges and open water, and leave enough room for crews to tie bags shut. Read the Minnesota volunteer safety guidance.

    Some objects belong to trained responders. Leave needles, broken glass, batteries, dead animals, heavy or bulky objects, sealed containers, and unknown substances alone. Tell the group leader, who can report the item to the right authority.

    Hazard rule: If you can't identify it or lift it safely, don't touch it.

    A county roadside program requires safety training, a vest, gloves, and hard-soled shoes or work boots before participation. Review the Will County roadside terms and conditions. Texas guidance also places volunteers in a defined right-of-way workflow, asks groups to carpool, and says bags should remain tied and reachable for collection. Read the Texas cleanup safety tips.

    When you finish, wash your hands and disinfect reusable equipment. Safety keeps one enjoyable morning from becoming a reason to quit.

    A safety and gear checklist for litter cleanup volunteers featuring essential items like gloves, tools, and protective equipment.

    Cleanup Etiquette That Keeps Teams Kind and Unified

    A cleanup group works best when nobody treats the morning like a competition. I share the awkward finds, the heavy sections, and the boring stretches. Someone else may take the next bag, hold a flag, or walk with a newer volunteer who feels unsure.

    Keep your footprint light in the neighborhood. Stay aware of entrances, gardens, parked cars, and people using the sidewalk. Keep voices reasonable, leave private property alone, and let the leader handle questions from residents or tricky waste.

    Small teams make the work easier to supervise. Assign one side of a road at a time, keep buddy pairs together, and use a clear handoff for anything hazardous. Never pressure someone to work faster, lift beyond their capacity, or enter a place that feels unsafe.

    Protect the volunteer mood

    A volunteer-first group protects energy. Leaders should explain the plan, notice fatigue, and make breaks normal. Nobody should feel embarrassed for sitting out a difficult patch or leaving when the weather turns.

    Celebration helps too. A flag, a theme song, or a badge can turn a plain bag of litter into a shared achievement without turning service into a performance. I like the moment when everyone sees the same block at the end and recognizes the difference.

    • Do welcome newcomers: Introduce yourself and explain the next simple task.
    • Do share information: Tell the leader about hazards instead of trying to solve them alone.
    • Don't pressure donations: People arrive to give time, and organizers should respect that.
    • Don't shame residents: Clean the space without turning strangers into targets.
    • Do thank the team: A sincere goodbye makes returning feel easy.

    Before joining a group, read its volunteer code of conduct so you understand how it handles respect, safety, and shared work.

    How Volunteering Transforms You and Your City

    The first time hail hit during a cleanup, I nearly headed home. Then a friend tightened her hood, laughed, and kept walking. We filled bags between showers. That morning changed my idea of service. A cleanup clears one sidewalk, while returning regularly changes how you see yourself and your neighborhood.

    The Litter Caterpillars' rain-or-shine, all-wards approach makes that change visible. You learn to show up before you feel ready, work beside people you did not know, and trust a plan when the weather turns. Bravery becomes an ordinary habit, built one meetup at a time.

    Friendship grows through repetition. You meet the same people at the gathering point, follow familiar routes, and learn how someone laughs when a bag snags on a thorn. Those small moments create belonging without demanding an instant friendship.

    Chicago looks different with a grabber in your hand. Walking through its wards has led me down streets I might otherwise overlook. Projects such as Caterpillar Park in Englewood also give volunteers a place where shared work can continue beyond one cleanup morning.

    Turn one morning into a practice

    Keep the first commitment modest. RSVP for one event, bring a friend, and decide beforehand which weather would send you home. Afterward, record the next date while the experience still feels fresh.

    For another community view of waste reduction and local action, read Fillaree's guide to the top reasons Durham is zero-waste capital.

    The broader participation is encouraging. Keep Britain Tidy reports that many adults take part in litter picking regularly, and that hundreds of thousands of volunteers collected hundreds of thousands of rubbish bags in one year. The scale shows that local service can become a shared public habit.

    You do not need a heroic plan. Choose a meeting point, wear shoes you trust, and let the people beside you make the morning lighter. Return before the habit disappears.

    Litter Caterpillars organizes volunteer trash pickup events across Chicago, provides grabbers, bags, and gloves, and offers a practical way to meet people while cleaning local streets. Visit Litter Caterpillars, RSVP for a weekend cleanup, and bring a friend to your first morning.

  • How to Build a Community Litter Cleanup Program That Works

    How to Build a Community Litter Cleanup Program That Works

    At 7:30 on a Chicago Saturday morning, I hand an orange bucket to a new volunteer, point toward the alley, and watch the group split into pairs. By 10, the pop-up tent holds full bags, dusty grabbers, and a crew already asking where we're cleaning next.

    What a Weekly Cleanup Looks Like Before You Build One

    The first arrivals gather at a familiar corner. Someone brings coffee. Someone else checks the weather and counts gloves. I pass out orange buckets, grabbers, bags, and safety vests while people trade quick introductions.

    Then we move.

    Two volunteers take the alley on the east side of the block. Two head west. The grabbers make a light scraping sound against the pavement as they catch bottle caps, wrappers, food containers, and scraps of plastic tucked beneath parked cars. The work has a rhythm. Bend, pinch, lift, bag. Talk, laugh, point, keep moving.

    A homeowner opens the front door and offers lemonade. One volunteer switches to a smaller bag because the large one keeps dragging through the narrow passage. A child watches us sort the pile and asks why we leave recyclables on the curb. I explain that our disposal plan depends on the city and the site, so we separate what we can and never make promises we can't keep.

    At 10, we meet beneath the pop-up tent. We count bags, record the route, photograph the pile, and check that nobody has a cut, sore back, or overheated face. The numbers matter, though they never tell the whole story. The same corner looks different when people see us return every week.

    Our Chicago group cleans across all 50 wards every week, and we've learned that consistency carries more weight than a dramatic one-day push. The International Coastal Cleanup shows how far volunteer action can reach. In its 2023 report, nearly 470,000 volunteers across 97 countries collected more than 4,000 tons of trash and plastics, recording 15,519,392 items across 15,508 miles of coastline and waterways (Ocean Conservancy report).

    A diverse group of volunteers cleaning up litter in a park with a city skyline backdrop.

    That scene contains the whole machine in miniature: a meeting point, supplies, routes, captains, safety rules, records, and a reason to return. The rest of this guide breaks down the choices behind it.

    What a Community Litter Cleanup Program Actually Is

    A community litter cleanup program is a recurring volunteer group that removes litter from defined neighborhoods on a fixed schedule. The schedule matters because a one-time event can clear a place, while a recurring crew can notice what returns, who needs help, and which routes demand attention.

    I think of the program as a kitchen.

    The captains are the head chefs. They choose the site, brief the crew, assign routes, and stop work when conditions turn unsafe. Volunteers are the line cooks. They arrive ready to work, follow the site plan, and tell the captain when a task or object creates a problem. Routes are the menu, because they tell everyone where to go and what the crew can finish during that morning.

    Supplies are the pantry staples. Keep gloves, closed-toe shoes guidance, grabbers, bags, water, first aid supplies, and high-visibility vests ready before people arrive. A shared group chat is the open kitchen line. Volunteers use it to find the meeting point, report a blocked route, ask about disposal, and invite a friend.

    The basic operating pieces

    A small group can begin with a notebook and a phone. I'd still build these parts from the start:

    • Recurring time: Pick a day and hour people can remember.
    • Defined zone: Use a block, park edge, alley network, shoreline, or ward route.
    • Sign-in process: Record names, emergency contacts, and waivers where required.
    • Supply kit: Store gear in labeled bins so setup doesn't depend on one person's memory.
    • Data log: Track bags, weight when available, hours, location, and unusual hazards.
    • Newcomer path: Give people one simple page or group-chat message that shows the next event.

    Wollongong's Rise and Shine program began in 1986 and recorded 99 community volunteer events, 1,436 participants, and 44.58 tonnes of waste in 2025 (Mirage News). A program can start with three people on one block and grow into a citywide operation when every new site uses the same basic recipe.

    A five-step guide on the volunteer-first philosophy to encourage community litter cleanup program participation and retention.

    The Volunteer-First Philosophy That Keeps People Coming Back

    I keep our values in the group chat because volunteers need to know what kind of room they're walking into. We talk about bravery, kindness, unity, and service. Those words only matter when they guide an uncomfortable decision.

    We schedule pickups on weekend mornings because working people need a real chance to attend. A volunteer shouldn't have to choose between earning a living and helping clean a block. Weekend timing also gives newcomers a predictable habit. They can bring a friend, learn the route, and return without asking when the next event will happen.

    Safety outranks donations. Happiness outranks publicity. We never pressure volunteers for money, and we won't ask anyone to touch a sharp object to make a photo look better.

    What the rule looks like on the pavement

    A new volunteer shadows a captain during the first session. The captain demonstrates how to use a grabber, where to place a bag, and when to step away. If someone finds glass, a needle, a suspicious container, or anything they can't identify, they call the captain instead of reaching in.

    Captains can cancel a site or change the route when weather, traffic, harassment, flooding, or unstable ground creates too much risk. That authority protects the crew from the quiet pressure to finish a route at any cost.

    Our working rule: A full bag never matters more than a volunteer going home safe and willing to return.

    Groups that chase sponsorship money before they protect volunteer energy often create the wrong bargain. They add meetings, branding demands, reporting tasks, or public appearances until the people doing the cleanup feel like unpaid marketing staff. Money can buy bags. It can't replace trust after a volunteer feels ignored or pushed into danger.

    We've used volunteer retention strategies to keep the focus on belonging, clear roles, and a reason to come back. If you're planning a cleanup with activities, polls, or team challenges, designing an interactive event can help you shape participation without turning the morning into a performance.

    The discipline compounds. First-timers learn the route. Regulars learn to lead. Captains learn to train someone else. That chain gives a community litter cleanup program a future beyond its founder.

    An infographic titled Safety and Legal Basics for cleanup groups listing safety gear and legal requirements.

    Safety and Legal Basics Every Cleanup Group Needs

    I start with a five-minute safety talk, even when half the crew has attended before. Repetition catches the person who arrived late, the volunteer who forgot gloves, and the captain who assumes everyone understands roadside risk.

    Everyone needs durable gloves and closed-toe shoes. Give volunteers grabbers so they can keep bare hands away from the ground. Use high-visibility vests near traffic, keep work in daylight, and have people walk in pairs or groups of three instead of working alone. A volunteer safety briefing also warns against direct contact with broken glass, fish hooks, and hypodermic needles (Litter Free Dorset safety briefing).

    Match the plan to the site

    Parks need attention around play areas, benches, drainage points, and brush. Keep volunteers away from unstable branches, wildlife, steep slopes, and areas where children could encounter hidden sharps.

    Alleys require careful footing and awareness of vehicles, gates, dogs, and private property. Stay on approved public space, leave blocked or unsafe sections alone, and never enter a yard or building to reach litter.

    Roadways create the highest exposure to moving traffic. Stay off medians, bridges, roundabouts, rail tracks, construction zones, steep slopes, and high-traffic edges. One city guide limits adopt-a-street work to public property, daylight hours, and lower-risk locations (Seattle Public Utilities safety guidance).

    Waterways add slippery banks, hooks, changing water levels, and wildlife. Wear suitable footwear, keep a safe distance from the waterline, and stop when the bank becomes unstable.

    Never pick up needles, weapons, ammunition, car batteries, chemicals, dead wildlife, or unknown containers. Put distance between the item and the crew, keep children away, photograph the location if you can do so safely, and contact the responsible city department or trained responder. Public guidance draws this boundary clearly for hazardous litter (Cobb County volunteer guide).

    Handle the paperwork before people arrive

    Ask the parks, sanitation, transportation, or ward office whether your route needs a permit. Use a waiver suited to your location and group. Set an age policy, require adult supervision where appropriate, and keep emergency contacts with the captain.

    Bring water, a light snack, sunscreen, and a first aid kit. Hardware stores, municipal solid-waste departments, and neighborhood businesses may donate gloves, bags, vests, or grabbers. One cleanup guide lists garden gloves, closed-toe shoes, water, snacks, and grabbers as basic preparation (North Central Texas Council of Governments guidelines).

    If something goes wrong, the captain stops the route, moves volunteers away from danger, calls emergency services when needed, contacts the program lead, and records the time, place, object, weather, witnesses, and action taken. Keep the report factual. Don't hide a minor injury because you fear paperwork.

    An infographic titled Safety and Legal Basics for cleanup groups highlighting eight essential safety and compliance tips.

    For a printable preparation list, use this volunteer safety checklist.

    Partnerships and Funding Without Losing Your Independence

    I divide outside support into three lanes: in-kind donations, local sponsorships, and grants. Each lane can help, and each can change how your Saturday works.

    In-kind support usually creates the least paperwork. A hardware store might provide gloves, bags, or grabbers. A café might provide water. The trade is simple, though you still need to track what you receive and avoid promising public promotion you can't maintain.

    Local sponsorships can pay for shirts, storage, printing, or disposal. They also can bring logo requests, exclusive access demands, or pressure to post branded content. A sponsor should make the route easier. If the sponsor wants to approve every photo or claim ownership of a public space, the cost exceeds the check.

    Grants can support planning, equipment, and larger site work. They usually demand a clear proposal, a budget, progress records, and a final report. When I prepare a short inquiry, I explain the route, the volunteer need, the safety plan, the disposal plan, and the records we already keep. A resource on using Grantlas for grant letters can help organize that first written ask.

    Funding Type What You Get What It Costs You Best Fit For
    In-kind donations Bags, gloves, water, grabbers, printing Pickup coordination and basic thanks New groups and regular routes
    Local sponsorships Supplies, shirts, storage, disposal support Branding requests and relationship management Established neighborhood crews
    Grants Project funding and equipment Applications, budgets, reports, and deadlines Programs with records and a defined project

    Write a one-page ask

    Use a named location instead of a broad promise. Show a route photo, your schedule, the number of regular volunteers qualitatively, your safety controls, and the exact item or expense you need covered. Sponsors and funders want to see that their help will reach the pavement.

    I also avoid exclusive cleanup rights, mandatory logos on every shirt, and social-post quotas. Those terms can turn volunteers into a promotional channel.

    My partnership test: If the deal creates more Saturday work than it removes, I decline it.

    The International Coastal Cleanup tracks individual items as well as collected trash, which shows why a simple data log can make a volunteer program easier to explain to partners (Ocean Conservancy annual report). Your partner doesn't need a glossy presentation. They need a clear request, a safe plan, and honest evidence.

    Measuring Impact and Turning Cleanup Into a Park

    For years, I watched people count bags and stop there. Bags are easy to see, but they can hide the difference between a light route and a heavy one. They also say nothing about whether the same corner stays cleaner after the crew leaves.

    Our sheet now records the location, date, volunteer hours, bag count, weight when available, unusual litter categories, and a quick cleanliness score for repeat sites. We take a photo from the same position whenever possible. That turns a vague memory into a comparison.

    The five-minute field sheet

    At the end of each pickup, one person records:

    • Where: Street, alley, park edge, or waterway section.
    • Who: Volunteer count and total hours.
    • What: Bags, weight, and notable items.
    • Condition: A simple clean-to-heavy-litter rating.
    • Follow-up: Disposal completed, hazard reported, or return visit needed.

    The monthly summary should fit on one screen. List the locations, show the photos, name the volunteers who led routes, and explain what changed. People read records when the records help them see their own street.

    The data also gives you a way to ask harder questions. A route that produces fewer bags may have improved. A route with repeated heavy litter may need a bin, enforcement, better collection, or a conversation with the property owner. Cleanup removes the symptom. Source control and waste infrastructure still determine what returns.

    A major Australian litter report counted plastics at 80.8% of litter items in its reported litter stream (Clean Up Australia litter report). That kind of category record helps a group discuss prevention rather than treating every pickup as an isolated chore.

    From an empty lot to Caterpillar Park

    We photographed the same empty lot in Englewood during weekly pickups. The images showed the broken glass, wrappers, dumped material, and weeds, but they also showed people returning with a plan. Neighbors could point to a named place instead of describing a general problem.

    Those photos and route records helped us speak with the alderman, neighbors, and a land-bank partner. We won the empty lot at auction and turned it into Caterpillar Park. The park didn't appear because we had one heroic cleanup. It grew from repeated visits, visible care, and records that made the request concrete.

    The strongest measure remains simple: does the place we cleaned last month still look clean this month? This community impact measurement guide can help you build a record that people can understand and use.

    Your First 30 Days of Running a Cleanup Program

    Start small enough that you can keep your promise. Choose one neighborhood block and one recurring time slot. Don't begin by claiming an entire city if you haven't tested your supplies, route, waiver, disposal plan, and captain coverage.

    Week one, choose the ground

    Walk the block during daylight. Note traffic, alleys, vacant lots, drainage areas, steep sections, private property, and places where volunteers could step into danger. Contact the local parks or sanitation department and ask about permits, bags, disposal, and public-space rules.

    Pick a meeting point that people can find without guessing. Write the address, time, route boundary, weather policy, and contact person in one short message.

    Week two, recruit a small regular crew

    Print a flyer for the block. Publish one social post with the same details. Ask directly for five regulars, and give each person a role. One person can manage supplies, another can lead the route, another can record data, and another can welcome newcomers.

    Keep the invitation honest. Tell people how long the pickup lasts, what gear they need, what the group won't handle, and where the bags will go. People trust a clear boundary more than a grand promise.

    Week three, run the first cleanup

    Bring printed waivers, gloves, closed-toe footwear reminders, grabbers, bags, water, first aid supplies, and a phone with emergency contacts. Start with the safety talk. Keep people in pairs where traffic creates risk, stay in daylight, and stop for heat, cold, broken glass, needles, wildlife, harassment, or unsafe footing.

    Take a before photo. Record the route, volunteer hours, bags, weight if available, and unusual litter. Take an after photo from the same position. Dispose of the bags through the arrangement you confirmed before the event.

    Week four, return and review

    Repeat the same route at the same time. Ask each volunteer what felt smooth, what felt confusing, and what would make the next pickup easier. Store the answers with the field sheet instead of letting them vanish in conversation.

    At day 30, success looks modest and real:

    • A returning crew: People came back without needing a new sales pitch.
    • A shared calendar link: Everyone can find the next event.
    • A safer route: You removed or changed tasks that created risk.
    • A before-and-after pair: You can show one named place and what changed.
    • A usable record: You know what to repeat, revise, or stop.

    On Monday, walk one block and choose the first Saturday time. Then invite five people before you buy anything fancy. A community litter cleanup program becomes durable when the first promise stays small enough to keep.


    Litter Caterpillars organizes weekly volunteer trash pickups across Chicago, with supplies such as grabbers, bags, and gloves available for participants. Visit Litter Caterpillars to find a cleanup, meet the group, and turn your first route into a steady community practice.

  • Weekend Cleaning Schedule That Actually Sticks

    Weekend Cleaning Schedule That Actually Sticks

    At 6:10 on a Saturday morning, frost coated my gloves before the first bag filled. Three neighbors watched the street wake up, then one of them tied a second bag to the cart and said, “Let's keep going.”

    That small decision captures a weekend cleaning schedule better than any color-coded calendar. The hard part isn't writing a list. It's protecting enough energy, clarity, and goodwill for people to show up again next week.

    Why a Weekend Cleaning Schedule Is Worth Building

    At one cleanup, rain soaked my sleeves before the first row was finished. A volunteer who had never joined us before stood beside the bag pile, unsure where to start. Another regular greeted them, pointed out the boundary, and worked alongside them until the route felt familiar. By the end, the newcomer stayed for the final count and asked about the next Saturday.

    That morning changed how I judge a weekend cleaning schedule. Its value is not a prettier checklist. It is the shared ritual around the work: people know where to meet, what to bring, how long the effort lasts, and who will notice when they arrive.

    The household version carries a similar weight. A household cleaning survey reported by Home Clean Secrets found that Americans spend nearly six hours each week cleaning their homes. Without a plan, that work can occupy every spare pocket of a weekend. A scheduled block gives chores a visible place, so the rest of the day does not feel like an unfinished job waiting in every room.

    I learned the human side through small failures. One new volunteer left early because nobody explained the route. Another came back after a difficult week because someone greeted them by name, offered a familiar task, and showed them exactly where to work.

    Those details decide whether a group becomes a recurring crew. The greeting at arrival, the gear table, the safety circle, and the closing thank-you create a rhythm people can trust. Volunteers may forget how many bags they filled. They remember whether they felt lost, rushed, or welcome.

    Practical rule: Build the morning so a tired person can understand it within a few minutes.

    For a home reset, the same principle applies. A schedule should make the work visible without making the household feel trapped by it. The point is a repeatable Saturday ritual that leaves room for changing weather, uneven energy, and the people doing the work.

    Why Saturday Mornings Win for Cleaning

    An infographic showing that most people prefer cleaning in the morning due to higher energy and focus.

    At our Saturday cleanups, the first hour often decided the whole day. People arrived with more focus, daylight made hazards easier to see, and finishing early left room for family plans or recovery. A commissioned study likewise found Saturday morning was the most popular cleaning time, while Sunday night and early Monday morning ranked among the least popular periods, according to Study Finds' summary of the cleaning survey.

    That timing matters for a volunteer crew because energy is shared. On a hot morning, a clear start helped us collect more before fatigue turned small frustrations into arguments. In winter, daylight and a defined finish made the work feel manageable. The schedule had to respect the people carrying it, not only the bags or tools.

    U.S. time-use data shows that weekend days bring more housework than weekdays, 40% compared with 35%, while food preparation and cleanup appear slightly more often on weekdays, 66% compared with 63%, according to HerWay's household chore statistics. That supports a practical split. Put the higher-friction work in a weekend morning block, then leave space for errands, worship, rest, recreation, or an unplanned change of weather.

    Morning, afternoon, or evening

    Time What helps What gets in the way
    Morning Cooler air, daylight, sharper focus, and a clean finish before the day expands Shift workers, religious observance, sleeping children, and local noise rules
    Afternoon More daylight and easier access for people who need a slower start Heat, errands, sports, shopping, and family plans
    Evening Cooler temperatures in summer and availability after work Low motivation, darkness, traffic visibility, and Sunday-night fatigue

    A flexible household rhythm can also protect goodwill. People do not all bring the same energy each weekend, so the morning block should absorb the tasks that keep being postponed rather than demand one exhausting marathon.

    A workable default

    Start on Saturday at 8:00 a.m., work for three hours, and keep Sunday morning available for Saturday conflicts. In a home, shorten the block to the jobs that create the most resistance, while routine wiping, dishes, and tidying stay on other days. For overnight workers or people observing Saturday religious practices, Sunday morning preserves the same social ritual without asking anyone to choose between participation and personal commitments.

    Your Sample Weekend Morning Itinerary

    At 8:00 a.m., I put the map on the hood of the truck, greet each volunteer by name, and give the morning a visible shape. Short blocks keep instructions from competing with the work, while the closing count gives people proof that their cold hands or tired legs changed the site.

    The three-hour plan below follows the creek-litter cleanup protocol, using a briefing, fixed sections, a collection point, and material counting.

    A visual itinerary graphic showing eight sequential steps for a weekend volunteer community cleaning event schedule.

    The three-hour version

    • 8:00 to 8:15, arrival and sign-in: The captain greets each person, records attendance, checks emergency contacts if the group uses them, and hands out a map. Late arrivals use a visible sign-in point instead of breaking into the briefing.
    • 8:15 to 8:30, gear check: A supply lead distributes bags, grabbers, gloves, water reminders, and high-visibility clothing for roadside work. Everyone confirms a buddy before leaving the meeting point.
    • 8:30 to 8:45, safety briefing: The captain names boundaries, traffic risks, unstable ground, heat concerns, sharps handling, and the buddy rule. Volunteers learn which items stay untouched and whom to contact when they find one.
    • 8:45 to 9:00, zone assignment: The route lead gives each team a fixed start and end point. Volunteers repeat their segment aloud, which prevents wandering and makes the route easy to check.
    • 9:00 to 9:45, systematic sweep: Teams move in one direction, fill bags, leave hazardous items alone, and bring full bags to the agreed drop point. The lead watches the pace and checks that nobody works alone.
    • 9:45 to 10:15, count and sort: The sort team groups material by category and records totals on a tally sheet. A full count can expose debris a visual scan misses and show how material accumulates over time, as described in this roadside-litter audit framework.
    • 10:15 to 10:45, weigh and record: The captain records bag totals, unusual items, and unfinished areas. The group photographs the final collection point when that image will help plan the next visit.
    • 10:45 to 11:00, debrief and recognition: Each volunteer shares one observation. The captain thanks named contributors, then the team agrees on the next meeting point.

    The 90-minute version

    For a smaller group, use 8:00 to 8:15 for arrival and gear, 8:15 to 8:25 for safety, 8:25 to 8:35 for segment assignments, 8:35 to 9:10 for the sweep, 9:10 to 9:25 for sorting and counting, and 9:25 to 9:30 for weighing, cleanup, and thanks. Keep the order even when the blocks shrink.

    Captain's cue sheet: “Check in, choose a buddy, inspect your gear, hear the hazards, repeat your segment, sweep toward the drop point, leave dangerous objects alone, bring bags back, count what we collected, and finish together.”

    Splitting the Crew Into Roles and Segments

    At one cleanup, I told everyone to spread out and search. Within minutes, two volunteers were picking through the same pile while another stood alone near the road. Since then, I assign ownership before anyone leaves the parking lot. Clear roles protect the work and the people doing it.

    The creek-cleanup methodology uses briefings, subteams, fixed sections, and a central collection point. I adapt that structure for weekend mornings, where a familiar routine helps new volunteers join without feeling lost.

    A diagram outlining the roles and responsibilities of a cleanup crew, including leads, heavy-lift, sort, and safety.

    Four roles that prevent drift

    • Lead team: Two people check the route, mark hazards, confirm the boundaries, and set a pace that keeps volunteers connected.
    • Heavy-lift crew: Volunteers with grabbers and sturdy bags handle bulky debris within safe reach. They leave objects that are dangerously heavy, unstable, or too deep to retrieve.
    • Sort-and-count team: This group stays near the collection point, separates material by type, and records each category on a tally sheet. One litter audit recorded 5,348 items before an intervention and 4,933 afterward across 27 litter types. Your local count can be smaller. Consistency matters more than scale.
    • Support and safety team: This pair carries first-aid supplies, watches traffic and footing, tracks water pauses, and checks that each person remains with a buddy.

    I write every assignment on a card and tape it to a grabber or supply kit. New volunteers work beside experienced people for their first few sessions. They learn the route, the signals, and the quiet habits that keep a group together.

    Fixed segments make the work measurable

    Give each subteam a printed map showing its start, finish, bag drop, and regroup time. If one group finds a dense patch, the lead records it rather than sending everyone toward the same pile.

    A fixed segment also gives returning volunteers a clear memory of what changed. One litter report found that plastics made up 80.7% of counted litter at surveyed sites. That finding may support a plastic-focused plan on one route, while another area calls for attention to glass, food packaging, or construction scraps. The point is to let each weekend's record shape the next assignment, without turning volunteers into competing crews.

    Weather, Safety, and No-Show Contingencies

    Chicago has taught me to respect forecasts and distrust optimism. I've stood under hail with a crew that wanted to keep going, and I've sent people home on a bright morning because the route had become unsafe. A captain protects the people first, then the bags.

    Use a laminated contingency card. Read it before every cleanup, even when the sky looks friendly.

    A safety infographic detailing contingency plans for severe weather, workplace hazards, and low staff attendance rates.

    Weather changes the plan

    Set your weather decision before volunteers leave home. A captain can cancel, shorten, or move the event when conditions create unsafe footing, poor visibility, dangerous heat, or lightning exposure. Send the message early, include the next meeting option, and don't make people wait at the site for a debate.

    For hot mornings, start earlier, build in water pauses, and keep the route near shade when possible. For cold or wet mornings, ask volunteers to bring layers and spare socks. The volunteer site manager guide advises gloves, closed-toe or sturdy shoes, long pants or sleeves, bright clothing for roadside work, sunscreen, and water.

    Hazardous debris stops the sweep

    Never let enthusiasm turn into hand-to-hand contact with danger. Volunteers must leave syringes, needles, sharp metal, old batteries, and unidentifiable objects alone. Mark the location, notify the lead, and contact the responsible authority for disposal, following the guidance in this household hazardous-waste cleanup safety guide.

    Every volunteer should work with a buddy. Official cleanup guidance says crews should receive a safety briefing, work in teams of at least two, and use adult supervision for minors. The community cleanup safety checklist gives captains a practical reference for repeating that briefing.

    No-shows need a quiet backup plan

    Design each role so the work still functions when attendance drops. Pack supplies in role kits, print the tally sheet before arrival, and keep a two-person fallback team ready to absorb extra people or cover a missing group. If a zone becomes too large, close it and record it for a later morning instead of stretching volunteers beyond safe limits.

    Keeping Volunteers Coming Back Week After Week

    Pizza helps, but it rarely explains why someone returns in freezing rain. I've seen people come back because another volunteer remembered their name, handed them the flag, or saved them a place in the circle.

    People need a visible way to belong. A cloth patch or wristband after a volunteer completes a third cleanup gives regulars a small marker they can wear. A shared song, a group photo, or a familiar route can create the same feeling without spending much money.

    Give the morning a repeatable rhythm

    Start each event with the same short circle. Everyone says their name, assigned segment, and one small fact. The format takes little time, but it lets new people speak before the work begins and gives returning volunteers a reason to greet one another.

    End with a few rituals that make effort visible:

    • Read shoutouts aloud: Thank someone who carried heavy bags, helped a newcomer, spotted a hazard, or kept the count organized.
    • Update the tally board: Write the morning's categories where people can see them before they leave.
    • Take one group photo: Stand beside the collected bags, with permission from everyone included.
    • Rotate ownership: Let a different volunteer carry the flag, choose the song, lead the tally, or bring snacks.

    I've found that identity works better than pressure. Volunteers shouldn't feel trapped by guilt or asked to prove their worth. They should know that their presence changes the morning and that the group will welcome them when life interrupts.

    For more ideas on building a dependable group, review these volunteer retention strategies. Then send a short Sunday evening message with the count, two photos, and the next segment. That message keeps the thread alive without turning service into an obligation.

    Your First Saturday With This Schedule

    Your first event will feel exposed. People will watch for direction, the weather may change, and a small delay can decide whether the morning feels warm or chaotic. You don't need a perfect production. You need a captain who arrives prepared and speaks clearly.

    Arrive 15 minutes early. Post the route map, set out bags and grabbers, place water where everyone can see it, and keep a printed roster beside your phone. Run a brief safety talk, pair people into two- or three-person pods, and give every pod a fixed section. Announce the end time before anyone starts so parents, shift workers, and people with afternoon plans can trust the schedule.

    The final 10 minutes should include bag counting, one specific thank-you, and notes for next week. Write down a missing supply, a confusing turn, a slippery area, or a segment that took longer than expected. Those notes turn one morning into a system.

    First-weekend checklist

    • Route: Print the map and mark start, finish, bag drop, and regroup points.
    • Safety: Prepare the briefing, first-aid supplies, hazard instructions, and buddy assignments.
    • Gear: Pack gloves, grabbers, bags, bright clothing, and sturdy footwear.
    • Comfort: Bring water, sunscreen, layers, and a hat when conditions call for them.
    • Communication: Charge your phone and save the lead contact before arrival.
    • Attendance: Print the roster and leave space for walk-in volunteers.
    • Closeout: Carry a tally sheet, pen, camera, and a place to record next week's notes.

    Groups looking for a regular service rhythm can study weekend volunteer work on Saturdays and adapt the same approach to their own block, home, school, or park.

    The first Saturday may produce fewer bags than you hoped. That's fine. People will remember whether they felt safe, useful, and welcome. One morning repeated with care can outlast a large event that leaves everyone exhausted.


    Litter Caterpillars organizes recurring weekend morning trash pickups in Chicago, with clear meetup details, shared roles, and a volunteer-first approach to safety and friendship. Visit Litter Caterpillars to find an upcoming cleanup and bring this weekend cleaning schedule to life with a crew.

  • Logo and Identity: A Practical Guide for Community Groups

    Three volunteers had just finished a litter pickup on Chicago's South Side when hail drove them under a trail shelter. Their cardboard sign dissolved in the rain, but that night, from memory, we drew the first Litter Caterpillars logo.

    The Day Three Volunteers Got Caught in a Chicago Hail Storm

    The spring afternoon had started smoothly. Three of us walked back toward the trail shelter after picking up trash, carrying full bags, wet gloves, and the loose confidence that comes from thinking the weather will hold for one more block.

    Then the sky changed. Hail hit the path hard enough to sting our faces. The cardboard sign reading “volunteers needed” sagged in our hands, and every ride we tried to call canceled while we stood there shivering. We crowded beneath the shelter, watching the field we had just cleaned disappear behind a sheet of gray weather.

    Three young people huddled together in a rain-covered bus stop holding a community volunteers needed sign.

    That storm became our first identity lesson. We didn't create a logo after a long meeting about market position. We drew it later because we needed a way to remember what had happened. The mark carried the three people, the soaked sign, the cold, and the strange laughter that arrived after we realized we'd have to wait it out together.

    A mark born from the work

    Our name, Litter Caterpillars, already held a story. A caterpillar moves slowly, keeps going, and changes along the way. We weren't presenting ourselves as perfect organizers. We were people trying to practice cleanliness, consistency, bravery, and friendship through service.

    The first sketch captured that feeling. It gave us something to put on a sign, then a shirt, then a flag. Each use told a small part of the same story to someone who hadn't been under that shelter with us.

    A logo can carry memory in a compact form. One recent compilation reports that 75% of people say they recognize a brand by its logo, and consumers typically need 5 to 7 exposures before they remember a brand, according to logo recognition and memory data. Those figures describe brands broadly, yet the practical lesson works for a volunteer crew too. People need repeated chances to connect your mark with your people and your work.

    Our practical rule: Draw the thing your group has already lived. A polished mark with no story feels rented. A rough mark tied to a real memory can give people somewhere to belong.

    The rest of this guide follows that approach. Use what you have, keep the system easy to repeat, and let the identity grow from the mornings when people show up.

    What Logo and Identity Actually Mean for a Small Group

    A logo is the single mark people can recognize and remember. It might be a caterpillar, a hand, a tree, a neighborhood outline, or a wordmark built from your group's name.

    Identity is larger. It includes every repeated signal that makes the group feel like itself: colors, type, badges, flags, phrases, photographs, meeting rituals, and sound. When those pieces work together, a volunteer can spot your table across a park before reading the sign.

    An infographic titled What Logo and Identity Actually Mean for a Small Group, illustrating core branding components.

    Think in signals, not files

    The Caterpillar Park badge makes the difference easy to see. The badge has the mark, the group color, the park name, and the feeling of having helped turn an empty lot in Englewood into a place people could use. The badge isn't only a graphic file. It becomes a patch on a jacket, a small sign at an event, and a reminder that volunteers helped make the place.

    You can map your own system with a short list:

    • Logo: The mark people identify first.
    • Color: A repeatable visual cue for signs, shirts, and posts.
    • Typography: Letterforms people can read on a windy banner or a small phone screen.
    • Badge: A compact symbol for membership, service, or achievement.
    • Flag: A large signal that helps people locate your group from a distance.
    • Voice: The words and tone people hear in invitations and announcements.
    • Sound: A short theme or sonic signature that can bring the group to mind.

    Flags and badges already carry group meaning outside volunteer work. The Governor General of Canada's heraldry guide explains that flags can identify a country, school, sports team, province, or cause, while badges can show belonging to a group or belief in a cause. That matches what happens at a cleanup. A flag tells a newcomer where to walk. A badge tells a returning volunteer, “You're part of this.”

    For a deeper look at making a mark that remains useful over time, how to design a lasting logo gives practical design guidance. Keep your own standard simple: if a volunteer can't redraw the idea, explain it, or use it without special software, the system needs less complexity.

    The Pieces Inside a Real Identity System

    At a highway bike-event shutdown, our flying caterpillar flag did a job that a small logo couldn't do alone. Volunteers needed to know where the crew gathered, drivers needed to see the closed work area, and passersby needed a quick answer to the question, “Who is doing this?”

    One color can become a shortcut

    Our green started by accident. We used the green material we had, then repeated it because buying another color made no sense. Soon, green meant Caterpillars before anyone read the name.

    Color helps, but shape carries the mark when printing gets messy or a screen turns small. A 2026 cross-market analysis reported that shape-based assets reached 40% Fame and 71% Uniqueness, while color assets reached 12% Fame and 39% Uniqueness, as described in the analysis of shape and color brand assets. I take that as a useful budget rule. Protect the silhouette first, then choose colors that help people find it.

    Research on logo familiarity also shows that people remember color more strongly when they already know a brand, while low- and mid-familiarity conditions don't show the same memory-color effect, according to research on color and shape in logo memory. New groups should keep both the shape and the color consistent while people learn them.

    Type needs to survive the park

    We picked friendly, readable lettering because a banner can flap, fold, and sit several steps away from the person reading it. A decorative font might look lively on a laptop and become mud on a windy fence.

    Badges handle close viewing. Flags handle distance. A wordmark handles names and announcements. Supporting graphics, like a repeating caterpillar pattern or a simple leaf icon, fill empty space without forcing the main logo into every corner.

    A diagram titled The Pieces Inside a Real Identity System showing logo, typography, color, and applications.

    At the bike event, those pieces worked as a set. The flag helped people find us. The badge identified volunteers up close. The banner explained the temporary boundary. The same green and caterpillar shape made the separate objects feel connected.

    Budget test: Print the mark in one color, shrink it to a profile picture, and view it from across a room. If people lose the shape or the name, simplify before you buy more gear.

    Sound can join the system too. A sonic logo is a short sequence of notes, effects, or vocalizations that helps bring a brand to mind when people hear it, according to this review of sound branding and sonic logos. Our theme song gives event videos and group moments another way to feel connected.

    How a Volunteer Crew Builds Identity From Scratch

    You don't need an agency presentation to begin. You need a Saturday morning, a notebook, a few examples, and people willing to make decisions instead of leaving every choice open forever.

    Start with the story

    Gather examples that feel close to your group. Look at a park sign, a sports patch, a neighborhood flag, or an old volunteer shirt. Each person should bring one example and explain what they like about it. Don't copy the artwork. Notice the qualities: bold, welcoming, practical, playful, serious.

    Then sketch together. The Litter Caterpillars idea began as a chalk drawing on a sidewalk before it became a working badge, flag, and logo lockup. Draw quickly in a shared notebook. Try animals, tools, hands, streets, plants, and letter shapes. Keep the first round loose.

    Build the smallest usable set

    Use this sequence:

    1. Clean the badge: Choose one sketch and remove details that disappear when the mark gets small.
    2. Choose two colors: Pick colors that still print clearly through the cheapest printer setting. Keep green if it carries your group's story, but test it on white, dark fabric, and plain paper.
    3. Choose one wordmark: Use readable type for the full group name. Save decorative lettering for optional event art.
    4. Make a flag: Create a large version that people can spot at a rally, cleanup, or shared public space.
    5. Test a shirt: Put the badge on a sleeve or chest, then ask volunteers whether they can read it while moving.
    6. Write one page of rules: Show the primary logo, the small logo, the colors, the type choice, clear space around the mark, and examples of what not to do.
    7. Use a shared folder: Store editable files, print files, transparent images, and the one-page guide where the whole crew can find them.

    A step-by-step infographic showing five stages of a volunteer crew creating a new brand identity.

    Your group can build the visuals alongside its habits. The Litter Caterpillars approach to organizational culture building connects identity with the repeated choices volunteers make together. Keep the process friendly. A system that only one person understands will fail when that person misses a cleanup.

    Where Identity Shows Up in the Real World

    At Caterpillar Park, the flag hangs from the picnic shelter before volunteers arrive. Someone walking along the path can see the color moving in the wind and find the gathering point without checking a message thread.

    That same person sees the badge later on a hi-vis vest. At close range, the patch answers a different question. The flag says, “We're over here.” The badge says, “This person belongs to the crew.” A mark on a shirt can also open a conversation. People ask what the group does, and a volunteer can invite them to the next pickup.

    Objects give the system a place to live

    At the highway bike-event shutdown, a banner stretched across the closed lane made the temporary space readable. The logo didn't replace the safety instructions, cones, or event signs. It gave the work a visible owner and helped pedestrians connect the people managing the space with the group they had seen online.

    Volunteers also use smaller surfaces:

    • Shirts and vests: Put the badge where people can see it while working.
    • Totes and stickers: Use the single-color mark when printing space or budget is tight.
    • Event flyers: Keep the group name readable before adding extra artwork.
    • Meetup thumbnails: Use the silhouette so it survives a small crop.
    • Instagram posts: Repeat the same color treatment without forcing every photo into an identical template.

    If you need practical help preparing crisp custom apparel logos from Raccoon Transfers, focus first on the file format, size, placement, and fabric color your volunteers will use. A beautiful mark can still fail if the smallest text disappears into a vest seam.

    Digital identity needs the same field test as physical identity. Shrink your logo until it fits a profile image. Remove extra wording if the name becomes unreadable. Then check whether a new volunteer can identify the account among several event listings.

    The Litter Caterpillars guide to social media for volunteer recruitment treats posts as invitations to participate, not as a gallery of perfect designs. Show the gloves, bags, weather, jokes, and finished blocks. Your identity should help those moments feel connected.

    A group symbol can also change how people see the group around it. Research on logos, flags, and similar emblems found that shared symbols can make a collection of people seem more unified, effective, and coordinated, even when members don't look alike on their own, according to this summary of group-symbol research. That effect doesn't require expensive merchandise. It begins when people wear, carry, and repeat the same small signals while doing work together.

    Why Identity Is More Than Decoration

    A logo can look decorative when it sits alone on a file. It behaves differently when volunteers use it to make daily decisions.

    During the Caterpillar Park push in Englewood, the badge helped people recognize which meetings, signs, and workdays belonged to the effort. The green gave flyers a familiar thread. The same phrases and symbols helped new volunteers understand the group's tone before they knew everyone's names.

    A shared memory for a changing crew

    Volunteer groups rotate. One person moves, another starts a new job, and someone who organized every Saturday may disappear from the group chat. A consistent identity keeps a piece of the group's memory available when the original organizers aren't in the room.

    That doesn't mean every object needs the logo. It means the group can ask simple questions:

    • Does this invitation sound like us?
    • Would this sign make sense beside our flag?
    • Does this badge belong on a cleanup vest?
    • Will a new volunteer know what they're joining?

    The answers reduce arguments and save time. You don't need to debate every color for every flyer. You choose from a small set of decisions the crew already made.

    Shared symbols can also support pride. A study on national pride and sports found that identification with a national team before a final match predicted later pride in both the team and the country, as reported in research on team identification and national pride. A neighborhood cleanup isn't a championship, yet the emotional pattern feels familiar. People carry a shared symbol, do difficult work together, and feel connected to something beyond the single task.

    The Litter Caterpillars guide to stewardship puts service at the center of that feeling. The logo reminds volunteers what they chose to practice, even on a cold morning when the work feels heavier than expected.

    What Story Does Your Identity Tell

    The first Litter Caterpillars logo came from three people under a shelter, watching hail strike the field they had just cleaned. That story still gives the mark its shape. It says service can be hard, friendship can make hard work lighter, and a group can grow from one uncomfortable afternoon.

    Your group probably has a moment like that.

    Maybe it was the cleanup after the Fourth of July parade, when everyone found themselves carrying bags long after the crowd left. Maybe only one person arrived on a Saturday morning, and that person worked anyway. Maybe a child drew the first doodle on the back of a flyer while adults argued about the event name.

    Write the moment in one honest sentence. Then ask three questions:

    • What object appeared in that story?
    • What color belonged there?
    • What shape could someone recognize before reading the group name?

    Your answer might become a badge, a flag, a wordmark, or a theme song. It doesn't need to explain everything. It needs to help the right people recognize the feeling of showing up.

    Logo and identity work best when they compress belonging into something people can carry. Start with one sentence and one rough sketch. Let the volunteers test both in the places where your group works.


    Litter Caterpillars organizes volunteer trash pickups across Chicago, including workdays that bring neighbors together outdoors and build friendships through service. Visit Litter Caterpillars to find an upcoming event, meet the crew, and see how flags, badges, songs, and a simple logo can give a volunteer group a shared story.

  • How to Build Trust in Teams That Actually Lasts

    How to Build Trust in Teams That Actually Lasts

    The hail hit halfway through our first Litter Caterpillars cleanup, hard enough to sting through a winter coat. Three strangers stood under one tree, passing trash bags around as makeshift ponchos while every Uber canceled, and nobody left.

    What a Chicago Hailstorm Taught Me About Trust

    It was a bitter April Saturday along the riverwalk. We had started with a simple plan, pick up litter, fill some bags, and head home before lunch. Halfway through the route, Chicago changed the rules. Hail rattled against the pavement, gloves soaked through, and the wind turned every exposed hand numb.

    I had a choice. I could call it and squeeze everyone into a Portillo's, or I could ask three people I barely knew to keep working in miserable weather. I didn't want to confuse toughness with good judgment, so I checked that everyone could get warm and stay safe. Then something surprised me. The group chose to stay.

    We tied trash bags over our coats. We moved closer together. One person held the bag open while another grabbed bottles from the mud. We laughed at how ridiculous we looked, then finished the route. We didn't build trust through a speech. We built it by sharing discomfort, watching each other's backs, and doing what we said we'd do when the easy option disappeared.

    That experience changed how I think about how to build trust in teams. Trust grows through repeated evidence. People watch whether you arrive when conditions get rough, tell the truth when a plan fails, and protect one another when someone makes a mistake.

    Psychological safety gives teams a foundation for that work. Amy Edmondson's 1999 study of 51 work teams connected psychological safety with learning behavior, while learning behavior helped explain the relationship between safety and team performance. Edmondson's study describes a practical condition: people can speak up, ask for help, admit mistakes, and offer ideas before small problems grow.

    A diverse group of volunteers in colorful rain gear cleaning up trash along a muddy riverbank.

    You can build that kind of team in a volunteer crew, a nonprofit committee, or a workplace squad facing a deadline. The setting changes. The proof stays familiar. Someone shows up, tells the truth, follows through, and makes it easier for the next person to do the same.

    The Five Habits That Make Trust Stick

    Trust doesn't arrive because everyone shares pizza or tells one personal story. It forms through small habits that people can see.

    Show up before you have to

    On bad-weather cleanup days, I arrive early enough to check the route, bags, gloves, and safety concerns before volunteers gather. That quiet preparation tells people they won't have to carry the whole plan themselves.

    The same habit works on a work team. Join the call prepared. Read the document before the meeting. Reach out when a deadline looks shaky instead of waiting for someone to chase you.

    Tell the truth about what you saw

    A Sunday shift almost fell apart because we underestimated the amount of litter near a service road. I could have called the route “fine” and hoped energy would carry us through. Instead, I said, “This area is worse than we expected, and we won't finish it safely with the people and supplies we have.”

    That sentence gave us choices. We shortened the route, split the work, and left with a clear plan for the next visit. Honesty gives a team usable information.

    Finish small promises

    If you say you'll bring extra bags, bring them. If you promise to send notes, send them when you said you would. People accept larger commitments more readily after they watch you complete ordinary ones.

    Research supports this practical approach. A meta-analysis of 112 independent studies across 7,763 teams found an above-average positive relationship between intrateam trust and team performance, with ρ = .30. A separate review of 84 studies covering 5,582 teams found a moderate positive association, with a mean r = 0.34 and corrected r = 0.40. The PubMed review also supports recurring measurement because trust results vary by context and measurement method.

    Route work toward people's strengths

    On our crew, one volunteer remembers every route turn, another talks easily with newcomers, and another spots broken glass before anyone else. I name those strengths and match work accordingly. That doesn't trap people in one role. It lets the team start from competence while people try new tasks.

    On a remote team, ask, “What part of this work feels clear to you, and where would a second set of eyes help?” You may learn more from that question than from a generic skills inventory.

    Apologize fast, then get specific

    A teammate once admitted during a remote retrospective that she had missed a deadline. She didn't hide behind a system problem. She explained what she missed, what the delay affected, and what she would change next time. Her honesty made it easier for others to discuss their own blockers.

    Use the same pattern yourself: “I said I would send the route plan Friday. I sent it late, and that left you without enough time to prepare. I'm sorry. I'll send the next plan by Thursday afternoon.”

    For a fuller workplace framework, trust-building strategies for HR can help HR teams turn these behaviors into regular team practices. You can also connect these habits with servant leadership, where the leader takes responsibility for the conditions people need to do good work.

    An infographic titled The Five Habits That Make Trust Stick, featuring five numbered icons and corresponding advice.

    Weekly Rituals That Compound Trust Over Time

    A trust ritual should fit into the work already happening. If people need a special retreat to practice honesty, they won't practice it often enough.

    Friday roundup

    Send one short message at the end of the week:

    “Here is what worked, and here is what I need help with.”

    Then name one real win and one honest worry. On a cleanup crew, that might mean celebrating a full route while admitting that equipment ran short. On a product team, it might mean naming a finished release and a handoff that still feels unclear.

    The ritual activates low-stakes honesty. People learn that a worry can enter the group before it becomes a crisis.

    Two-minute pickup standup

    At the start of every pickup, ask each person two questions:

    “What are you bringing today, and where do you need help?”

    A person might bring route knowledge, extra gloves, or patience with a new volunteer. Someone else might need help carrying a heavy bag or navigating an unfamiliar block. Keep answers brief and make space for every voice.

    Google's Project Aristotle studied 180 teams across 250 attributes and identified psychological safety as the strongest factor separating top-performing teams from the rest. Google's team-effectiveness guide lists psychological safety, dependability, structure and clarity, meaning of work, and impact of work in that order. A short standup touches the first three without turning the meeting into a performance.

    Sunday reflection email

    Ask one question:

    “What surprised the team this week?”

    A surprise might reveal a route hazard, an overlooked success, or a communication gap. Read the replies before the next gathering and act on at least one useful point. Reflection loses credibility when people share observations and nothing changes.

    Monthly shared meal

    Keep it simple. Cold pizza on a tailgate counts. So does soup after a winter pickup or coffee at the end of a Saturday shift. The meal gives people room to meet outside their assigned task, which helps them see one another as full people rather than names on a schedule.

    These rituals work because they repeat. A single honest message may feel small. A pattern of honest messages teaches people what happens when they speak plainly. Over time, that pattern helps a team handle larger mistakes, tighter deadlines, and sudden changes without waiting for a perfect meeting.

    Handling Conflict Without Burning Trust

    A disagreement tells you more about a team than a cheerful team-building exercise. People learn whether trust exists by watching what happens when two reasonable people want different things.

    Two regular volunteers nearly quit after a public argument about route safety. One wanted to continue toward a difficult stretch. The other believed the group should leave before traffic and weather made the route unsafe. The argument grew because each person felt the other had ignored a real concern.

    I stepped in with one sentence:

    “I want to hear both of you fully before we decide anything.”

    Then I used a simple sequence.

    Name what happened

    Say what you observed without assigning motives: “We disagreed about whether this route was safe, and the conversation became public and sharp.”

    Name the feeling underneath

    Ask what the disagreement brought up: “I hear concern about safety. I also hear frustration that the group's time and effort might get wasted.” Naming the feeling gives people a way to discuss the need beneath the position.

    Agree on one repair step

    The repair might involve a route rule, a private follow-up, a new safety check, or a decision about who can stop the work. Make the step concrete: “We'll pause at the first blocked section, check traffic together, and leave if either safety lead recommends it.”

    Follow up next time

    Open the next meeting by asking whether the repair worked. Without follow-up, an apology can sound like a way to end the uncomfortable conversation.

    Fast apologies often feel fake because people rush to remove tension before they understand the harm. A slower acknowledgment rebuilds credibility more reliably: “I interrupted you twice, dismissed the safety concern, and made it harder for you to speak. I'm sorry. Next time, I'll let you finish before I respond.”

    A team can disagree and still trust one another. It needs rules that protect candor, safety, and dignity at the same time.

    A three-step infographic on how to resolve conflicts professionally without damaging trust within a team.

    When the disagreement involves power, identity, or political differences, use structure instead of demanding agreement. State the shared purpose, pair people who rarely work together, and give each person time to speak before the group decides. A divided team needs room for real disagreement and a clear reason to keep working together.

    Onboarding New People the Right Way

    A new person doesn't experience onboarding as paperwork. They experience it as a series of answers to one question: “Can I rely on these people?”

    I use a trust contract for the first month. On day one, pair the newcomer with a buddy who can answer ordinary questions without making the person feel foolish. The buddy should explain where supplies sit, how decisions happen, what safety rule matters most, and who to contact when something changes.

    Within 48 hours, give the new person a low-stakes task. On a winter pickup, that might mean sorting gloves, carrying bags with a buddy, or helping mark a short route. On a small product team, it might mean updating one straightforward ticket and reviewing the result together.

    At the end of the first week, hold a 10-minute check-in. Ask, “What feels clear? What feels confusing? What question haven't you asked yet?” Silence should concern you more than a beginner's mistake. A quiet newcomer may still be trying to figure out whether honesty is welcome.

    Build clarity through the month

    Use week two for a feedback loop. Tell the person what they already do well, then name one adjustment with a clear example. By week four, explain the full role picture, including decisions they can make, decisions that need approval, and how their work connects to the group's purpose.

    A volunteer can review volunteer job descriptions before arriving, while a workplace manager can use an employee onboarding checklist guide to organize conversations and tasks.

    Warmth helps people feel welcome. Clarity helps them act with confidence. Give both, then keep the promises you make during the first month.

    A visual guide illustrating a 30-day onboarding trust contract process with steps for new employee integration.

    Simple Ways to Measure Trust as You Go

    You don't need a long survey to learn whether people trust the team. Use a small pulse that fits on an index card and ask people to answer privately.

    Ask:

    • Speaking up: “Would you flag a mistake before it grows?”
    • Disagreeing: “Can you disagree with the lead without fearing embarrassment or punishment?”
    • Helping: “Would you help a teammate without waiting to be asked?”

    Read the answers over time rather than treating one response as a verdict. Psychological safety concerns the team climate that lets members ask questions, offer different viewpoints, and admit mistakes without punishment. The CIPD evidence review also warns that cross-sectional and single-source studies can produce larger trust-performance effects than time-lagged and different-source studies. That gives me a simple rule: pair what people say with what they do.

    Watch for these behaviors:

    • Meetings start when the team says they will.
    • People say “I don't know” before guessing.
    • Small problems surface early.
    • Teammates ask for help without apologizing for needing it.
    • People complete small commitments without repeated reminders.

    Don't confuse happiness with trust. A friendly group can avoid hard conversations. A trusting group can disagree, report a mistake, and still expect a fair response.

    Signal What It Actually Means Why It Matters
    Early issue reports People believe the team can handle bad news Leaders can act before the problem spreads
    Honest uncertainty People don't need to perform certainty The team gets better information
    Reliable starts and handoffs Members can predict one another's behavior Work moves with fewer anxious follow-ups
    Unprompted help People feel mutual responsibility The group can respond when plans change
    Pulse answers over time People can describe their experience directly You can compare perception with behavior

    Use volunteer program evaluation methods when you need a wider view of participation and team experience. Keep the pulse separate from punishment, rankings, or performance pay. The moment people think honesty will cost them, the measurement starts hiding the condition you want to understand.

    Your 30 Day Trust Building Checklist

    Trust begins in hard weather, then grows through ordinary follow-through. Print this list, put it in your notebook, and check each item with the team.

    Week 1

    • Set the habits: Introduce showing up, telling the truth, finishing promises, naming strengths, and apologizing specifically at kickoff.
    • Name a conflict liaison: Give the team one trusted person to contact when disagreement starts to spread.
    • Run the first pulse: Ask about mistakes, disagreement, and unprompted help. Keep responses private.

    Week 2

    • Install two rituals: Try a Monday intention round and a Friday shoutout, or use the pickup standup and Friday roundup.
    • Close one loop: Act on a concern someone raised during the first week.

    Week 3

    • Practice conflict: Use the sentence, “I want to hear both of you fully before we decide anything.”
    • Repair clearly: Name what happened, name the feeling, agree on one repair step, and revisit it at the next meeting.

    Week 4

    • Onboard one person: Assign a buddy, give a low-stakes task within 48 hours, check in after week one, and hold a feedback conversation by day 30.
    • Share the pulse pattern: Tell the team what you learned without exposing individual answers.
    • Choose the next habit: Pick one behavior to repeat for the next month.

    For more practical reading on team routines and workplace tools, browse the latest articles from Expressify AI. Trust compounds when someone keeps showing up after the forecast turns ugly, the schedule changes, or the first plan falls apart.


    Litter Caterpillars gives volunteers a hands-on way to practice these habits through regular Chicago cleanups, shared routes, and real service alongside neighbors. Visit Litter Caterpillars to join an upcoming pickup, meet the crew, and build trust by showing up together.

  • Group Decision Making That Keeps Volunteers Moving

    Group Decision Making That Keeps Volunteers Moving

    The rain had turned the vacant lot into brown soup by the time our crew gathered. Ten volunteers stood around a folding table, trying to choose a cleanup site, set safety rules, and pick a Saturday schedule before the coffee went cold.

    Why Group Choices Feel Hard on Volunteer Crews

    A volunteer huddle has a different rhythm from a workplace meeting. Nobody clocks in under one boss. People arrive with different experience, different energy, and sometimes different ideas about what “safe” means. A longtime scout may know which alley floods, while a first-time volunteer may notice a broken fence nobody else saw.

    That mix helps the crew, but it can also jam the gears. One person wants the South Side lot with the worst litter. Another wants a smaller site that beginners can handle. Someone checks the weather. Someone else worries about transit. Meanwhile, the clock keeps moving and the crew still needs gloves, bags, water, and a starting point.

    A diverse group of hikers gathered together in a circle, collaboratively planning their route on a large map.

    Why volunteers need a clear decision path

    Friendship adds another layer. You may hesitate to question a friend's site choice because you don't want to sound difficult. A new volunteer may stay quiet because everyone else seems confident. A safety lead may see a problem but soften the warning until nobody understands how serious it is.

    I've learned to treat group decision making as a crew skill, much like sorting sharp objects or tying a full trash bag. You can practice it. You can give it a simple sequence. You can decide in advance which choices need broad agreement, which choices need a vote, and which choices belong with one trained lead.

    The research gives us a useful reason to care about that structure. In a review of hierarchical team decisions, team informity, staff validity, and hierarchical sensitivity explained between 25% and 65% of the variance in decision accuracy, while one cited study found team informity alone explained 24% (review of team decision accuracy). In plain language, more people won't automatically produce a better call. The right information must reach the right person, someone must turn field observations into sound advice, and the person with final authority must weigh that advice correctly.

    Field rule: Give every decision a method before the discussion gets noisy.

    This guide works as a field manual. You'll find a mental model, a method comparison, warning signs, meeting scripts, and short cleanup examples. Use the parts that fit your crew, then adjust them after the next wet Saturday.

    What Group Decision Making Really Means

    Group decision making means a group gathers information, weighs options, assigns authority, and acts on one choice. That sounds formal, but I see it every time volunteers carry a heavy tarp.

    If one person pulls hard, the tarp twists. If three people lift while two people drag, the load swings. The crew moves well when each person shares what they know, listens to the others, and follows a clear call about direction. A decision works the same way.

    A diagram illustrating the four key components of group decision making: information, judgment, authority, and coordinated action.

    The information layer

    Start with team informity, which means the decision group has access to the information that matters. A scout might report needles near the fence, standing water behind the shed, or a locked gate at the usual entrance. That report only helps if the group hears it before choosing the site.

    Use role-specific observations instead of general chatter. Ask the site scout about access. Ask the safety lead about hazards. Ask the scheduler about volunteer availability. Each person brings a different piece of the map.

    The judgment layer

    Next comes staff validity, the quality of the recommendations people give after they receive and interpret information. A volunteer may see broken glass but still recommend a route that passes directly through it. Another volunteer may connect the hazard to the right action, such as closing that section or adding a tool restriction.

    You don't need everyone to become a specialist. You do need people to explain the reasoning behind their advice.

    The authority layer

    Finally, hierarchical sensitivity describes how well the final decision-maker weighs the information and recommendations from the group. On a volunteer crew, that person might be the safety lead during a storm call or the event lead during a site choice. Authority doesn't erase participation. It tells everyone who makes the final call when time or risk makes full agreement impractical.

    A practical decision record can use four questions:

    • What do we know? Record direct observations.
    • What do we think it means? State the recommendation and its reason.
    • Who decides? Name the lead or rule.
    • What happens next? Assign the first action.

    That model keeps the crew from confusing more voices with better information flow. A large circle can still miss a hazard if nobody reports it clearly or nobody knows who must act.

    Five Common Methods Compared and When to Use Each

    On a rainy cleanup morning, the crew may need to choose a site, close a path, and set the next workday before anyone has found dry gloves. Each choice calls for a different method. Consensus builds support when local knowledge matters. Majority voting gives a clear result for routine choices. Delegation keeps people safe when waiting would expose them to danger.

    I match the method to the decision. A site choice benefits from shared knowledge about access, hazards, and nearby residents. A sudden lightning warning needs a named safety authority. A schedule ranking can use private votes when volunteers have different availability and may not want to defend it aloud.

    Method How It Works Speed vs Buy-in Best Volunteer Use
    Consensus The group discusses options until members can support or accept one choice. Slower, with strong buy-in. Site selection when access, safety, and neighborhood knowledge need careful discussion.
    Majority vote Members vote, and the option with the most support wins. Faster, with uneven buy-in. Choosing among routine dates or locations when the group needs a clear result.
    Delegated decision The group gives a lead authority to decide within stated limits. Fastest, with buy-in tied to trust and follow-up. Weather calls, hazard closures, equipment limits, and route changes.
    Delphi Members give views separately through repeated rounds, often without direct debate. Slower, with less social pressure. Planning a recurring schedule when volunteers may hesitate to speak in the room.
    Multi-voting Members rank or distribute votes across several options, then the group uses the combined priorities. Moderate speed, with broad input. Narrowing several cleanup sites or ranking possible Saturdays.

    Choosing between consensus and voting

    Consensus needs a clear rule, or the crew can keep circling the same muddy puddle. Unanimity Minus Two, or U-2, lets a proposal pass when up to two members dissent. The Open Group standards guide describes U-2 for groups of about five to nine people, with U-3 suggested for groups of 10 to 14 and U-4 for groups of 15 to 20 (consensus decision rules).

    Majority rule usually moves faster. A comparison of formal decision rules found that majority rule approves proposals more often than unanimity rule within the same group size, while unanimity creates more delay in small and large groups (comparison of majority and unanimity rules). Use the slower agreement process when shared support will affect follow-through. Use a vote when the crew needs a fair, visible result and the stakes allow some members to disagree.

    A simple field match keeps the choice practical:

    • Use consensus for a site with uncertain hazards.
    • Use majority voting for a routine schedule.
    • Use delegation for immediate safety.
    • Use Delphi when quieter volunteers may hold useful information.
    • Use multi-voting when several sites or Saturdays must be narrowed without letting the first loud opinion decide.

    Afterward, record the method and result in one sentence. Volunteers who join later can see how the crew chose, not only what it chose.

    Hidden Dynamics That Pull Groups Off Course

    A friendly huddle can still choose badly. During one rainy cleanup, our crew picked the nearest entrance because a familiar volunteer recommended it. We moved on before checking the flooded gate. A quieter scout already knew the path was blocked, but the discussion ended before that information surfaced.

    Research on 37 student decision groups found that groups using a unanimity rule reached more cognitive consensus than groups using a majority rule. Consensus and satisfaction were connected with behaviors such as asking why someone preferred an option, treating other views as legitimate, and using those views in the group's reasoning (study of information exchange and group consensus). Agreement by itself does not make a choice sound. The crew must examine the reasons beneath each view.

    A chart showing hidden dynamics like social pressures, communication traps, and cognitive pitfalls that hinder group decision making.

    Watch for premature agreement

    Listen for “whatever works,” “we always do that,” or “I'm sure the lead knows.” These phrases can signal comfort, but they can also cover uncertainty. Ask, “What could make this choice fail?”

    Give a dissenting volunteer a reason to explain, not a reason to retreat. Say, “Tell us what you're seeing,” then leave room for an answer. Structured turn-taking helps quieter people contribute because the fastest speaker no longer controls the whole conversation. On a high-turnover crew, that pause may reveal a hazard known only by someone who arrived last week.

    More participation doesn't guarantee a better call

    A 2025 randomized experiment with 1,475 participants in 281 five-person groups found that an LLM facilitator increased information sharing and raised the minimum engagement level, yet did not significantly improve the final decision compared with no facilitation (2025 randomized facilitation experiment). For a volunteer lead, the warning is practical. More airtime can improve the process while leaving the final choice unchanged.

    Before a vote, ask whether the crew has combined the information or merely collected it. Name the strongest argument for each option, then identify the fact that could disprove it. If the decision concerns a flooded route or unstable bank, keep checking until the safety evidence is clear. For a routine snack order, delegation may be enough.

    Diversity can slow the crew

    Different backgrounds and experiences can improve decision quality, while differences in perspective can slow execution and reduce commitment. A 2025 social-science study reported a positive effect of team diversity on decision quality alongside a “social categorization tax” that delayed execution and reduced team commitment. The quality effect was strongest when psychological safety was high (study of diversity, decision quality, and execution).

    On a volunteer crew, match the discussion to the risk. Use consensus for a site hazard or route affecting inexperienced volunteers. Let one person handle a minor supply choice. Use a quick check-in when weather changes, and explain the safety reason behind the call so a rotating crew can accept it.

    If disagreement continues after the practical choice is clear, use this conflict resolution guide for volunteer groups instead of asking a pre-work huddle to settle every relationship issue.

    Here's a short visual reminder before the next discussion:

    Facilitation Frameworks and Meeting Scripts You Can Run

    On a rainy Saturday, I have watched a confident volunteer fill the whiteboard while three quieter people kept their best safety observations to themselves. A fixed process gives every voice a place, especially on crews with high turnover and little formal authority. I often use the Nominal Group Technique when a crew has many ideas or strong personalities. Its five steps are to define the problem, generate ideas without speaking, share them in a round-robin, discuss the list, and vote privately (Nominal Group Technique guide).

    A five-step flowchart illustrating the Nominal Group Technique process for collaborative decision making and team facilitation.

    The five-step huddle

    1. Define the problem. Say, “We need one cleanup site for Saturday that the crew can reach safely.”
    2. Write in silence. Give everyone paper or a phone note. Allow about 5 to 10 minutes for options and concerns.
    3. Share one idea at a time. Go around the circle. Record each idea without debate.
    4. Discuss for clarity. Ask what an option means and what evidence supports it. Hold criticism until the comparison stage.
    5. Vote privately. Let each person rank or select options, then combine the votes into a group priority list.

    Use clear guardrails. During the first round, people write alone, with no discussion or clarification questions. Each person gives one idea per turn, and the group removes an idea only by unanimous agreement or when it duplicates another (ASQ Nominal Group Technique guidance).

    A 15-minute script

    Set a timer and keep the language plain.

    • Minute 1: “Our decision is ____. The decision-maker is ____. Safety limits are ____.”
    • Minutes 2 to 5: Everyone writes options and concerns without speaking.
    • Minutes 6 to 9: Each person shares one item per turn. Record every distinct option.
    • Minutes 10 to 12: Ask, “What reason supports this option?” and “What risk have we missed?”
    • Minutes 13 to 14: Vote privately or apply the agreed consensus rule.
    • Minute 15: State the result, the reason, the lead, and the first action.

    Match the method to the decision. Use consensus for a site hazard that affects inexperienced volunteers. Use a vote when several workable sites remain and the group needs a fair preference. Delegate a time-sensitive weather or safety call to the assigned lead, then explain the reason and invite relevant facts. That approach protects safety without treating buy-in as permission for everyone to control every decision.

    Do not turn participation into a performance. Ask volunteers to connect information to a choice, rather than rewarding whoever speaks longest.

    A one-page decision note can contain:

    • Decision: What must we choose?
    • Options: What choices did we consider?
    • Facts: What did scouts, safety leads, and schedulers report?
    • Rule: Consensus, vote, delegation, Delphi, or multi-voting?
    • Authority: Who makes the final call?
    • Reason: Why did this option win?
    • Action: Who does what first?
    • Review: What will we check after the cleanup?

    For practice building repeatable huddle habits, see this volunteer coordinator training. If I close a route because of exposed glass, I say, “I made the safety call. Does anyone have information that changes it?” The crew hears the boundary, the reason, and the proper way to add new evidence.

    Short Case Studies From Cleanup Crews in Action

    On a South Side cleanup morning, a crew had three possible lots. One lot had the worst visible litter. Another had easier transit access. The third had a scout's report of a blocked gate, though it sat near a neighborhood that rarely received cleanup attention.

    The lead asked volunteers to write their first choice and their reason. The crew then shared the options in a round-robin and used multi-voting to narrow the list. After discussion, the group used U-2 consensus. Two people still preferred the worst-litter lot, but they accepted the transit-friendly site because more volunteers could arrive safely and the crew could reach the work area without climbing around the blocked gate.

    The process took longer than a quick show of hands, yet it kept the scout's information in the decision. Nobody had to win an argument by speaking the loudest.

    Site choice takeaway: Gather field facts first, rank options second, and set the agreement rule before debate begins.

    A different crew faced a sudden weather call. Rain had started, wind pushed loose branches across the route, and several first-time volunteers waited near the meeting point. The lead had delegated authority for weather safety, so she called off the exposed route rather than asking the whole group to reach agreement in the rain.

    She used a short script: “I'm closing this route because the branches and visibility make it unsafe. We can move to the sheltered block if the safety check passes, or we can end today's event. I'll hear concerns now, then I'll make the final call.” The group moved to the alternate block after a quick check, and two volunteers chose to leave without pressure.

    The lead acted quickly, though she didn't hide the reasoning. That balance protected safety and gave people a fair chance to share information.

    Weather takeaway: Give a trained lead authority for urgent hazards, then explain the call and invite new facts.

    Keep Buy-In Strong After the Decision Is Made

    A decision isn't finished when hands go up. Volunteers need to know what happened, who made the call, and what they should do next.

    I use a simple four-part loop:

    • Announce: State the choice in one sentence.
    • Explain: Name the rule and the reason.
    • Assign: Give each next action to one person.
    • Check: Ask about safety and willingness before work begins.

    For example: “We chose the transit-friendly lot through multi-voting and U-2 consensus. Maya will check the gate, Luis will bring grabbers, and I'll mark the safe route. Does anyone see a safety problem or need a different task?”

    That question gives people a graceful way to speak up. It also prevents the common mistake of treating agreement with the site as agreement with every task.

    Keep a short record after each event. Write down what worked, what surprised you, whether the decision rule fit the situation, and what you'll change next time. A crew that reviews its choices learns faster than a crew that repeats its habits.

    Pride can help people return. Flags, badges, a theme song, and a sincere shout-out can make service feel shared without pressuring volunteers for money. For more practical ideas, use these volunteer retention strategies.

    Before the next huddle, ask yourself:

    Did the right information reach the right person? Did we choose the right decision method? Did the final authority act clearly? Did every volunteer leave knowing the next step?


    Litter Caterpillars uses structured event signups for volunteer trash pickups, including event pages and shift-based participation. Visit Litter Caterpillars to find a cleanup, join the next crew, and practice group decision making block by block.